Proctoring Live-reviewed exams
Read this section for the information on how to proctor exams with Live*-exam review* proctoring.
What is live proctoring?
Live proctoring is the process of monitoring students during live exams. One invigilator can monitor up to 150 test takers simultaneously.
Live proctoring works like this:
- A human proctor supervises a group of examinees by observing their screen and camera streams, and listening to their microphone audio to identify any misconduct
- At the same time, an AI known as Cyber Proctor oversees the sessions, flagging any possible infractions such as looking away from the screen. The human proctor then reviews these AI-generated alerts, deciding whether to validate or dismiss them.
- If a test-taker attempts to cheat, the proctor can immediately end their exam, marking it as "Declined".
- Test-takers who follow the rules successfully complete their exam session with the "Approved" status.
Now, let's go through the live proctoring process step by step.
Before the exam
When the exam session is about to start, do the following:
- Open the link to the proctoring dashboard and sign in with your proctor account.
- Сlick Calendar > Start Proctoring:

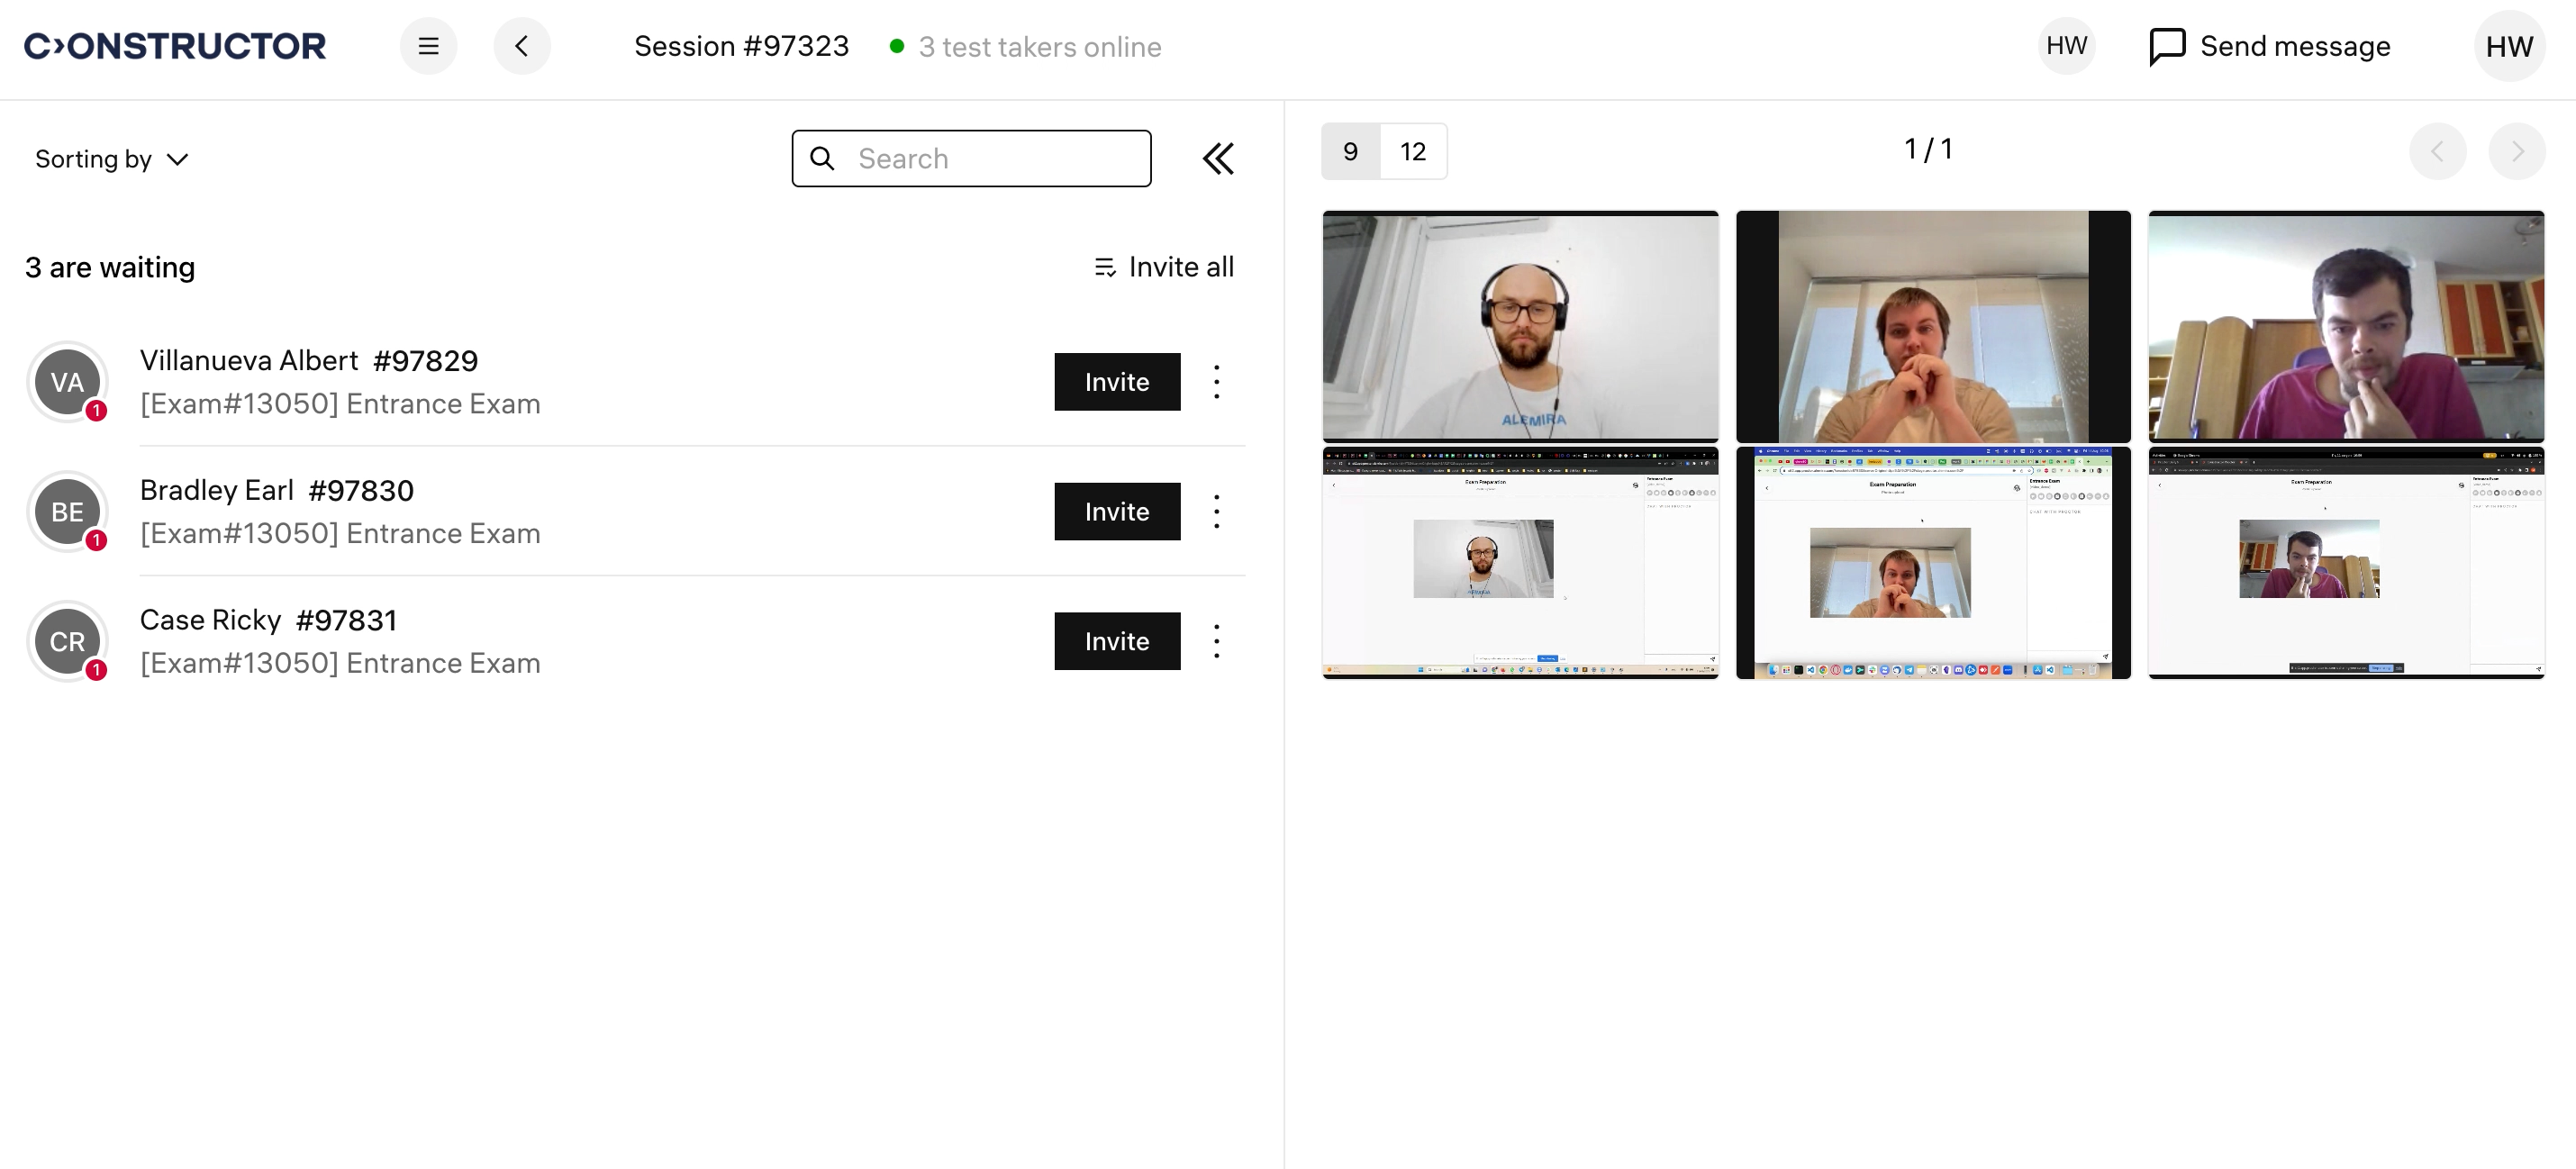
- You will see an empty live proctoring room:

- Examinees will start appearing on your screen when they pass the system check:
💡 A single proctor can monitor up to 150 test-takers simultaneously. If there's more than one proctor in a session, all examinees will be equally distributed among all proctors in the room.
Identification
Before a test taker can start the exam, they have to take a photo of their ID or their face (depending on exam settings). Your task is to identify each person using these photos and let them start the exam afterwards.
- Click on an examinee in the list:

- A personal view for the selected examinee will open. It's a list of events where you will find their ID & face photos, chat history, and AI-detected alerts. Click on a photo to maximize it A and request a new photo if the current one is dark or blurry B:

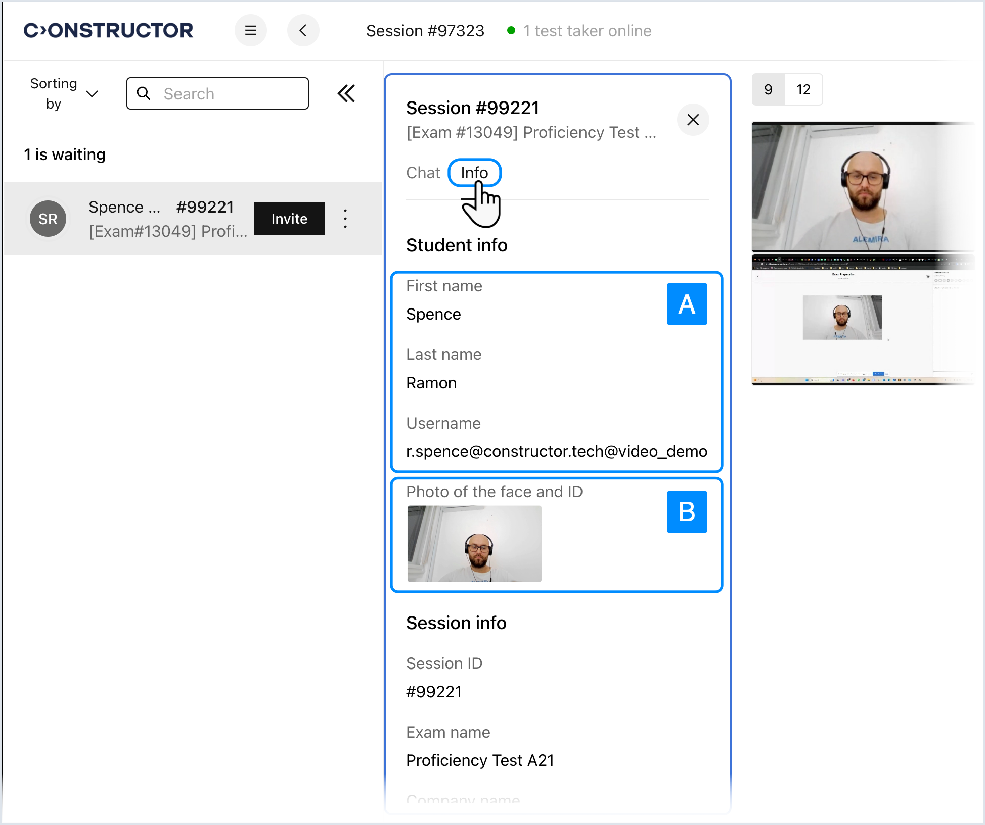
- If you ever need to double-check examinee's information, including their name/email A and identification photo B, open the Info tab from their personal view:
- If you ever need to double-check examinee's information, including their name/email A and identification photo B, open the Info tab from their personal view:
- To let the person start taking the exam, click Invite next to their name:

- Repeat steps #1-3 for other test takers.
- You can also let everyone in the session start the exam at once by clicking Invite all:

- You can also let everyone in the session start the exam at once by clicking Invite all:
During the exam
Once all test takers in the session start their exams, your task is to invigilate their actions and prevent any misbehavior that might take place.
There's a few ways how you can do that:
- Browse video streams of examinees to catch suspicious behavior;
- Check AI-detected violations and confirm the correctly detected ones;
- Send messages to examinees who act suspiciously;
Let's break down each of these activities.
Browsing video streams
- Point the cursor at the webcam video to hear sound captured from examinee's mic:

- When your cursor is pointing at the webcam video, you will see two icons pop up. Click on the upper button A to open personal view and chat with the examinee. Click on the lower one B to maximize the webcam stream:

- To maximize video from the screen, place the cursor on top of it and click on the button that appears:

- To maximize video from the screen, place the cursor on top of it and click on the button that appears:
- You can choose how many examinees appear in the video section by using the "9/12" switch:

- If there are more examinees than one screen can fit, you will see the number of the current screen on the counter A. Use the navigation buttons B to change the screen you're on:

- When you notice suspicious behavior from one of examinees, open their personal view and click the "Plus" button:

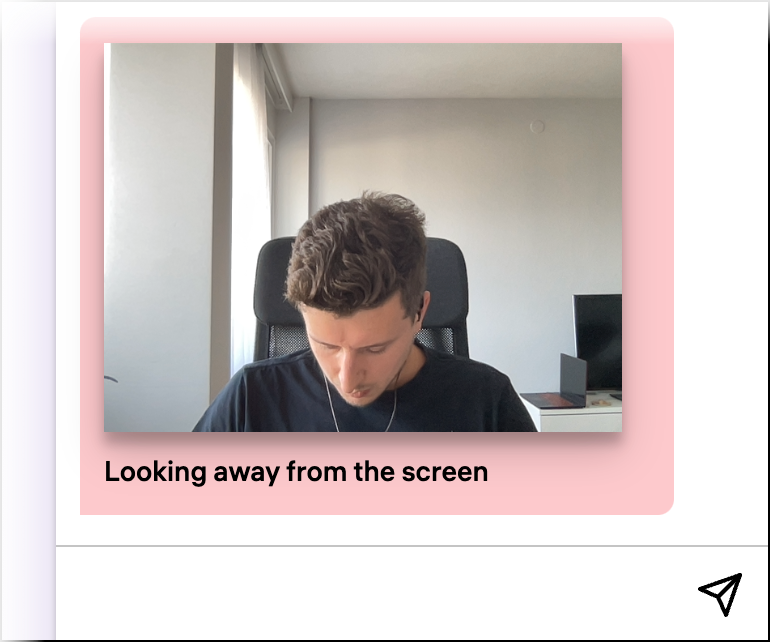
- Select Add warnings and then choose an appropriate warning type:

- After you do so, the test taker will see the warning you just added on their screen:

Checking AI-detected alerts
CyberProctor monitors every examinee in the session and will generate alerts to help you catch misbehavior.
- To see alerts generated for an examinee, click on them in the user list and enable Show AI alerts:

- You will see all AI-detected alerts for this examinee in the list of events that you can scroll. More recent alerts will be displayed at the bottom of the list.
- You can confirm any alert to notify the examinee about their misbehavior. To do so, click on the corresponding button:

- After you do so, a warning will appear on the examinee's screen:
The AI calculates an individual "cheating score" which represents the probability of cheating for each examinee. The more violations are committed by the examinee, the higher their cheating score is (0-100%). The score is displayed as a colored circle around each examinee's avatar in the user list:
Sent messages to examinees
- You can send a message to an examinee in their personal view:

Your chat history with the examinee will also be displayed in their personal view with recent messages being displayed on the bottom of the event list. - To send a message to all test takers in the room, click Send Message in the top right corner:

- Choose All to send the message to all examinees in the room A, or select an exam to send the message only to those taking this particular exam B:

- Enter your message A and click Send B:

Additional features
Search
- Use Search to find examinees in the list:

- You can search by examinee's name, email, or session ID.
Change how examinees are sorted in the participant list
- By default, examinees who sent you more messages that were not read will be displayed on top of the participants list. The message counter is a number on each examinee's avatar:

- You can change how examinees are sorted – open the corresponding menu and select a different sorting method:

- Here are the sorting types you can choose from:
- Unread first – the more unread messages there is from an examinee, the higher they are in the list (default type);
- Longest first – the longer examinee's exam session is, the higher they are in the list;
- Shorter first – shorter sessions on top;
- Exam name – sort alphabetically by the name of the exam each person is taking;
- Scores– the higher the AI cheating score, the higher their position in the list.
When you change the sorting method, examinees' video boxes will also be reordered to represent the sorting in the participants list (from left to right, from top to bottom).
Pin an examinee to the top of the user list
- If you're unsure about the behavior of one of the examinees, pin them to the top of the user list. It will make it easier for you to keep track of their actions. Click on three dots next to the session timer for the person:

- Click Pin in the pop-up menu:

- You will now always see this examinee on top of the user list. Also, their video will be displayed first in the panel with video streams:

- You can pin multiple examinees. To unpin a pinned test taker, click the three-dot button and select Unpin:

See other proctors in the room
- You can see other proctors and admins in the live session room. To do so, click on one of the proctor avatars in the top right corner:

- You will see names of all proctors and admins who are currently in the same session with you:

Finishing the exam
When a test taker finishes the exam, they can end the proctoring session by submitting their answers on the training platform. So, in a normal situation, you as a proctor don't need to end exam sessions for test takers – they can do it themselves.
However, if you'd like to interrupt a session prematurely (for example, if you caught someone cheating), click the three-dot button next to test taker's name and select Close Session:
When you do so, their exam will end on the spot and the proctoring status for their session will be set to Declined. You will find all recordings made during this live proctoring session in your Proctor Dashboard > Archive.