Planning
Click on the Planning button in the top menu to navigate to the Planning page. On the Planning page, you can create a complete term schedule based on your needs. After planning weekly hours, term week dates, classrooms or rooms, classroom priorities, courses, Insructors, course hours and classrooms, click the Distribute Activities button to finalize the planning process.
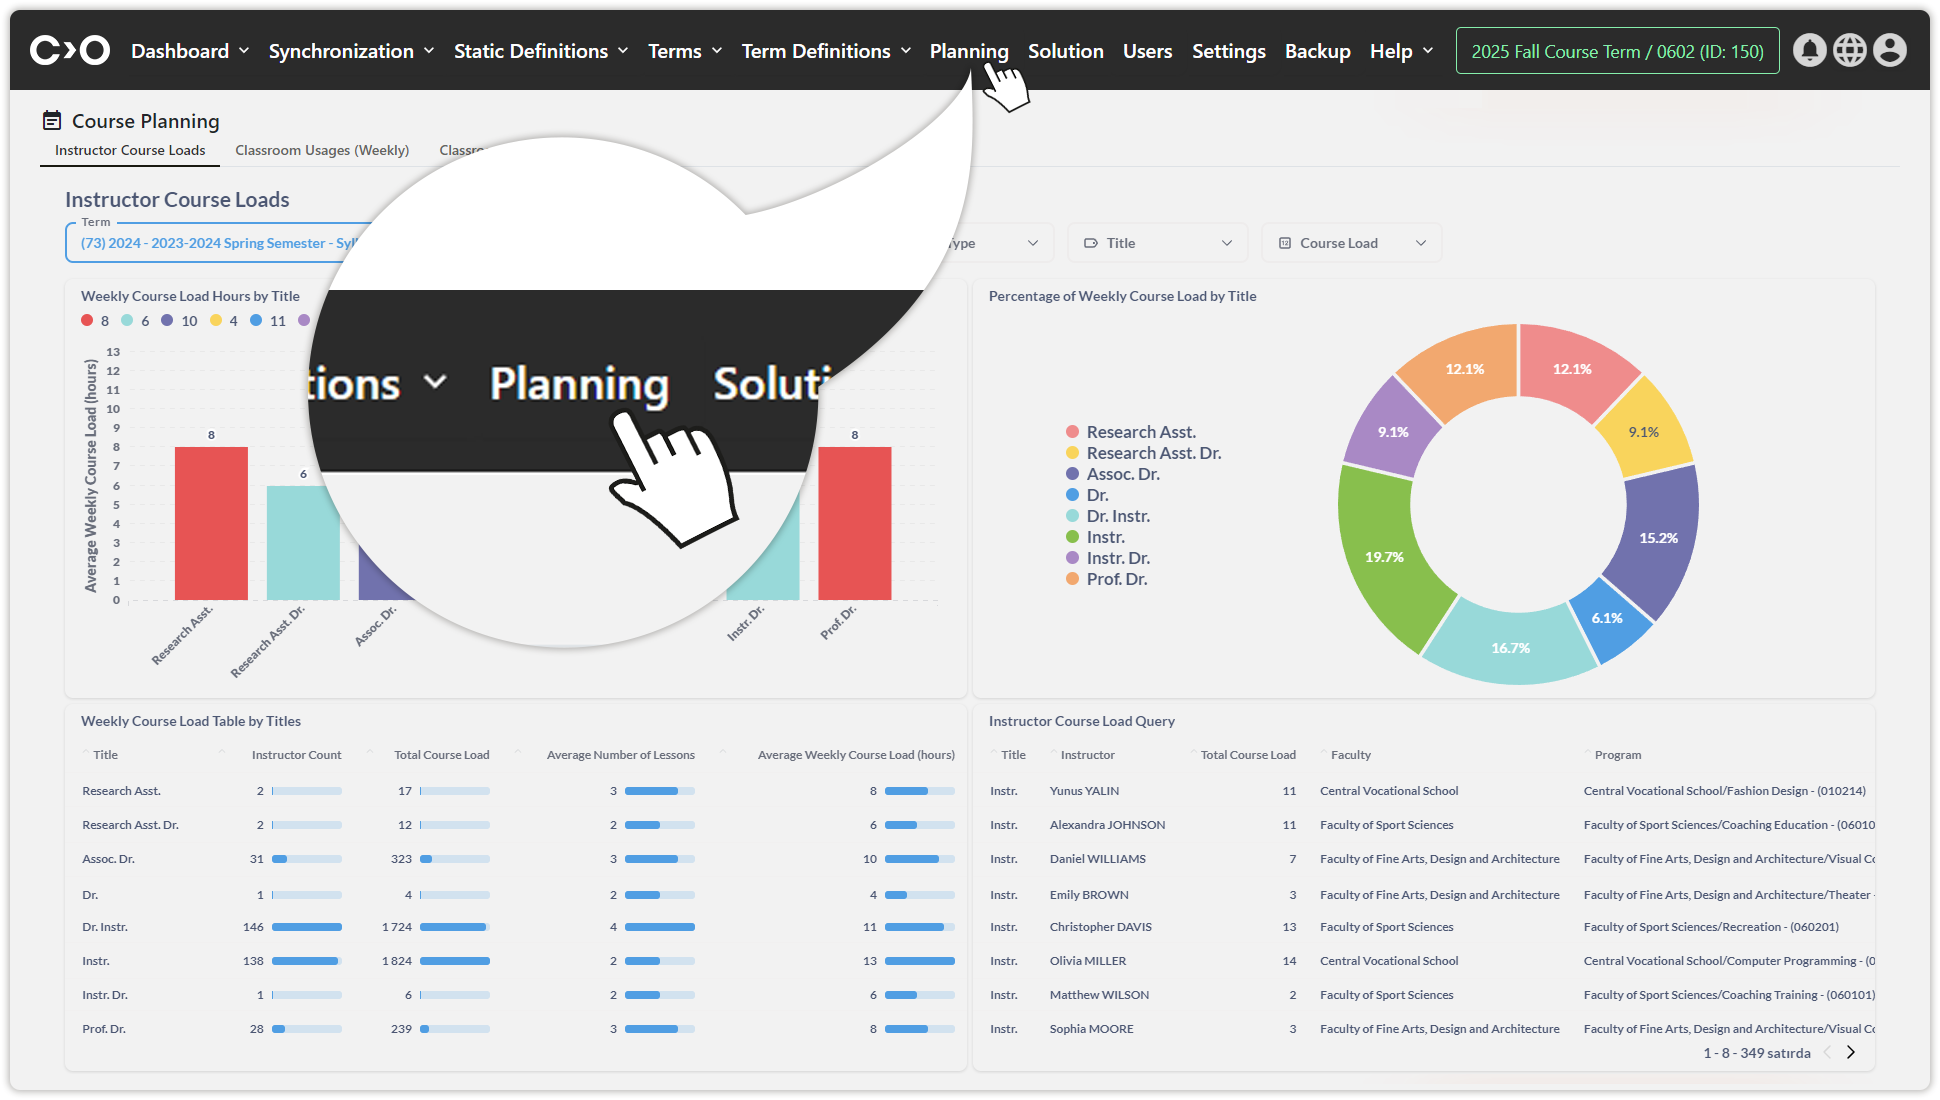
Click on the Planning button.
Weekly Hours
Click on the Planning button in the top menu, then select Weekly Hours at the top of the page to navigate to the weekly hours planning page. On this page, enter the start time, end time, slot duration, and optionally, gaps between classes, then select the specific hours for courses to create a weekly schedule.
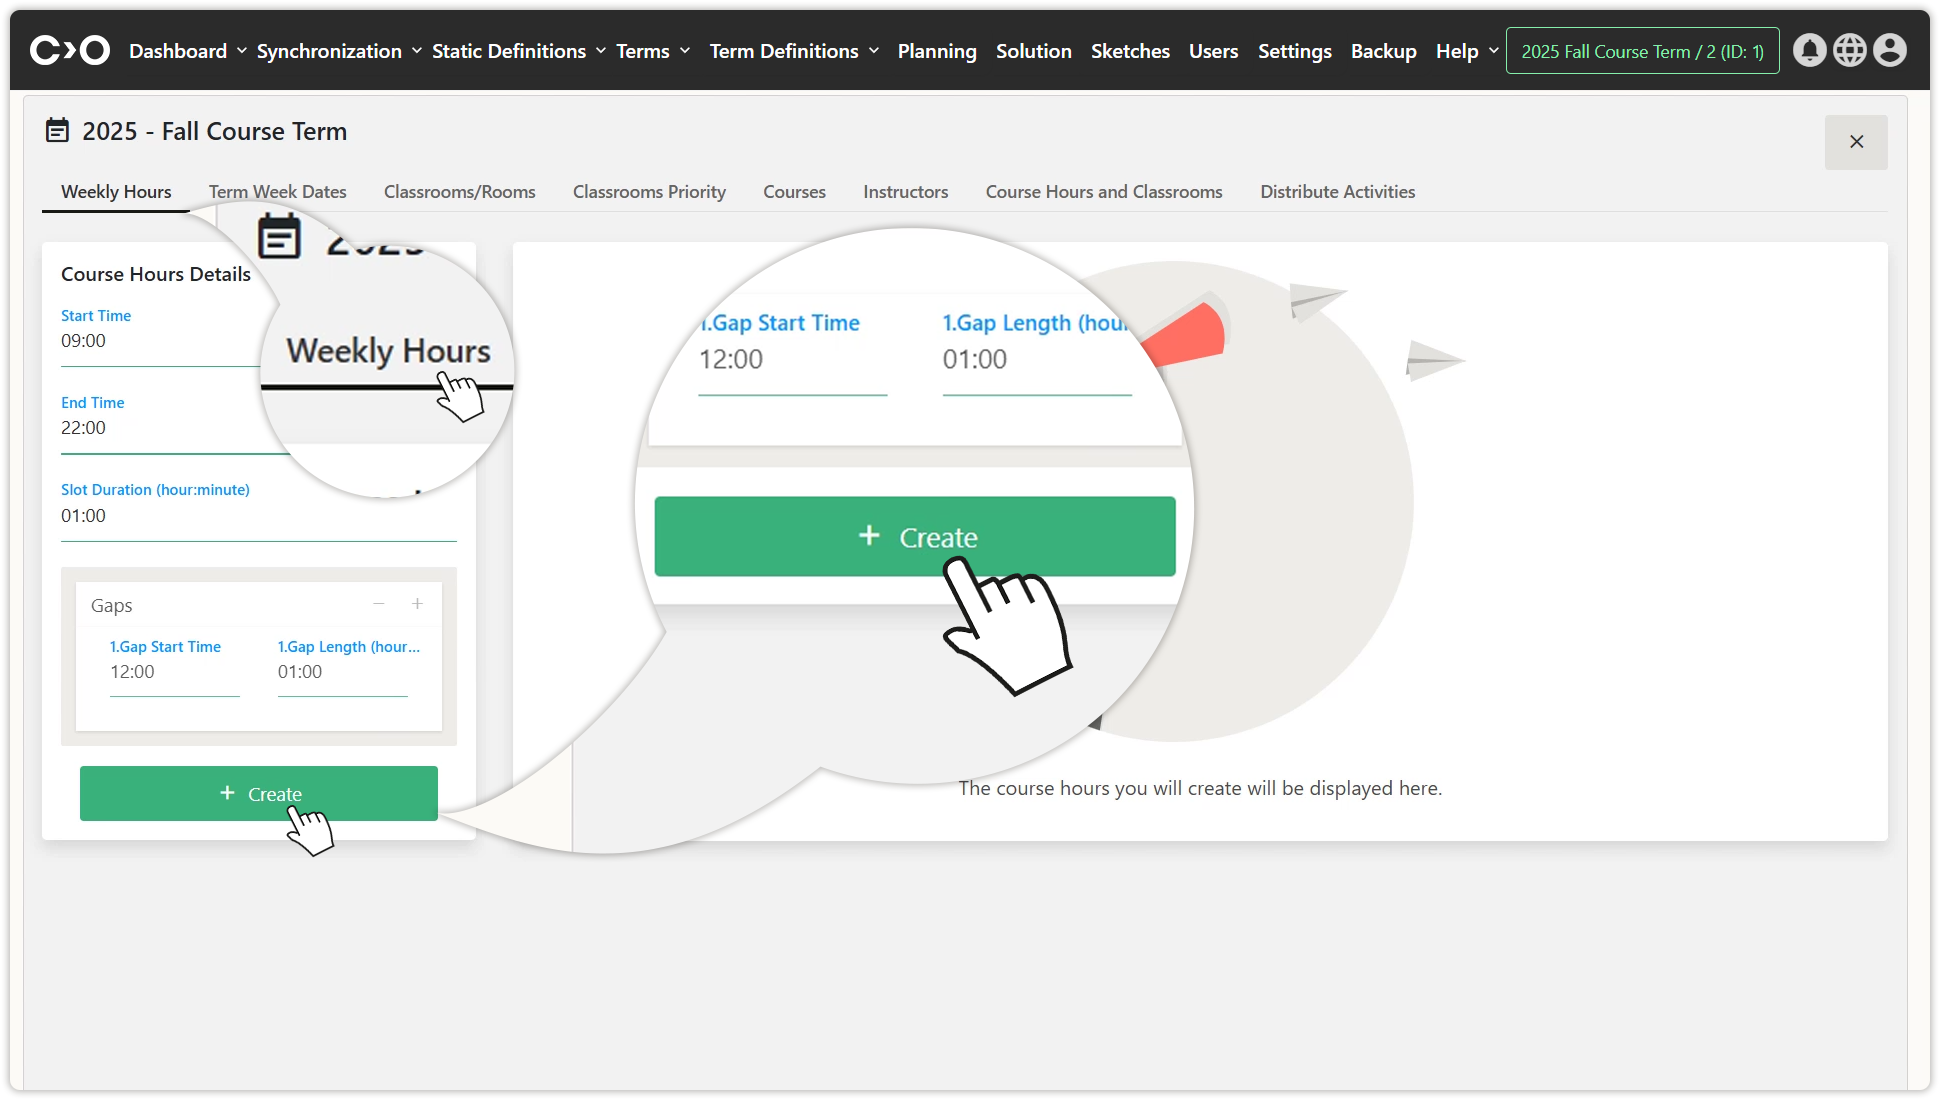
Enter the start and end times of the courses and the break duration.
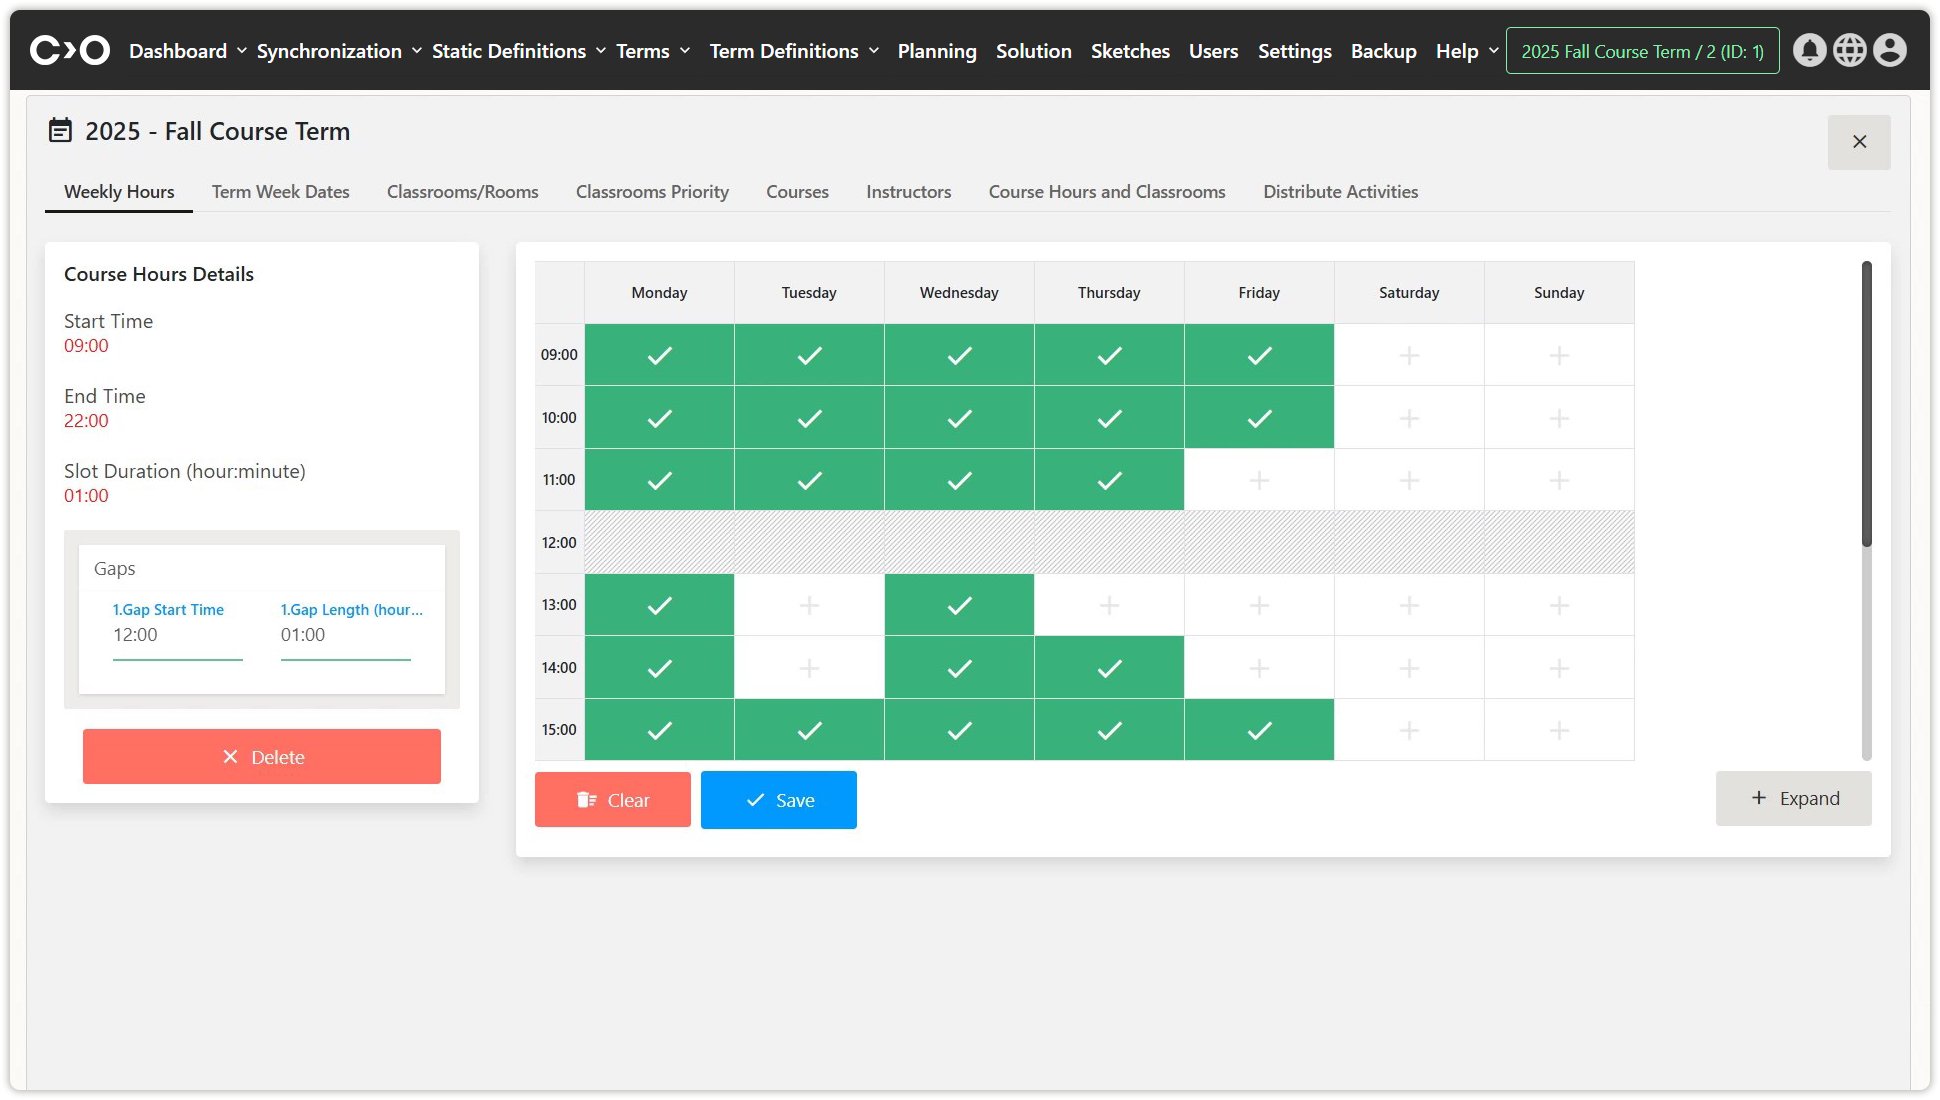
Mark specific hours as available or unavailable for the course.
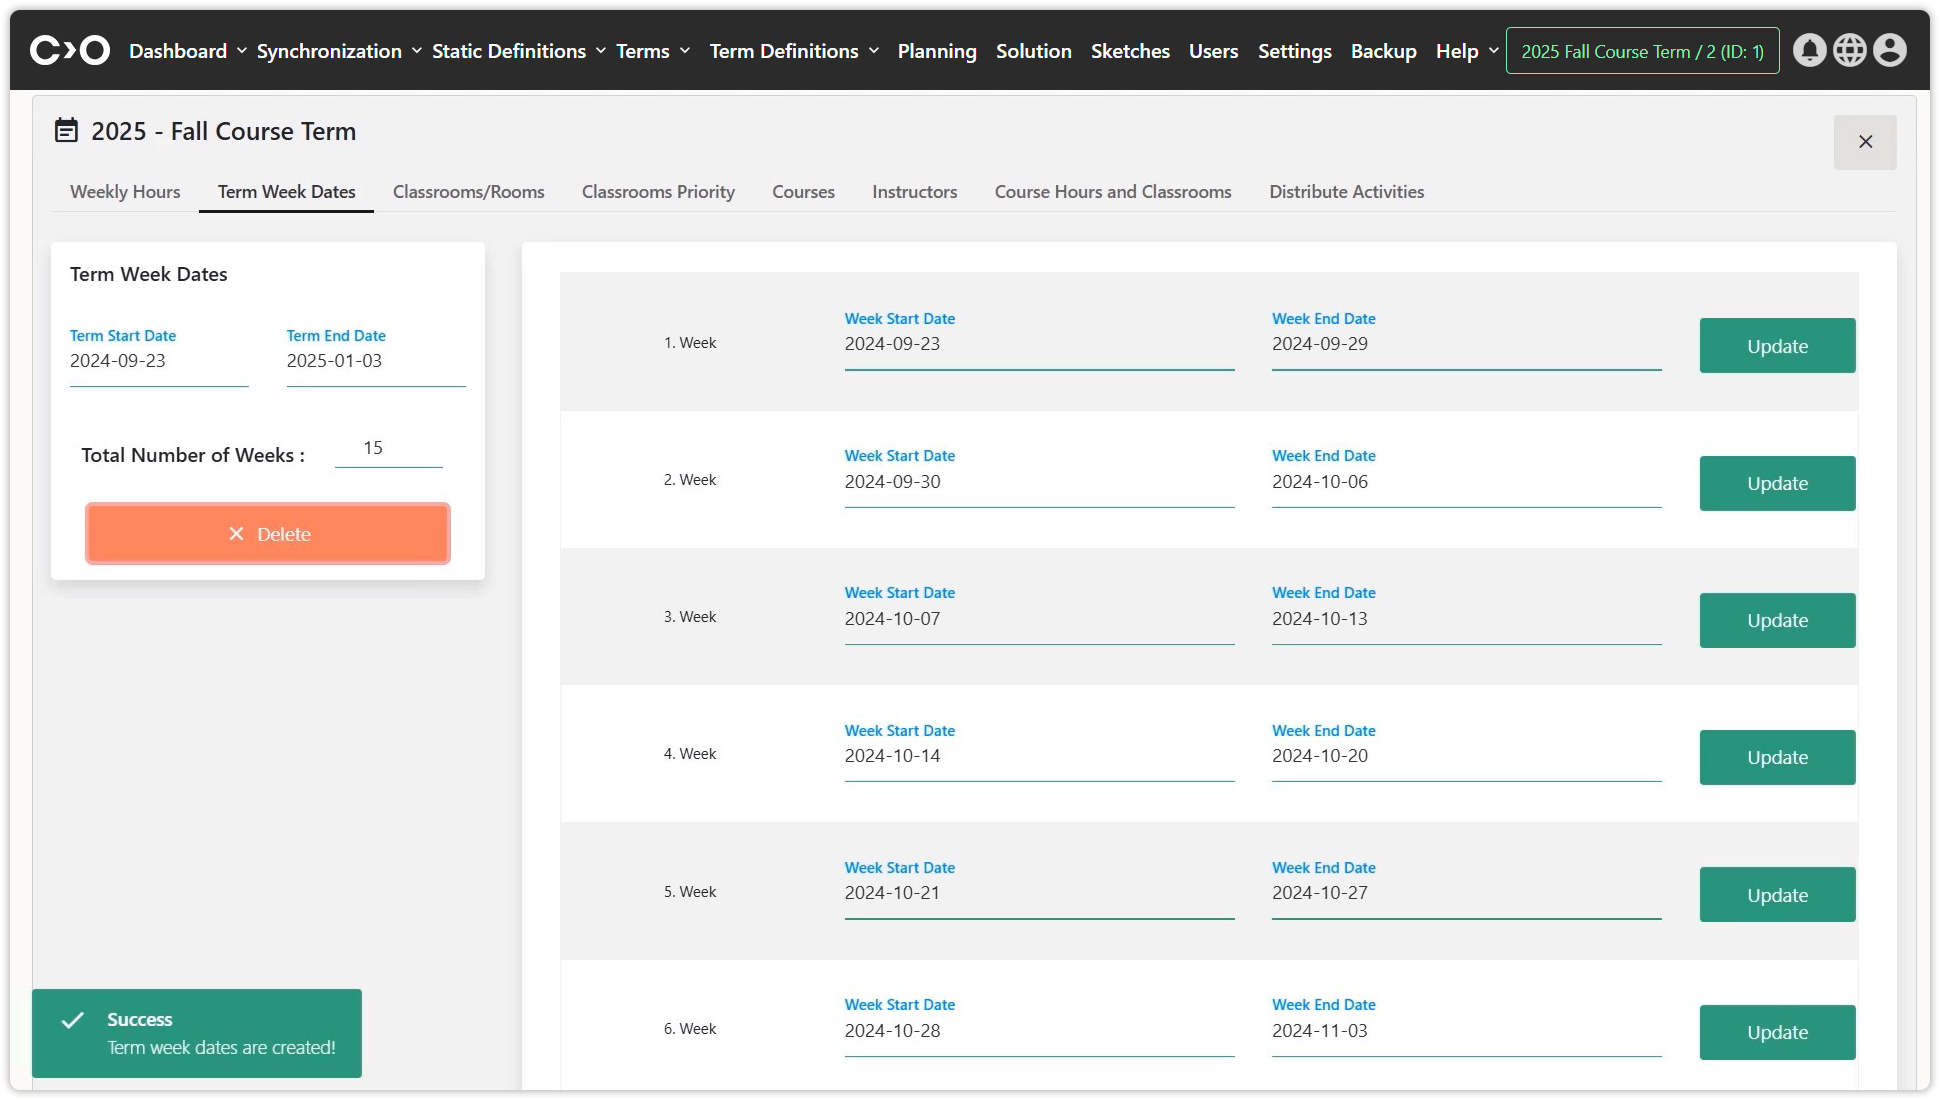
Term Week Dates
Click on the Planning button in the top menu, then select Term Week Dates at the top of the page to navigate to the term week dates planning page. On this page, enter the term start date, term end date, and total number of weeks to set up the term schedule.
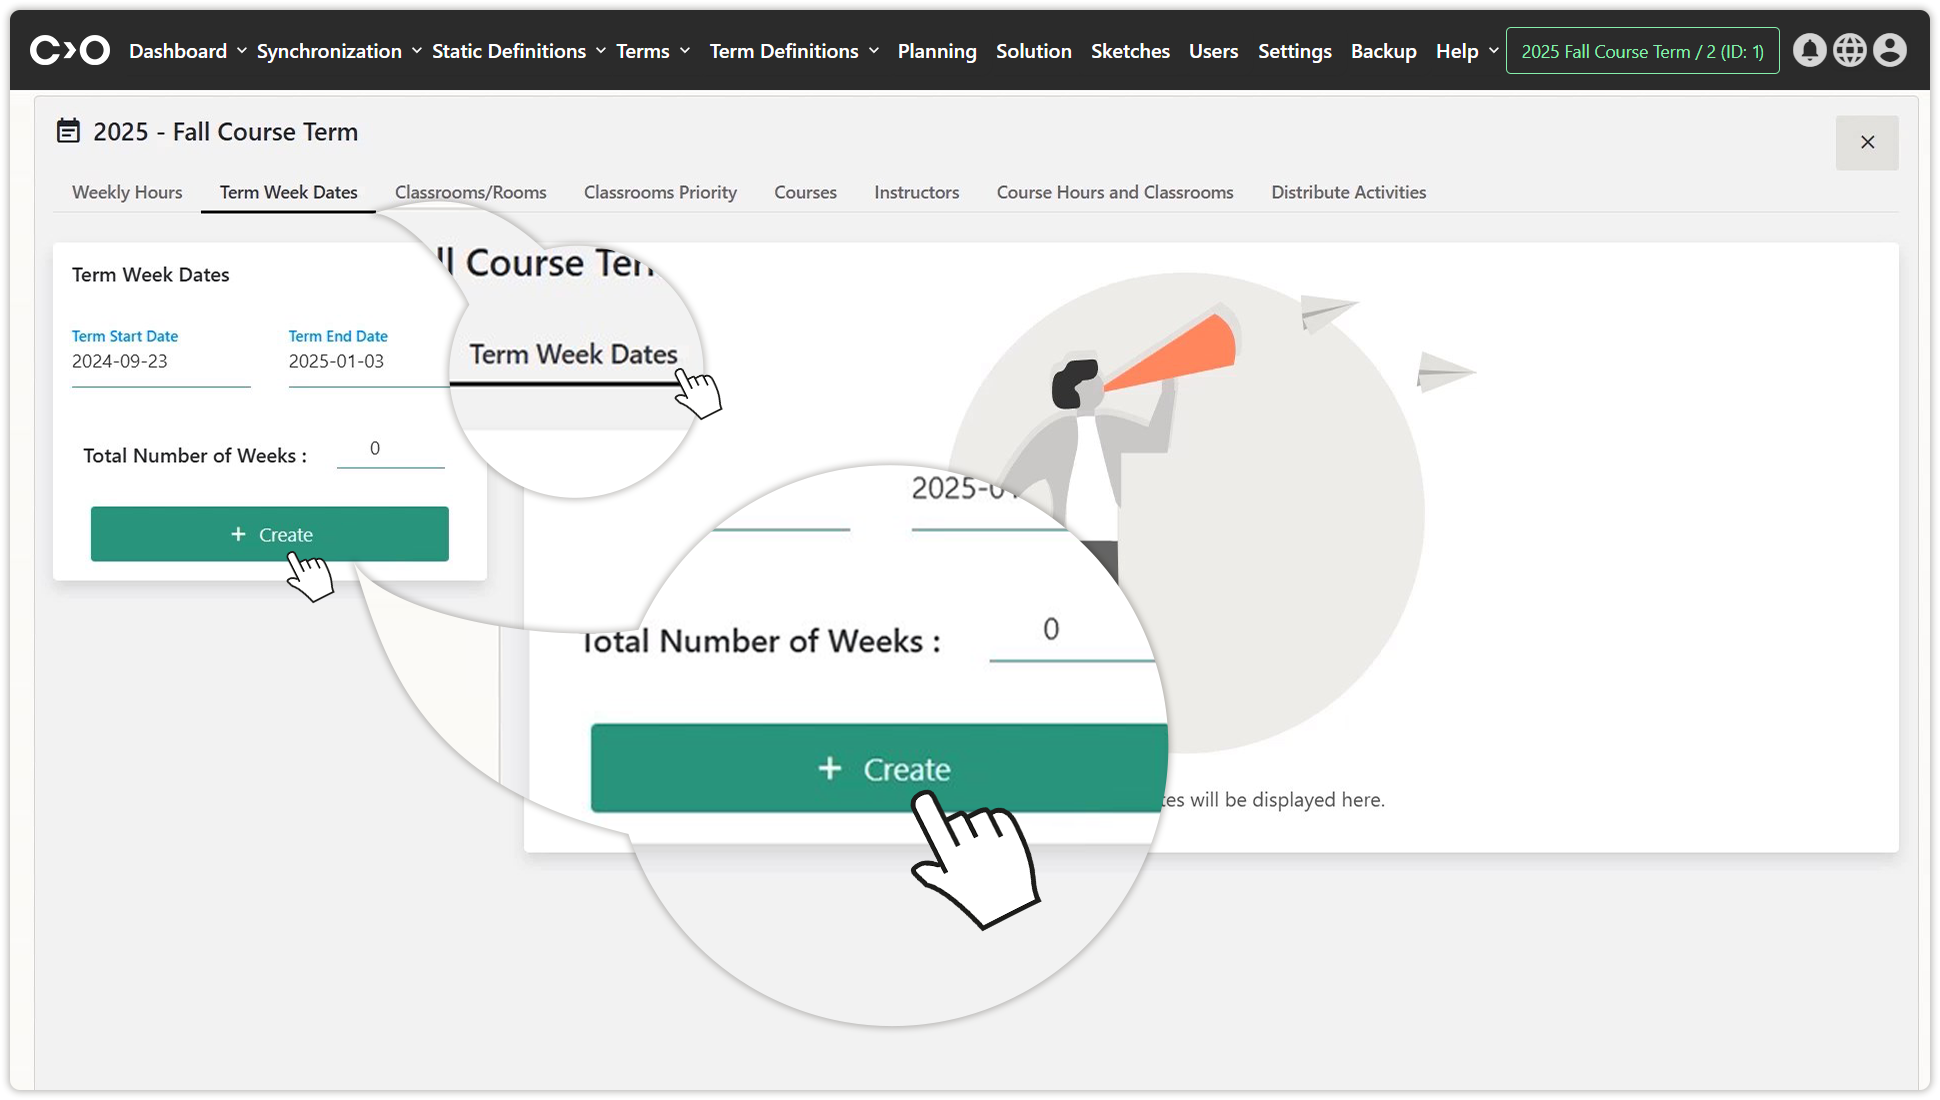
Set the start and end dates of the term.
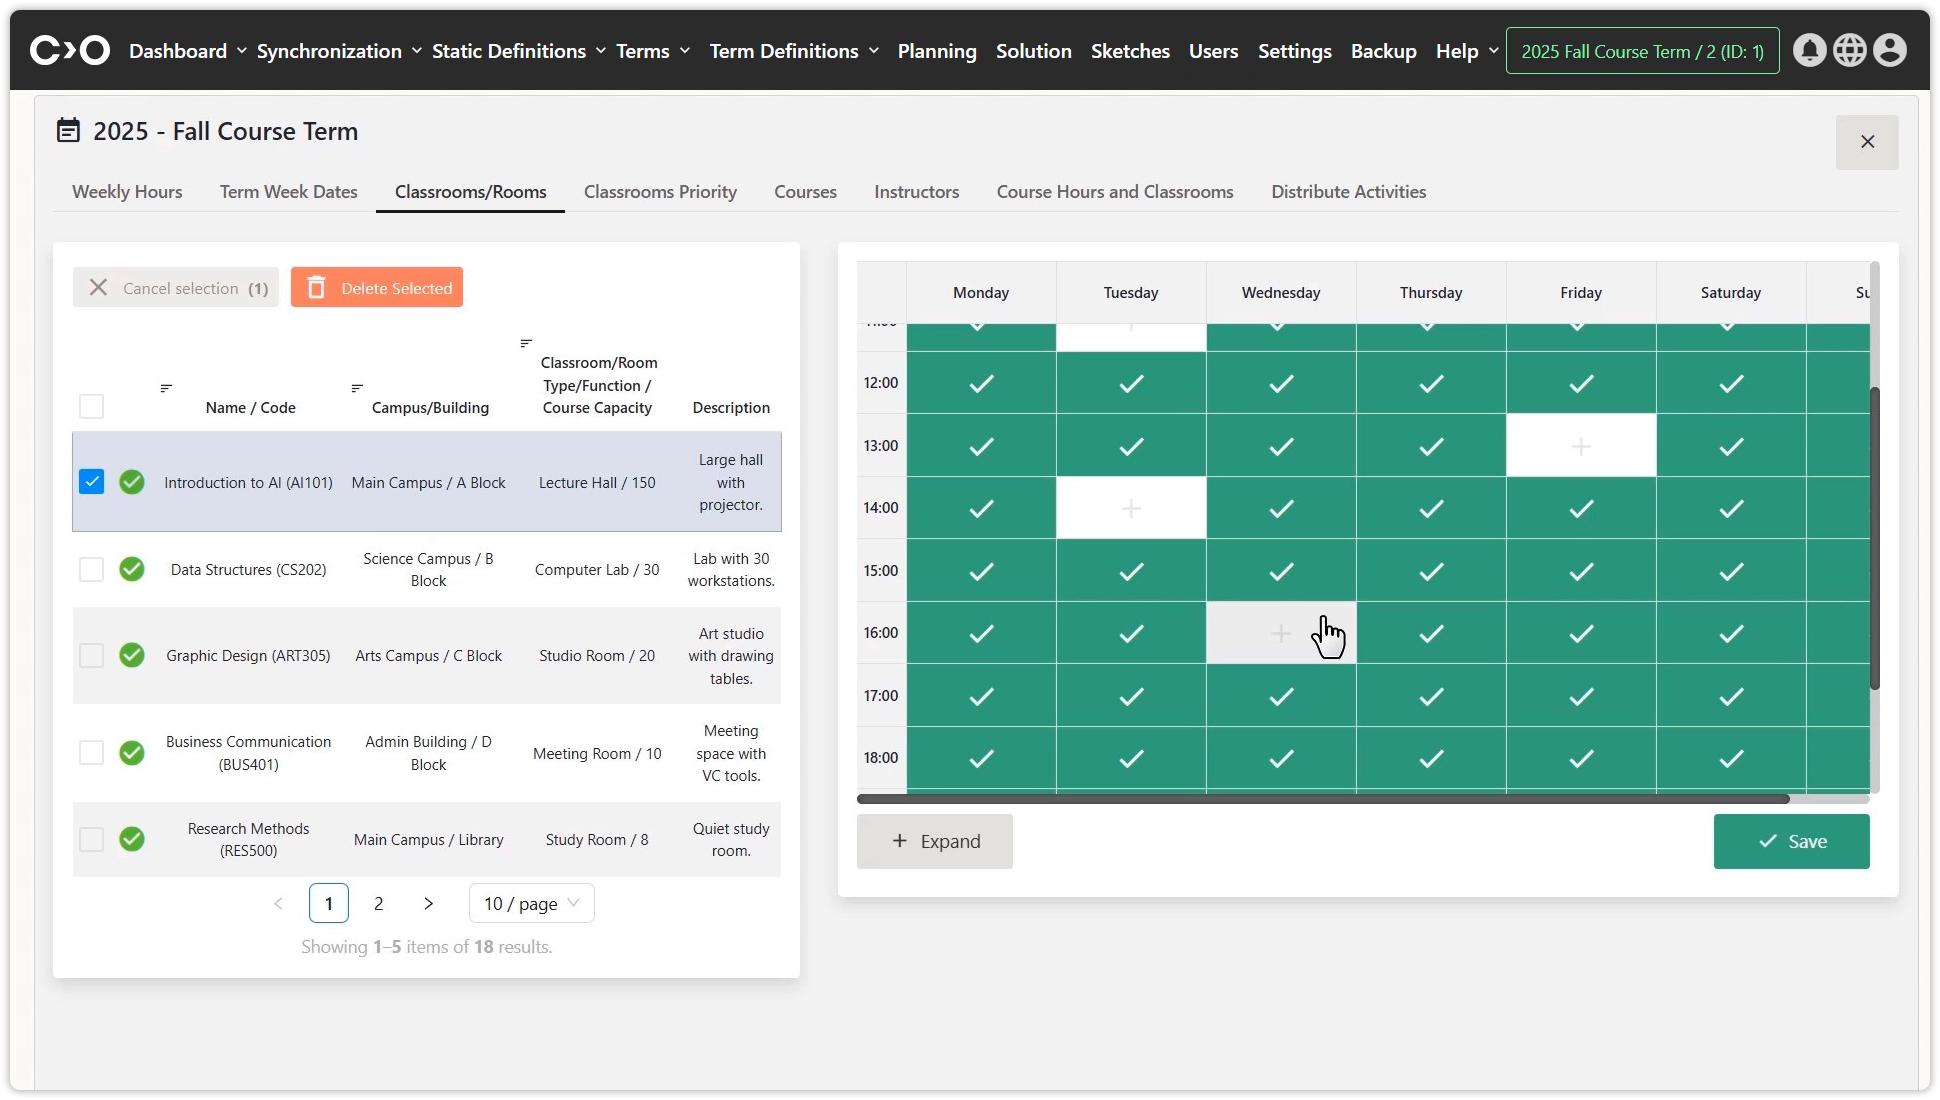
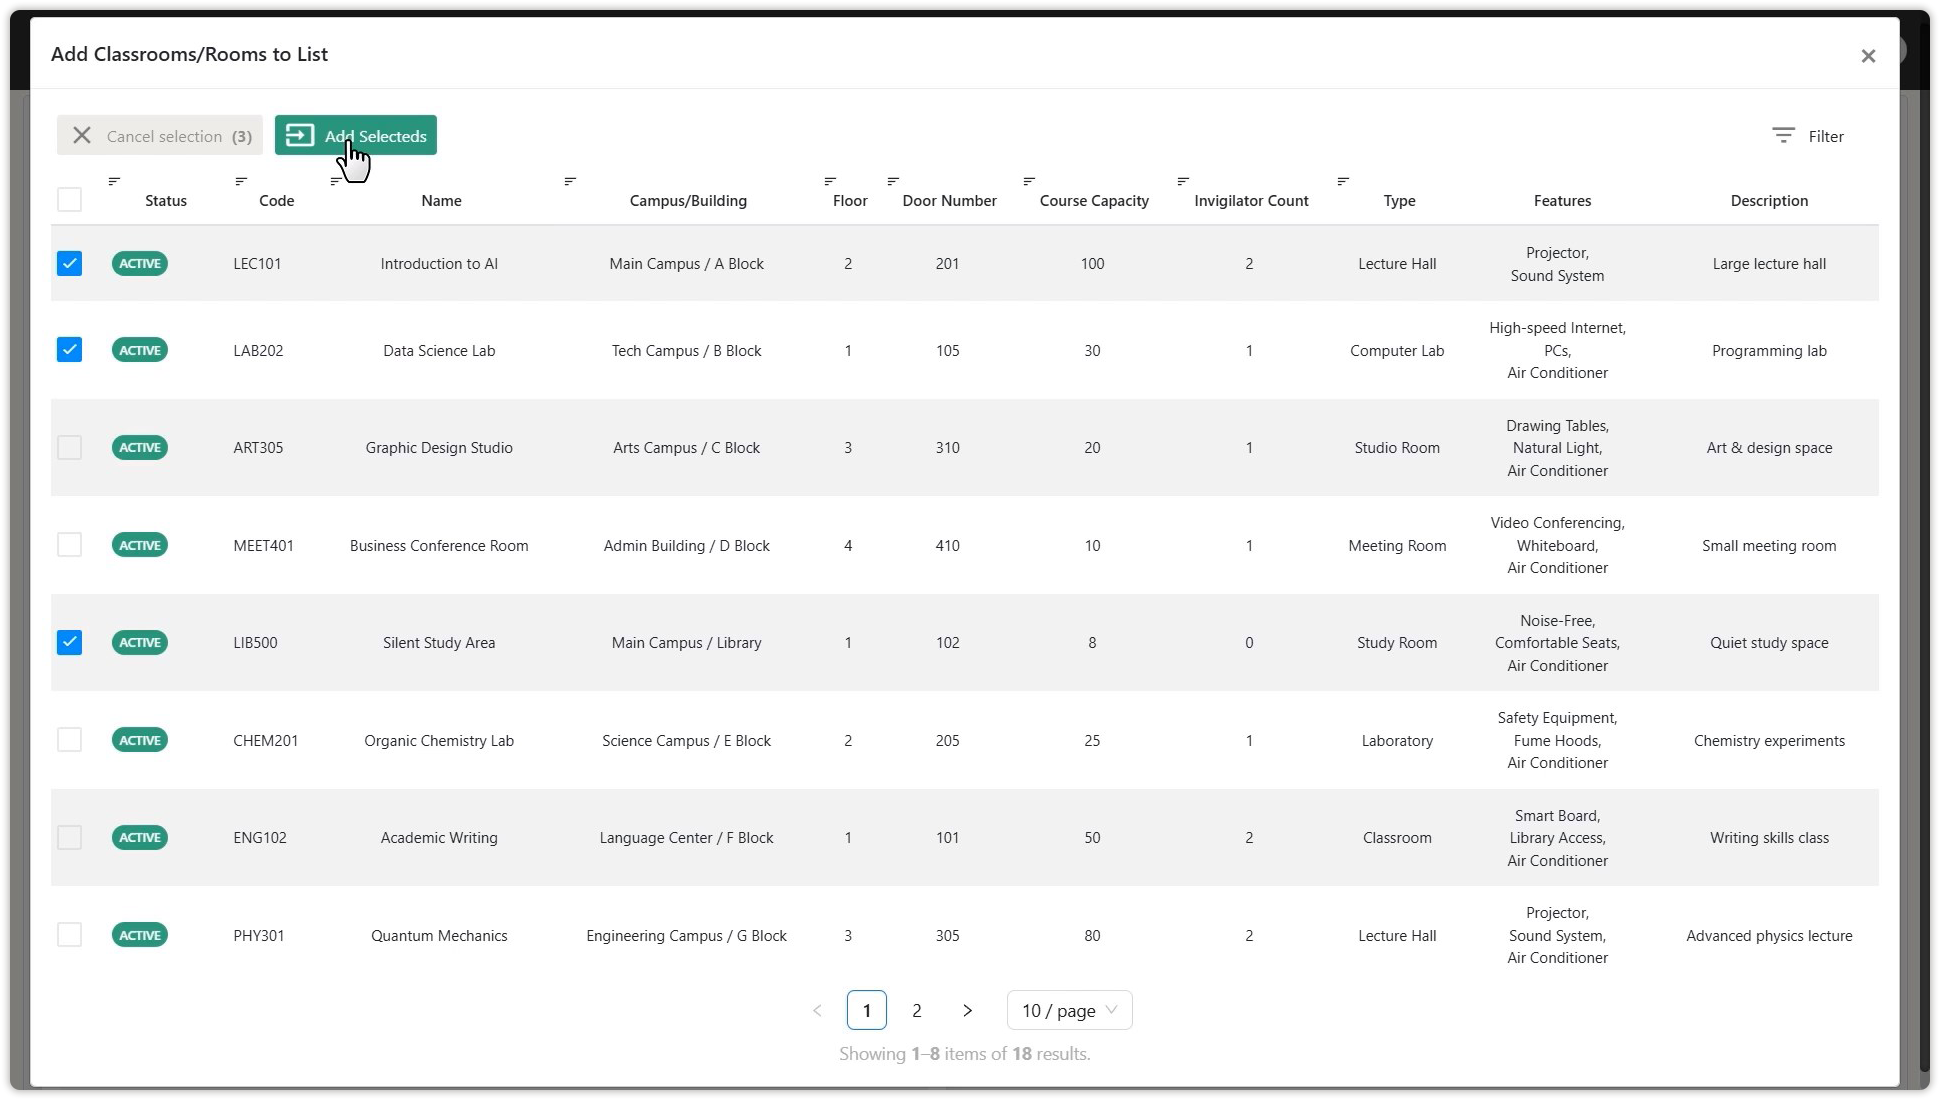
Classrooms or Rooms
Click on the Planning button in the top menu, then select Classrooms or Rooms at the top of the page to navigate to the classroom or room planning page. Click on the listed classroom or room names, then mark available or unavailable times to plan classroom and room usage.
- Click the Add button to include registered classroom or room in the plan.
- Click the Add With Excel button to add new classroom or room asses to the plan.
- Click the Download button to download the list of classroom or room to be scheduled.
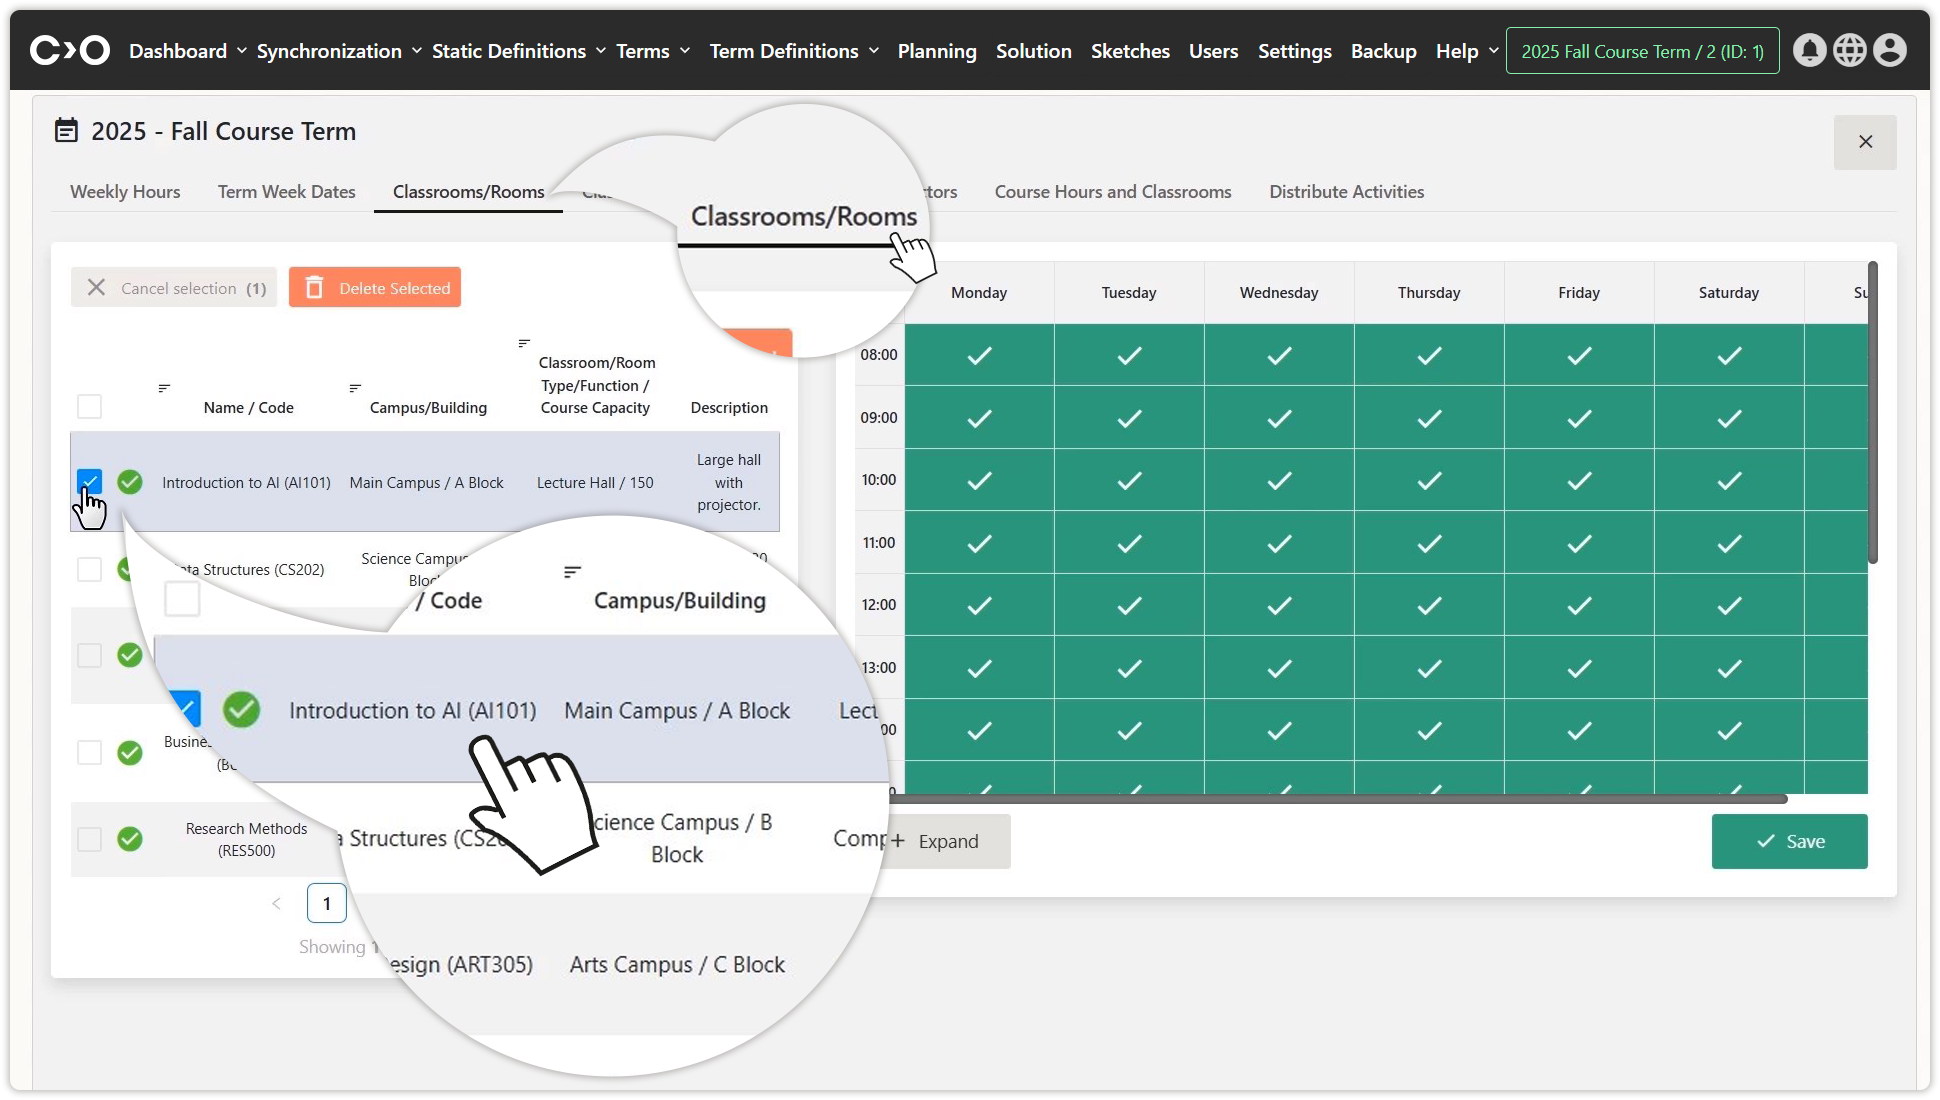
Set the times when classrooms or rooms are available.
Classroom Priority
Click on the Planning button in the top menu, then select Classroom Priority at the top of the page to navigate to the classroom priority planning page. Select a course from the list and assign a priority classroom for it.
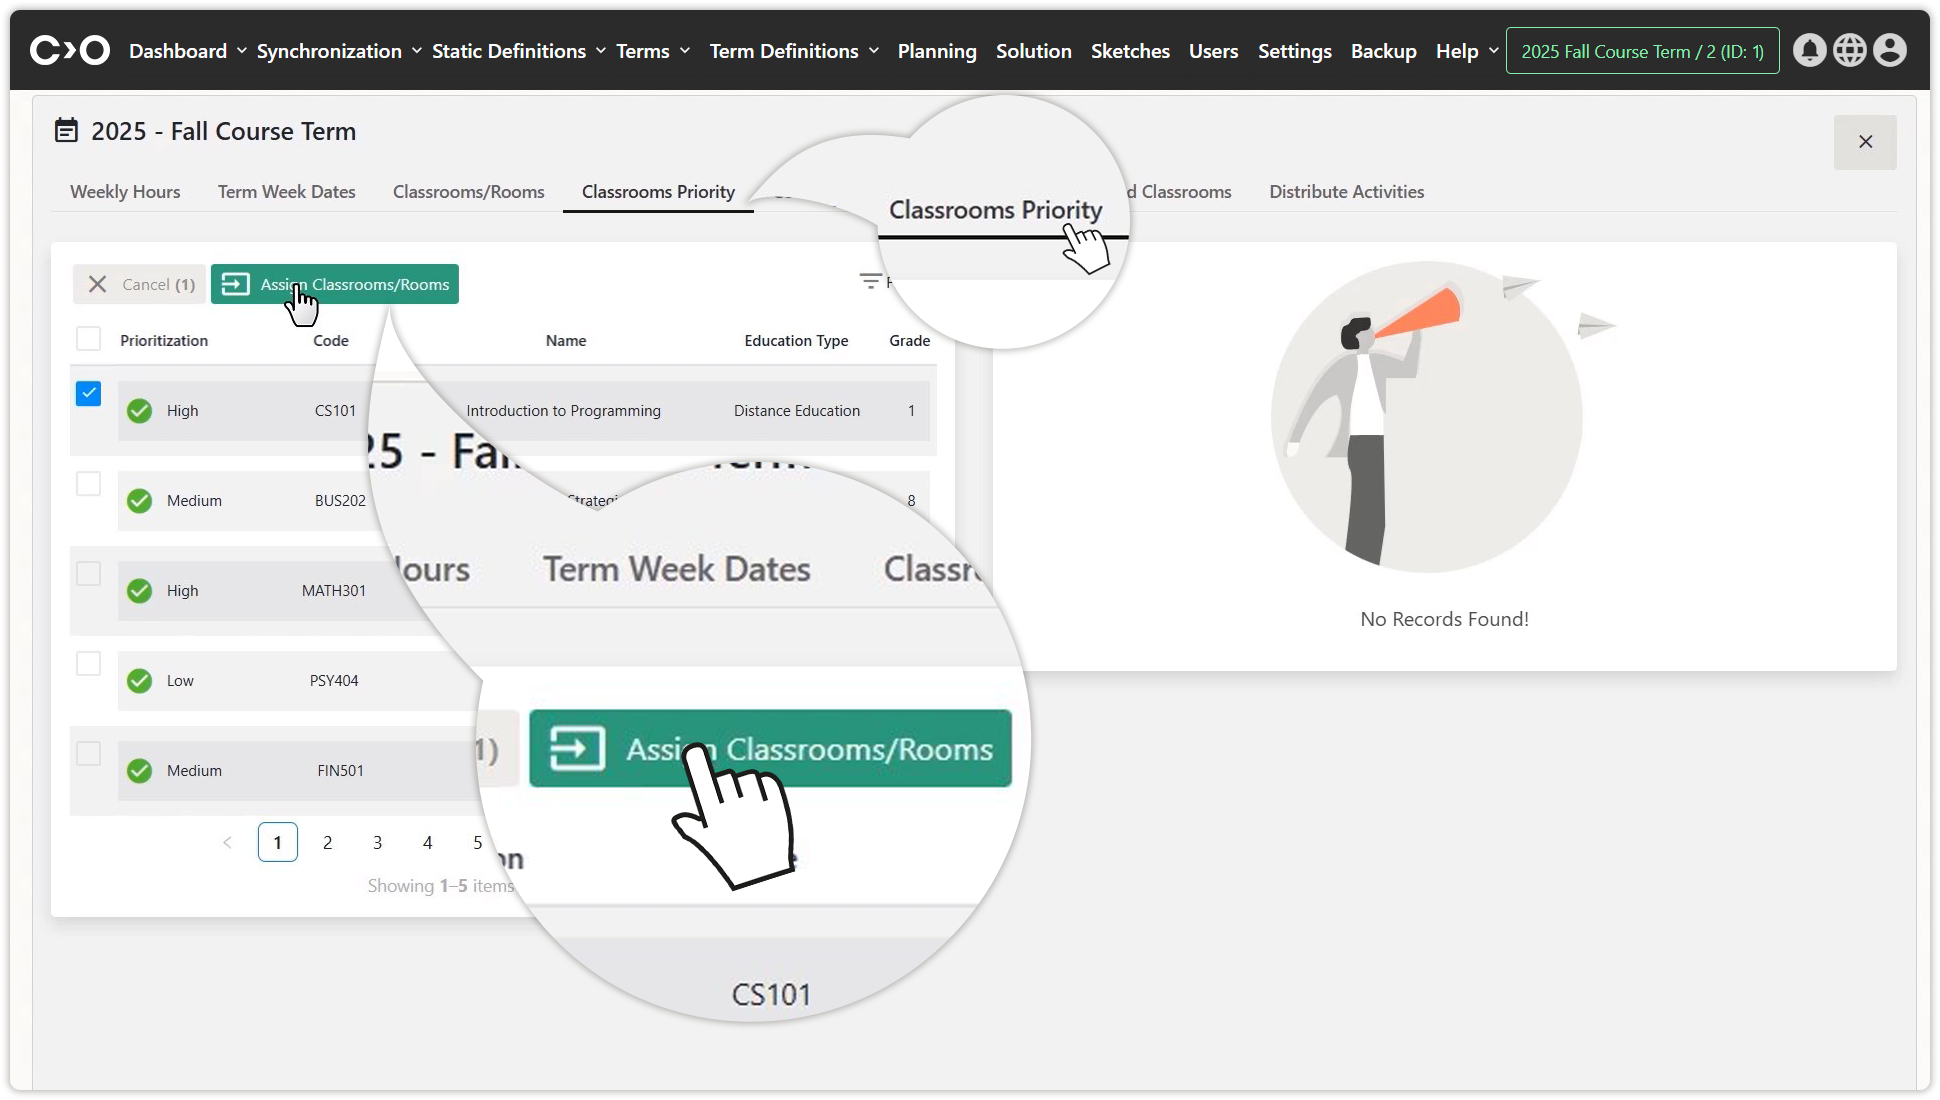
Set the priority courses for classrooms or rooms.
Select the classrooms or rooms and add the selected ones as a priority.
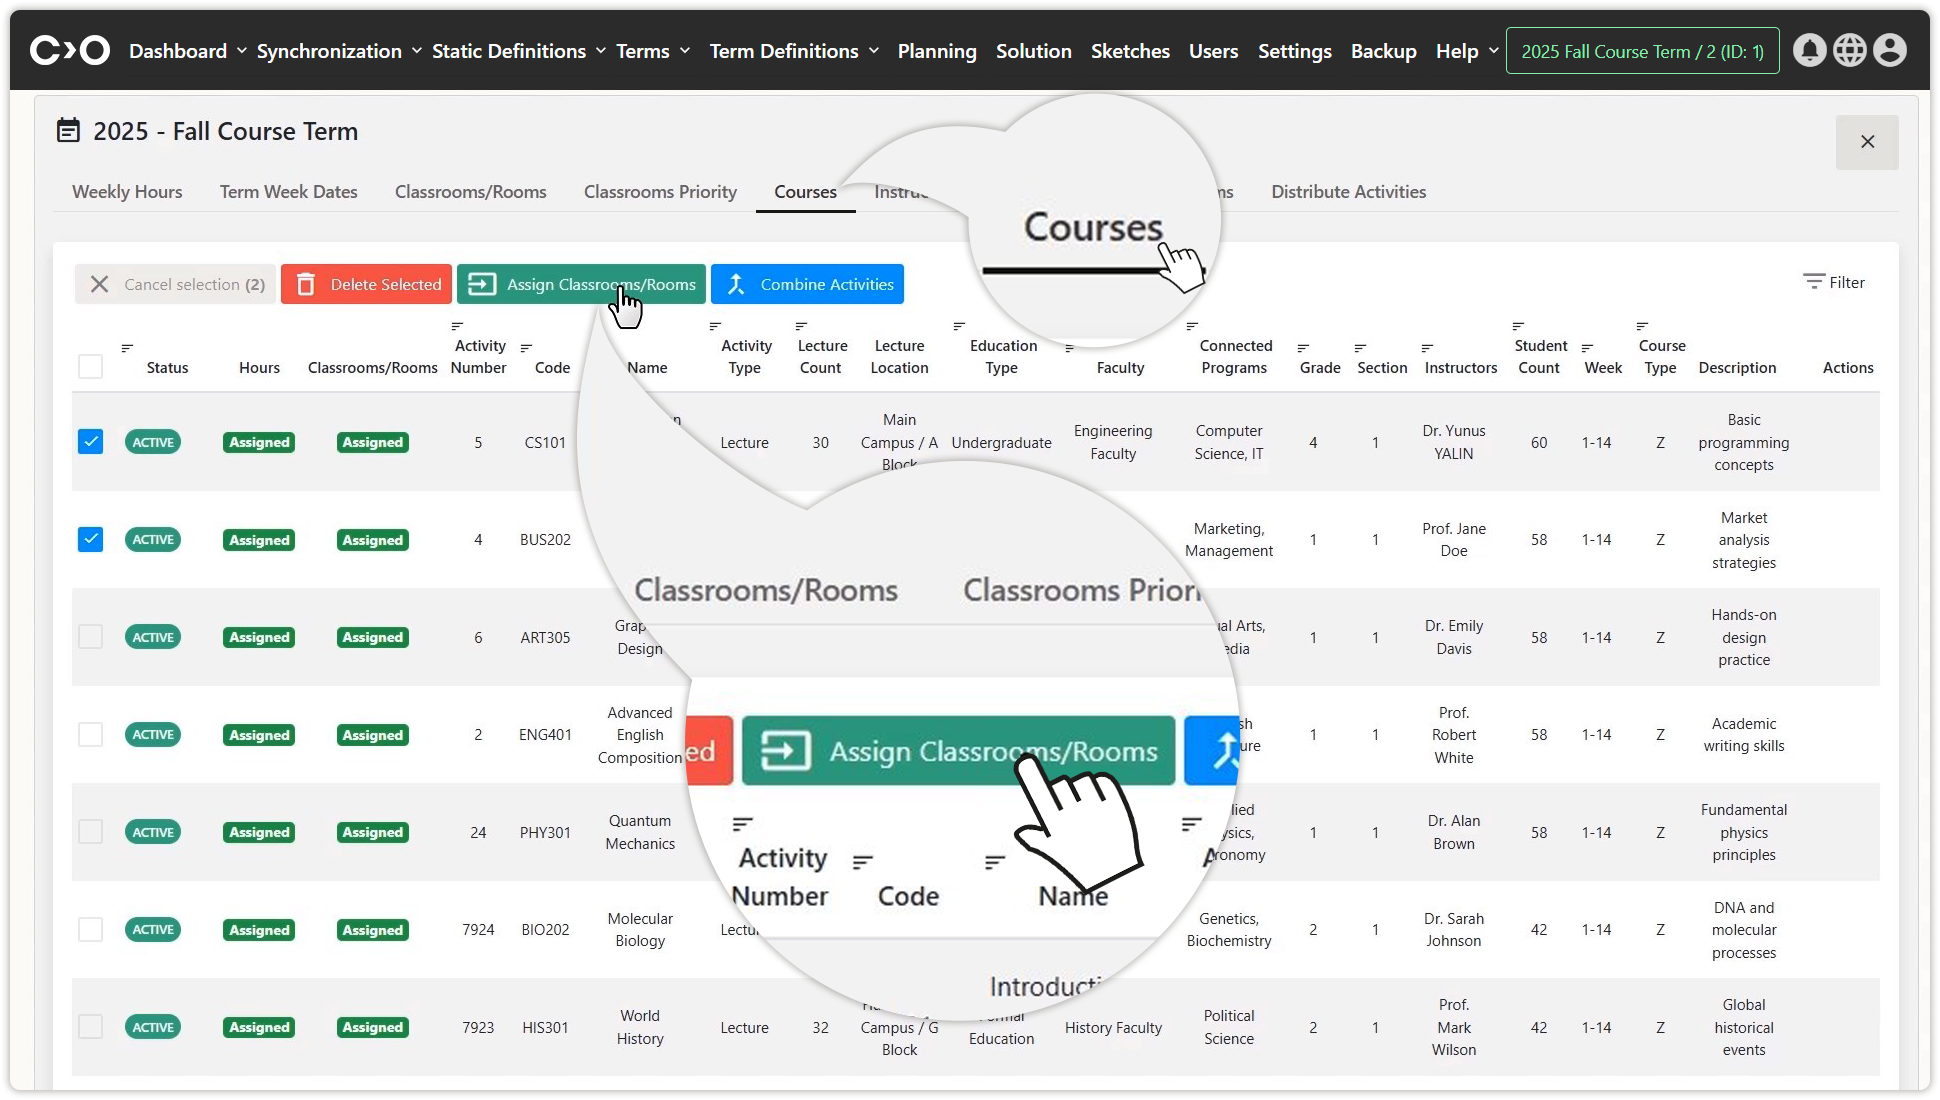
Courses
Click on the Planning button in the top menu, then select Courses at the top of the page to navigate to the course planning page. Click Add Course to list the courses you want to schedule, then select and add the courses listed. Click Update Section Values to update sections. You can also delete specific courses, assign classrooms or room, and copy selected courses.
Set the priority classrooms or rooms for courses.
Select the classrooms and add the selected ones as a priority.
Insructors
Click on the Planning button in the top menu, then select Insructors at the top of the page to navigate to the faculty member planning page. Click on insructorsnames from the result list and mark their available or unavailable times for custom scheduling.
- Click the Add With Excel button to add new insructorsasses to the plan.
- Click the Download button to download the list of insructorsto be scheduled.
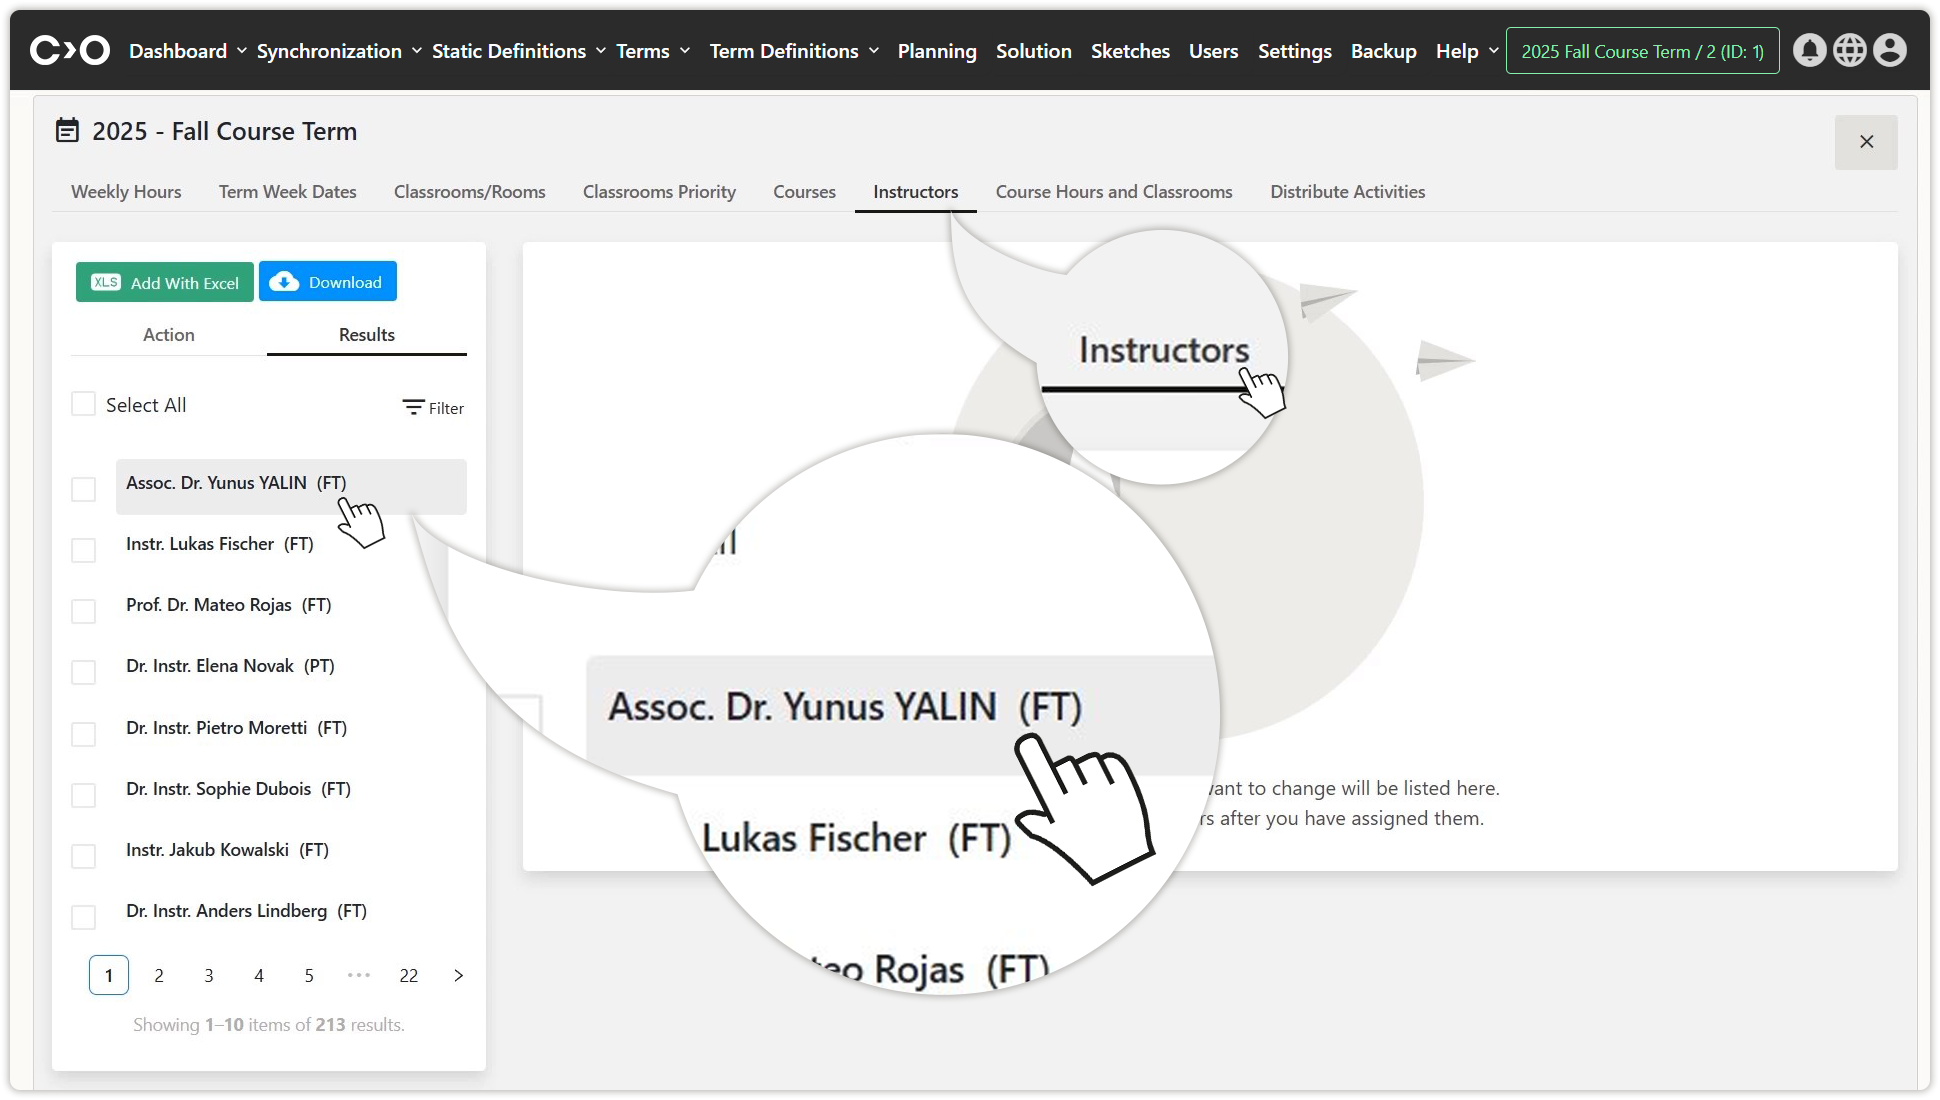
Set the hours when your instructors are available or unavailable.
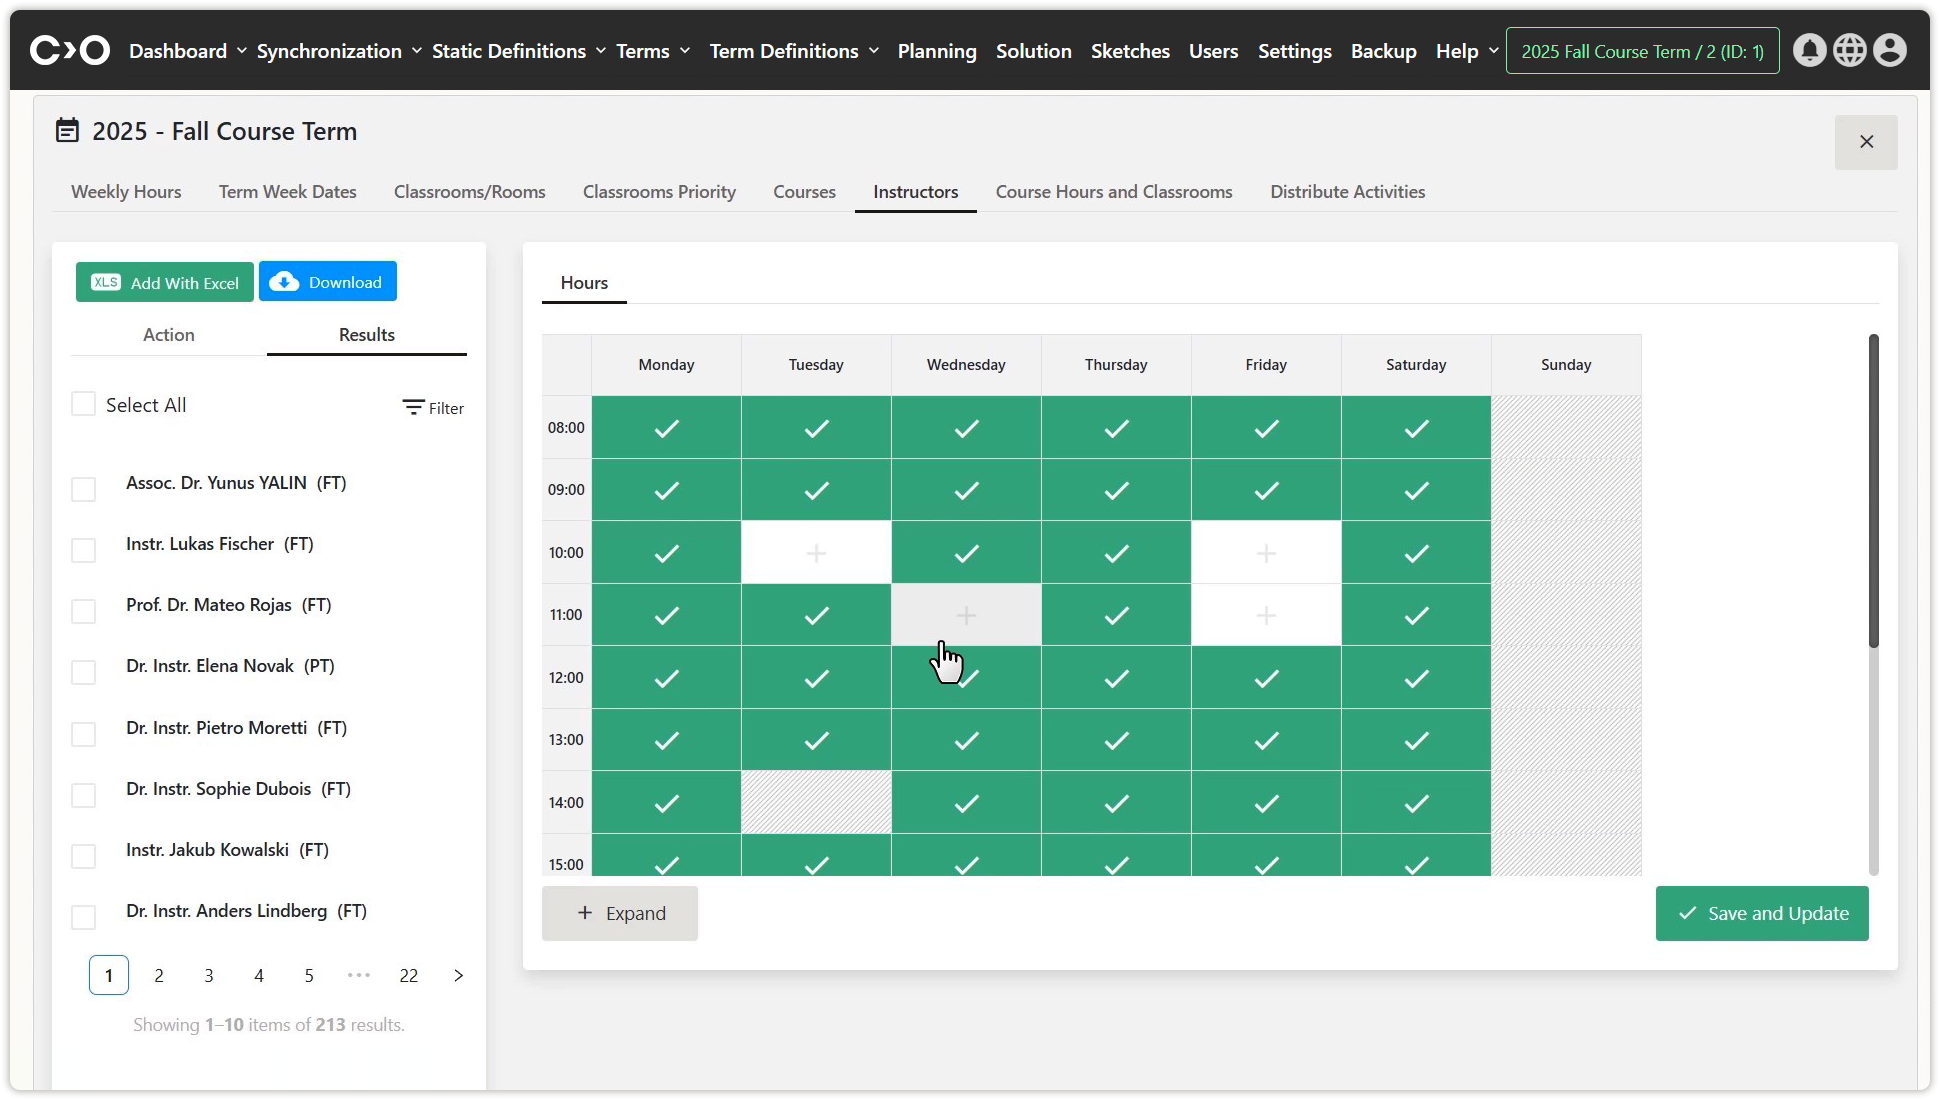
Set and save the hours.
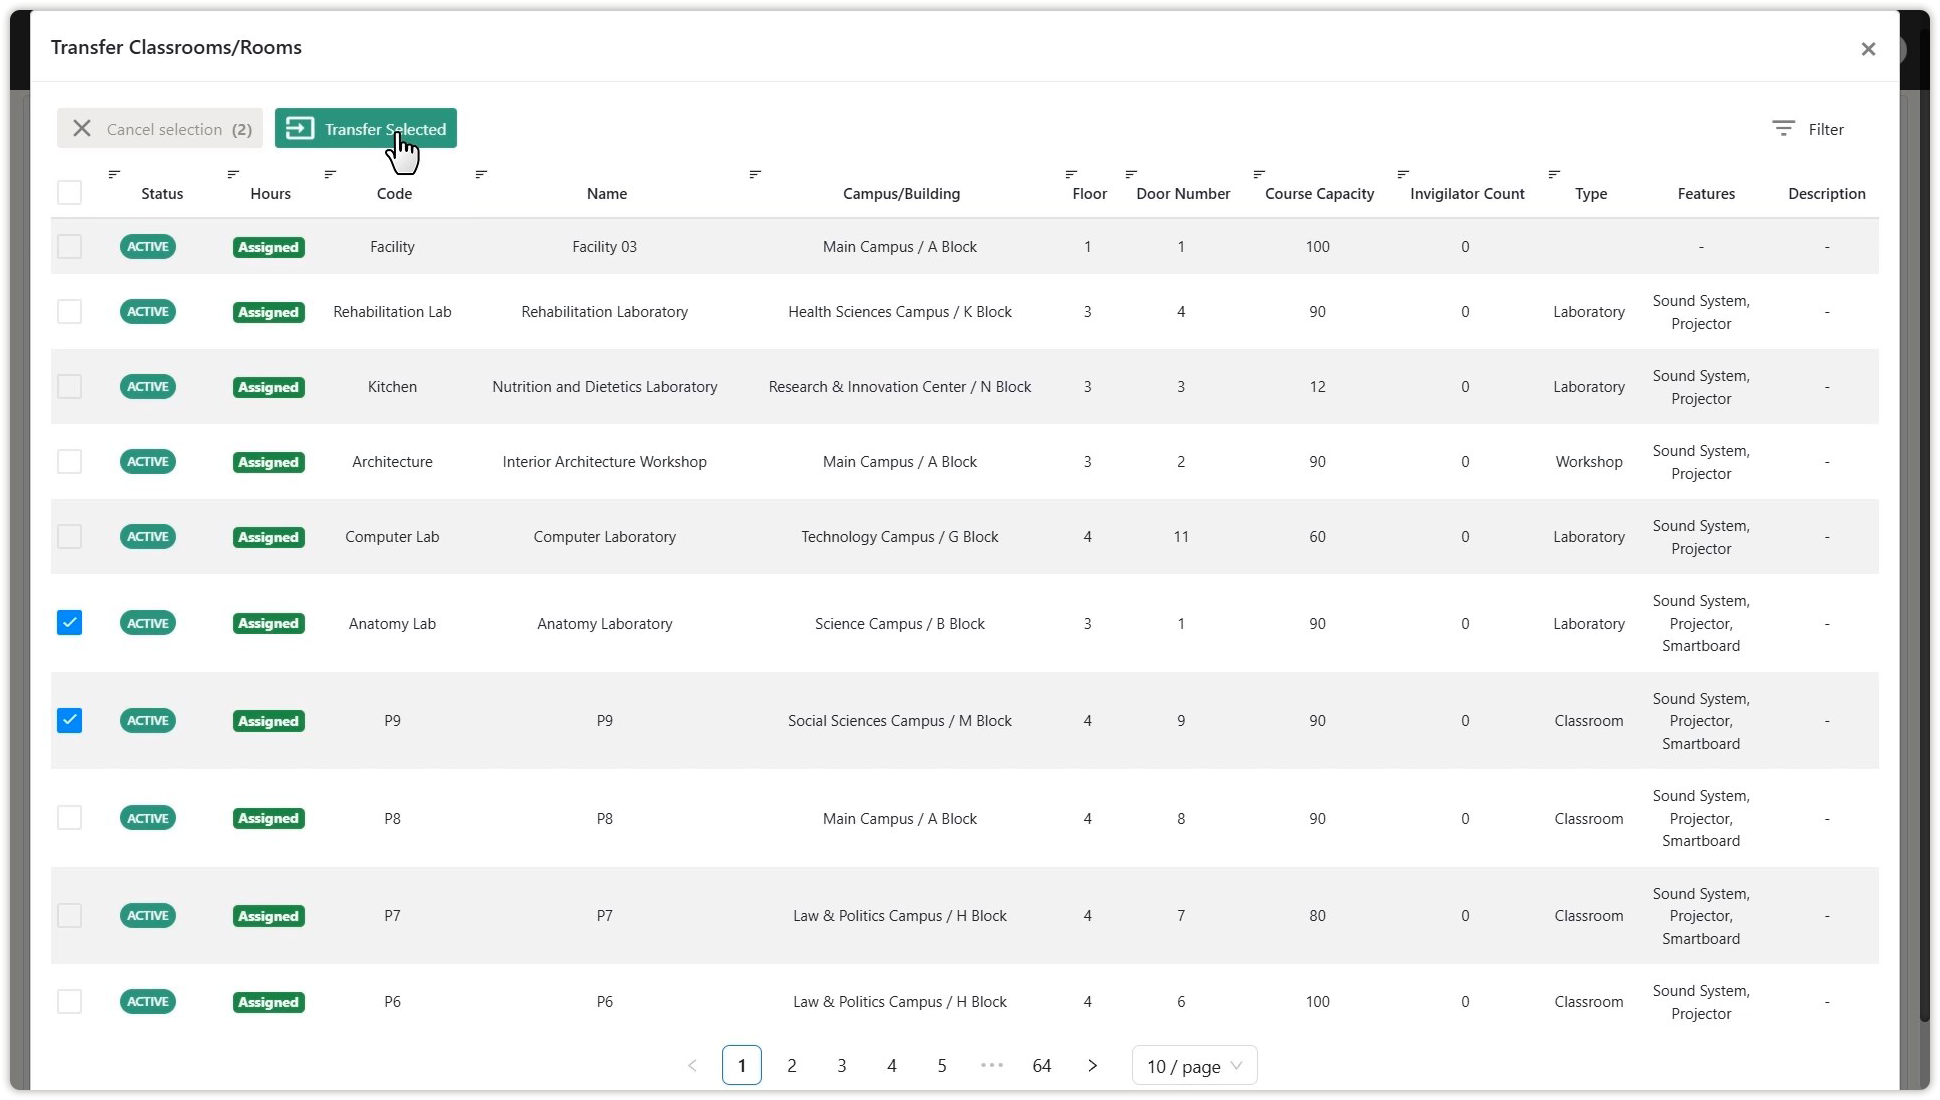
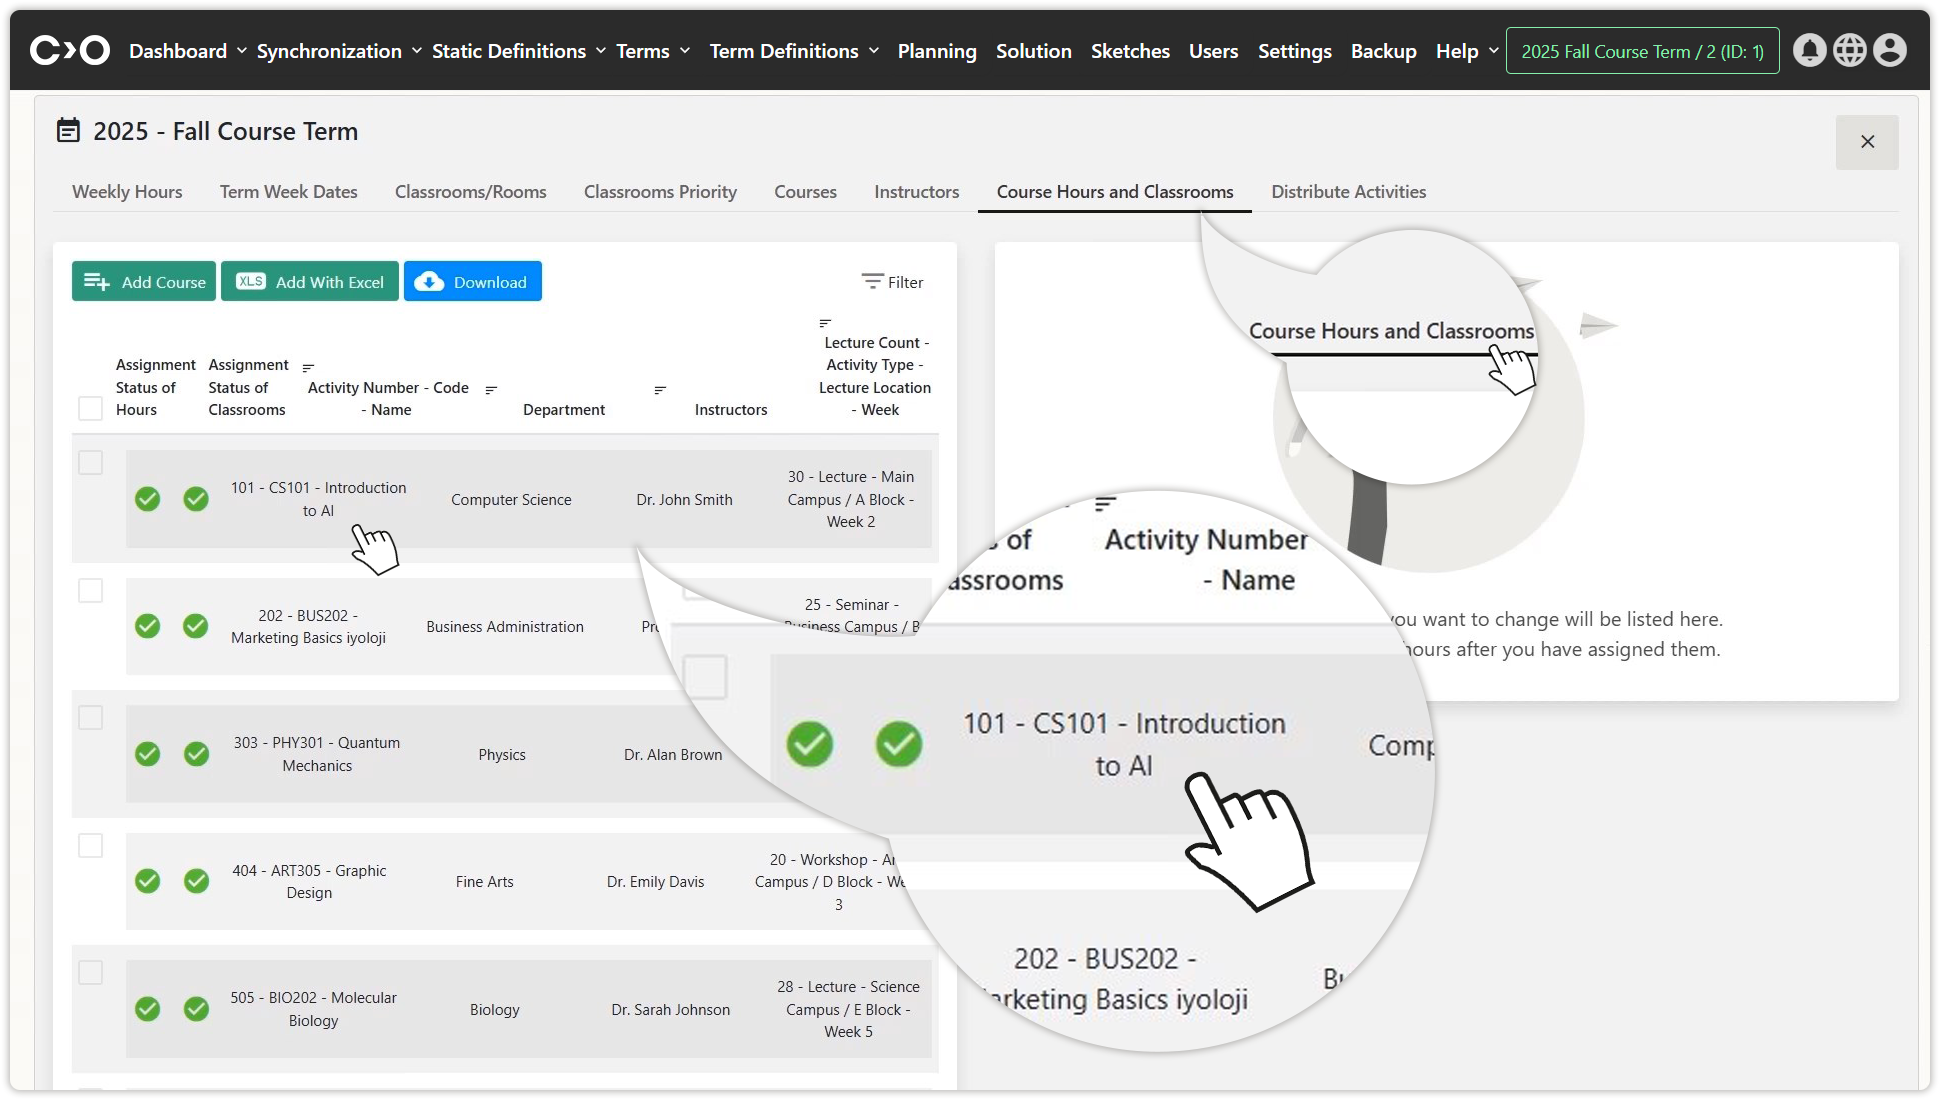
Course Hours and Classrooms
Click on the Planning button in the top menu, then select Course Hours and Classrooms at the top of the page to navigate to the course hours and classrooms planning page. Click on the listed course hours and classroom names, then mark available or unavailable times for custom scheduling.
- You can remove the assigned classrooms for courses from the schedule in the classrooms or rooms tab.
- You can check the course's schedulability status in the intersections tab.
- Click the AddCourse button to include registered course in the plan.
- Click the Add With Excel button to add new course asses to the plan.
- Click the Download button to download the list of course to be scheduled.
Select the classrooms for which you want to adjust the schedule or view availability.
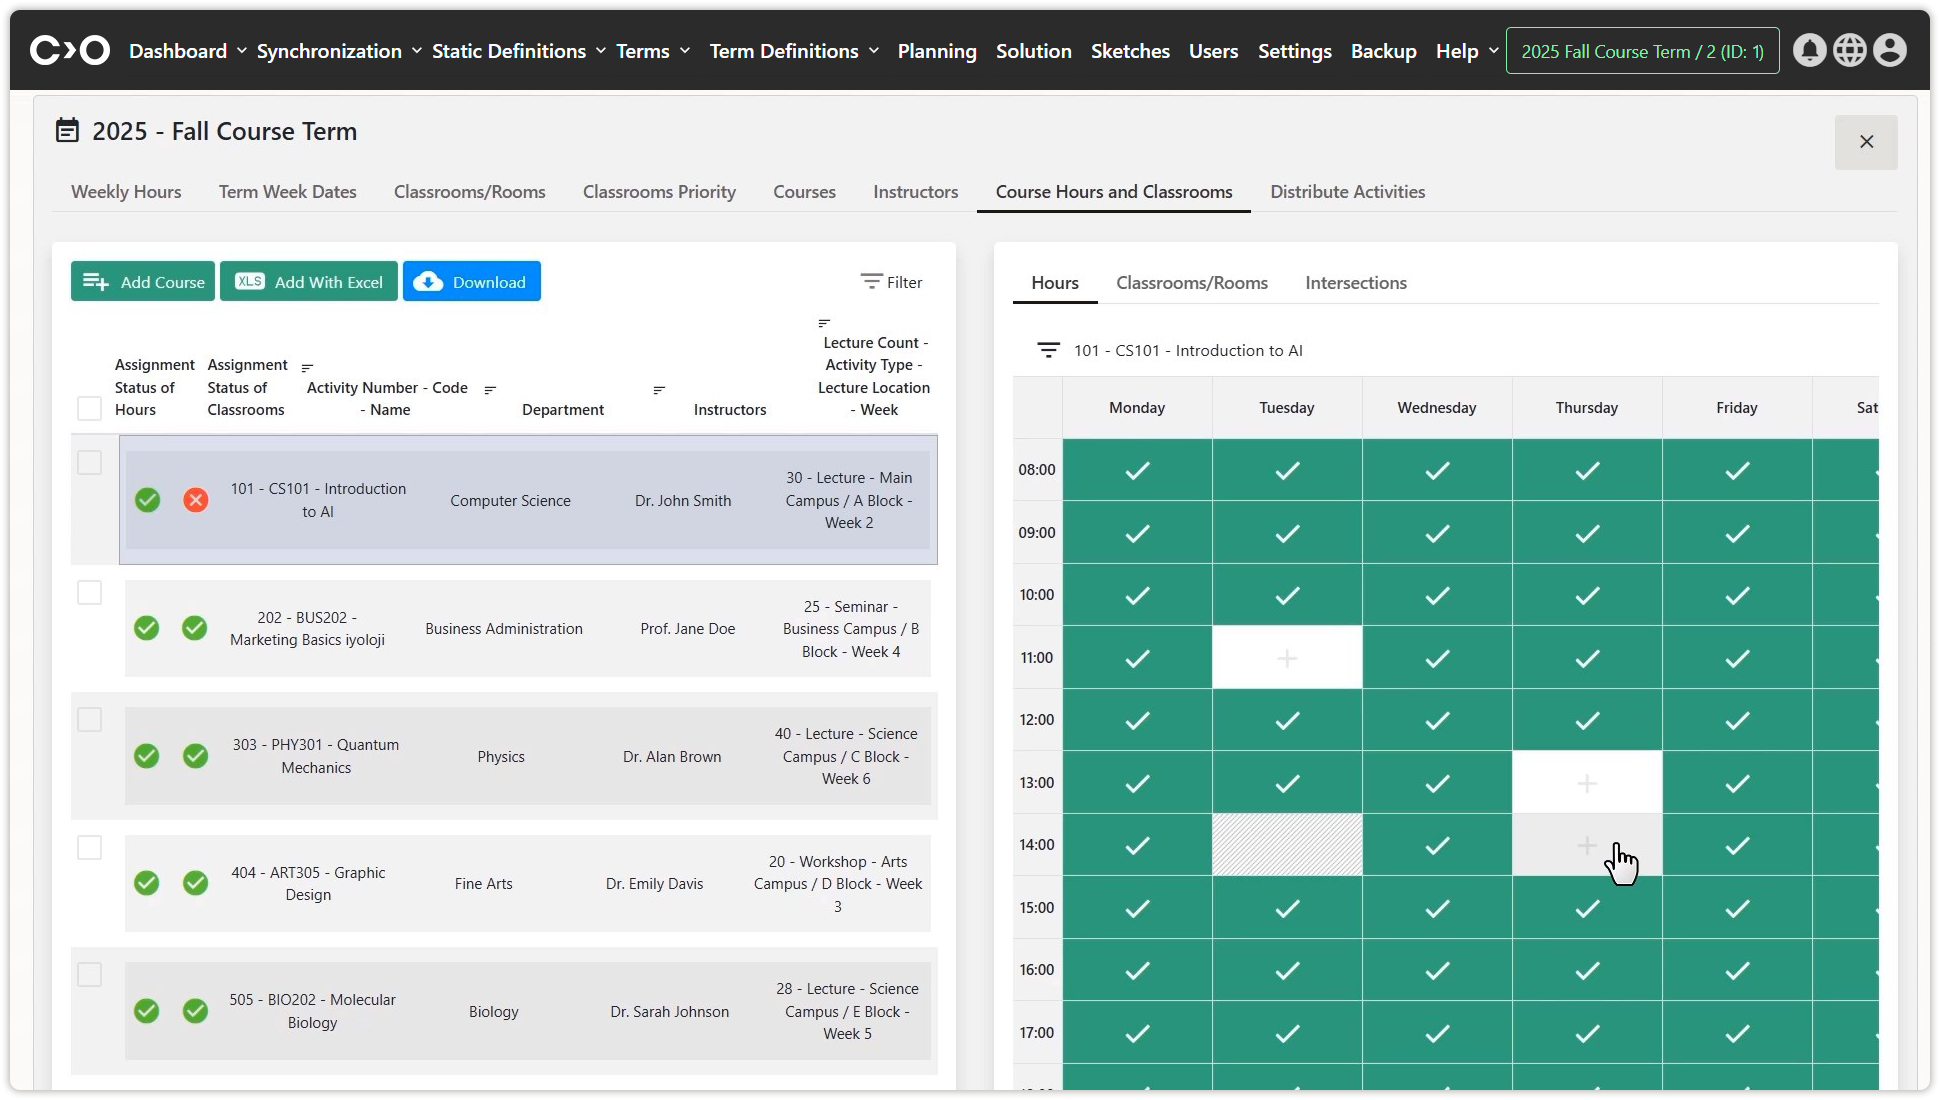
Set the hours when the classroom is available or unavailable.
Distribute Activities
Click on the Planning button in the top menu, then select Distribute Activities at the top of the page to navigate to the activity distribution planning page. Click the Distribute Activities button to start the planning process. Once completed, click Apply Solution to publish the finalized plan. Scheduling conflicts that may arise during the solution process are listed on the screen, and you can manually adjust them.
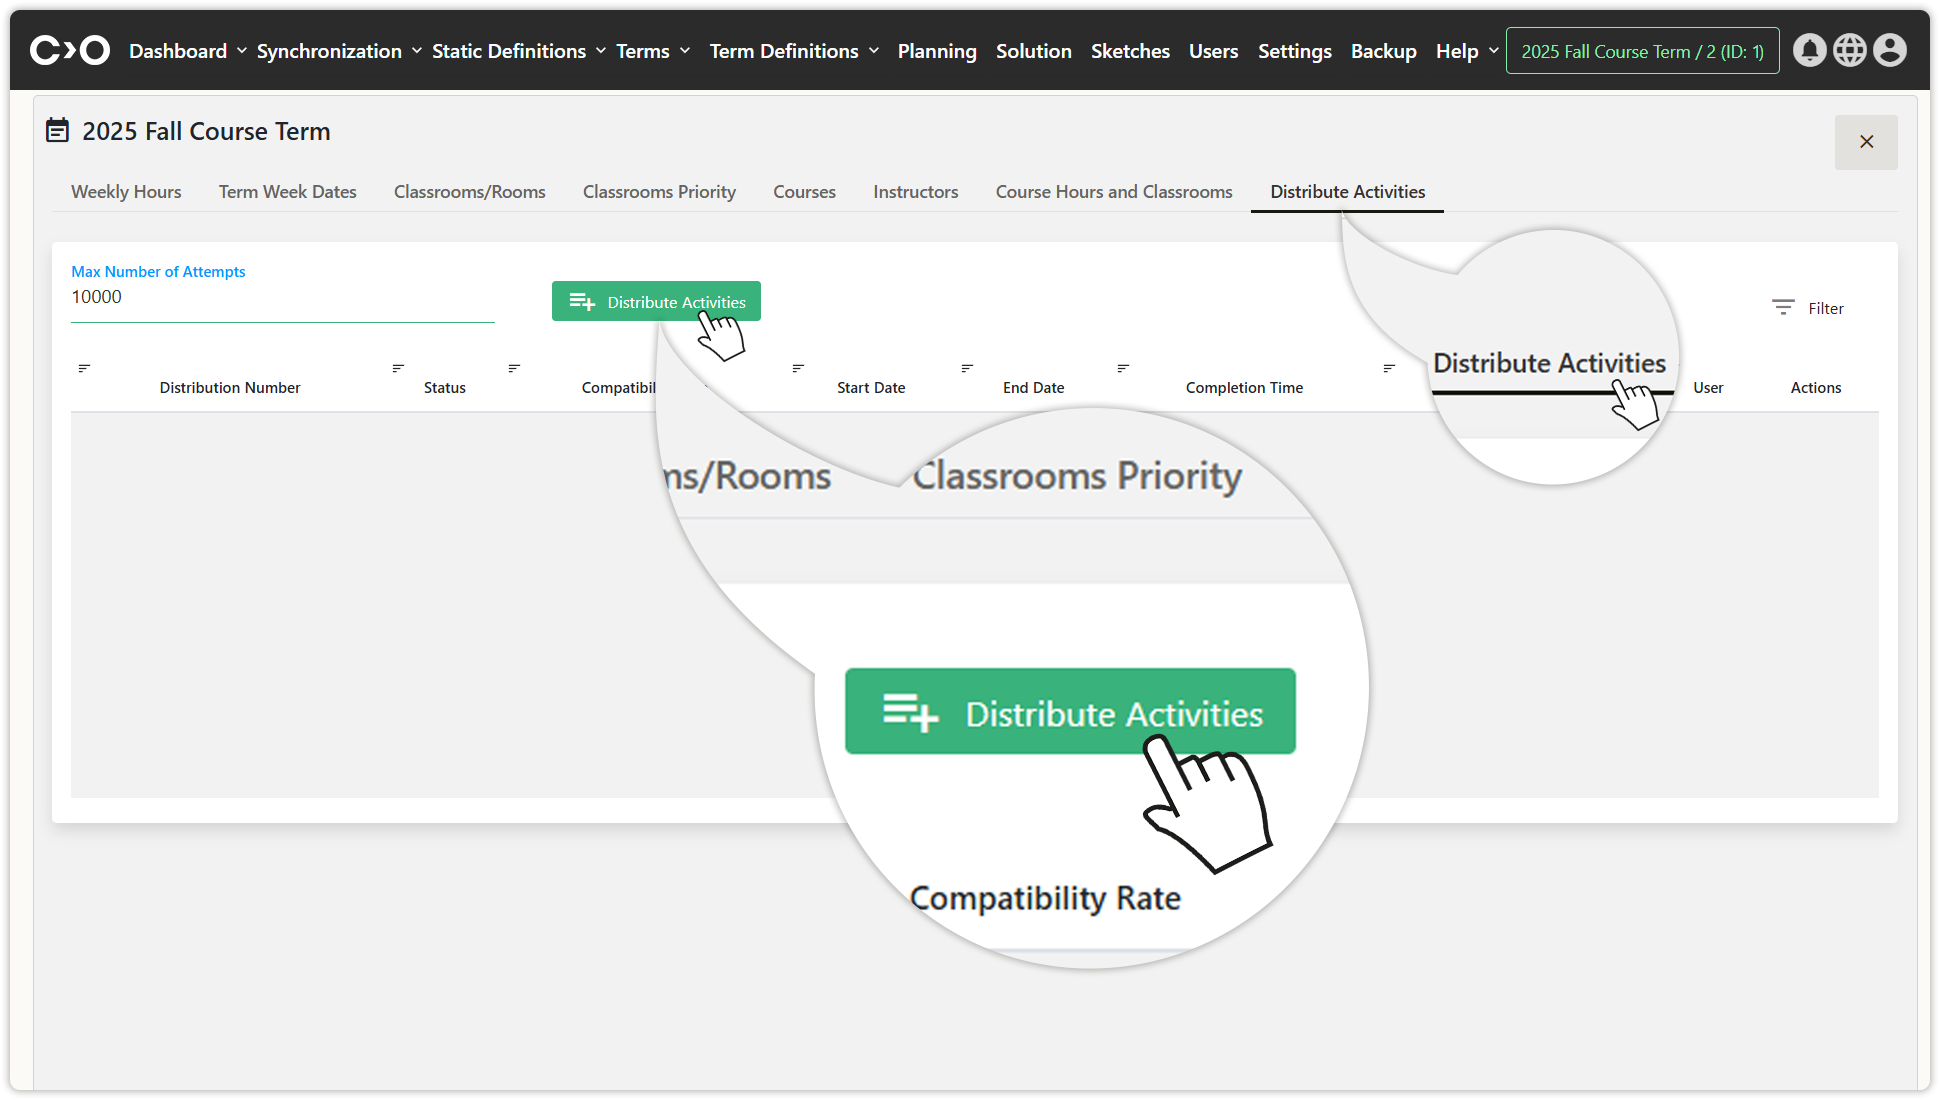
Click the "Distribute Activities" button to start the planning process.
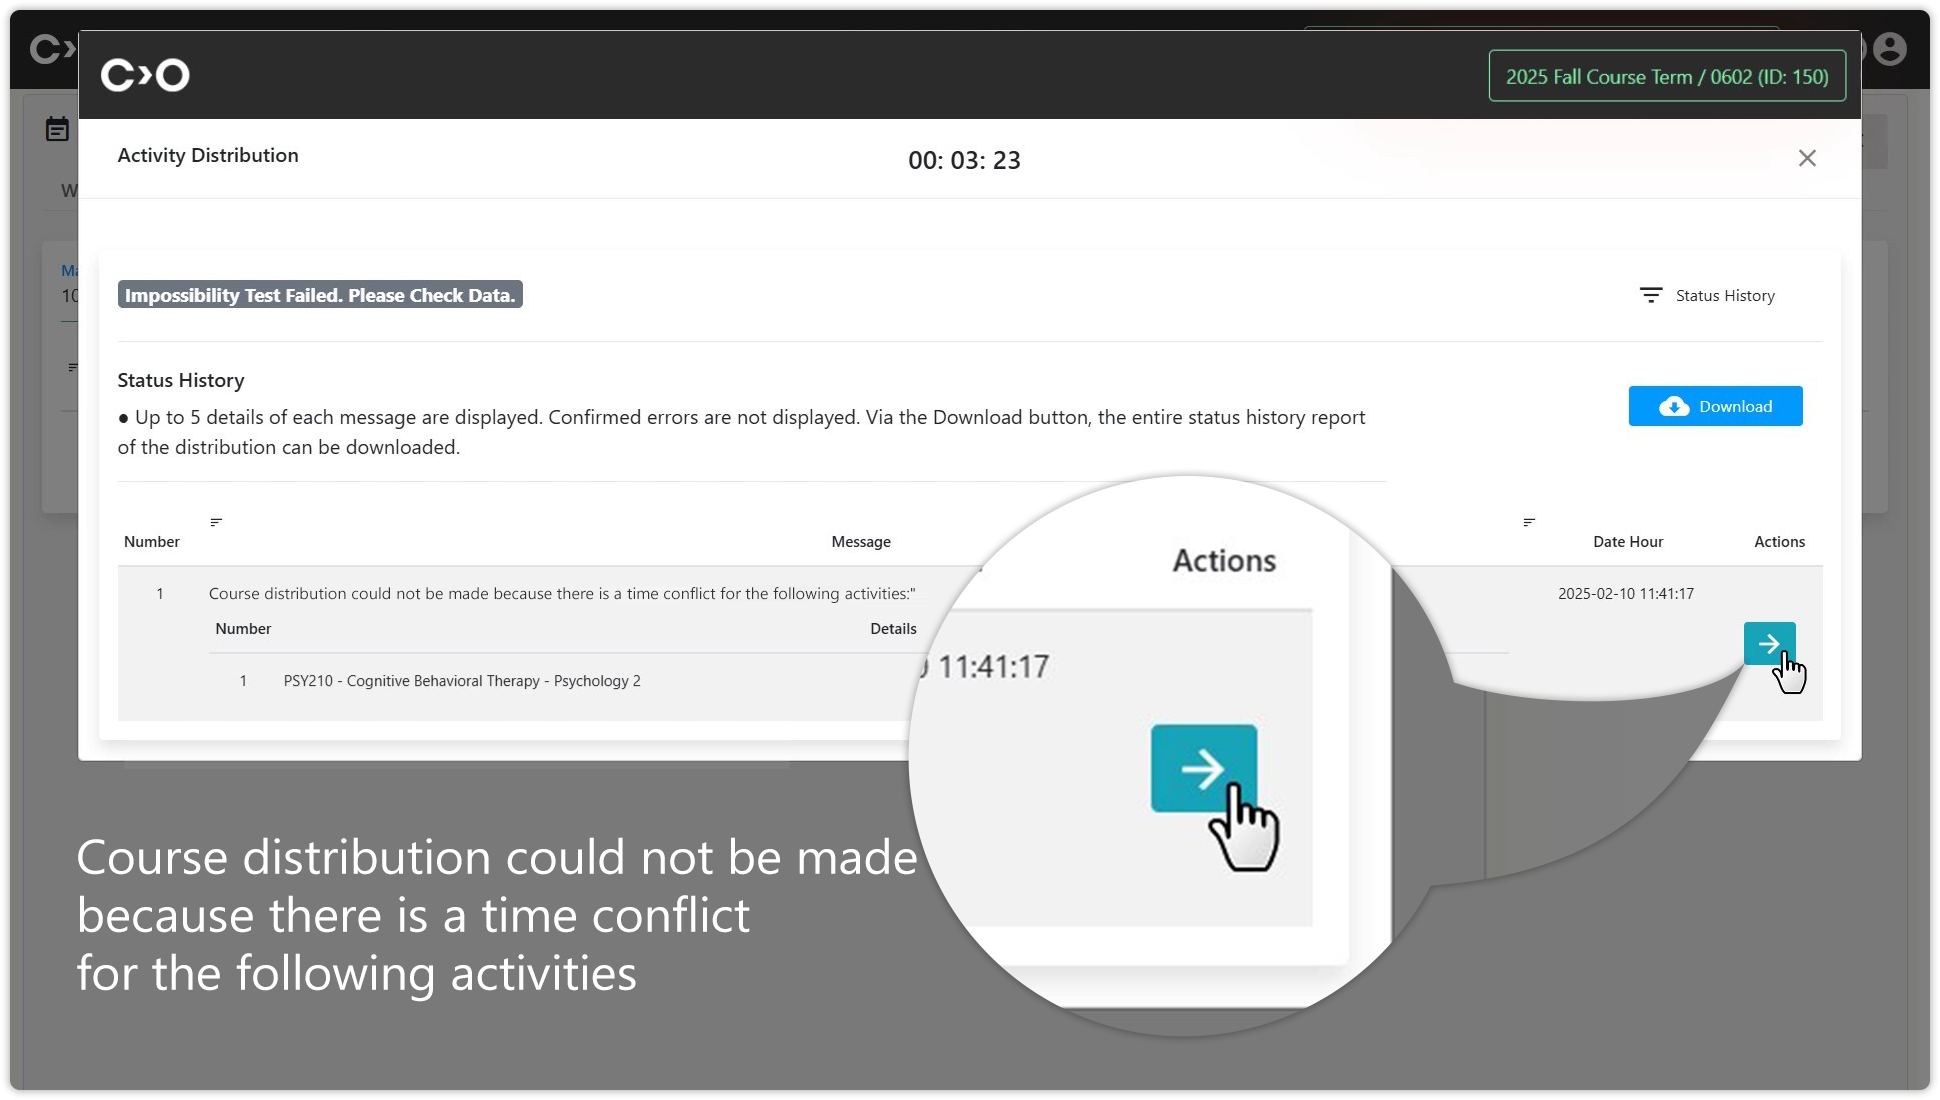
If there is a time conflict or any other issue preventing scheduling during the planning process, it allows you to manually adjust it.
| Select a new date and time for your conflicting course. | Save the change you have made. |
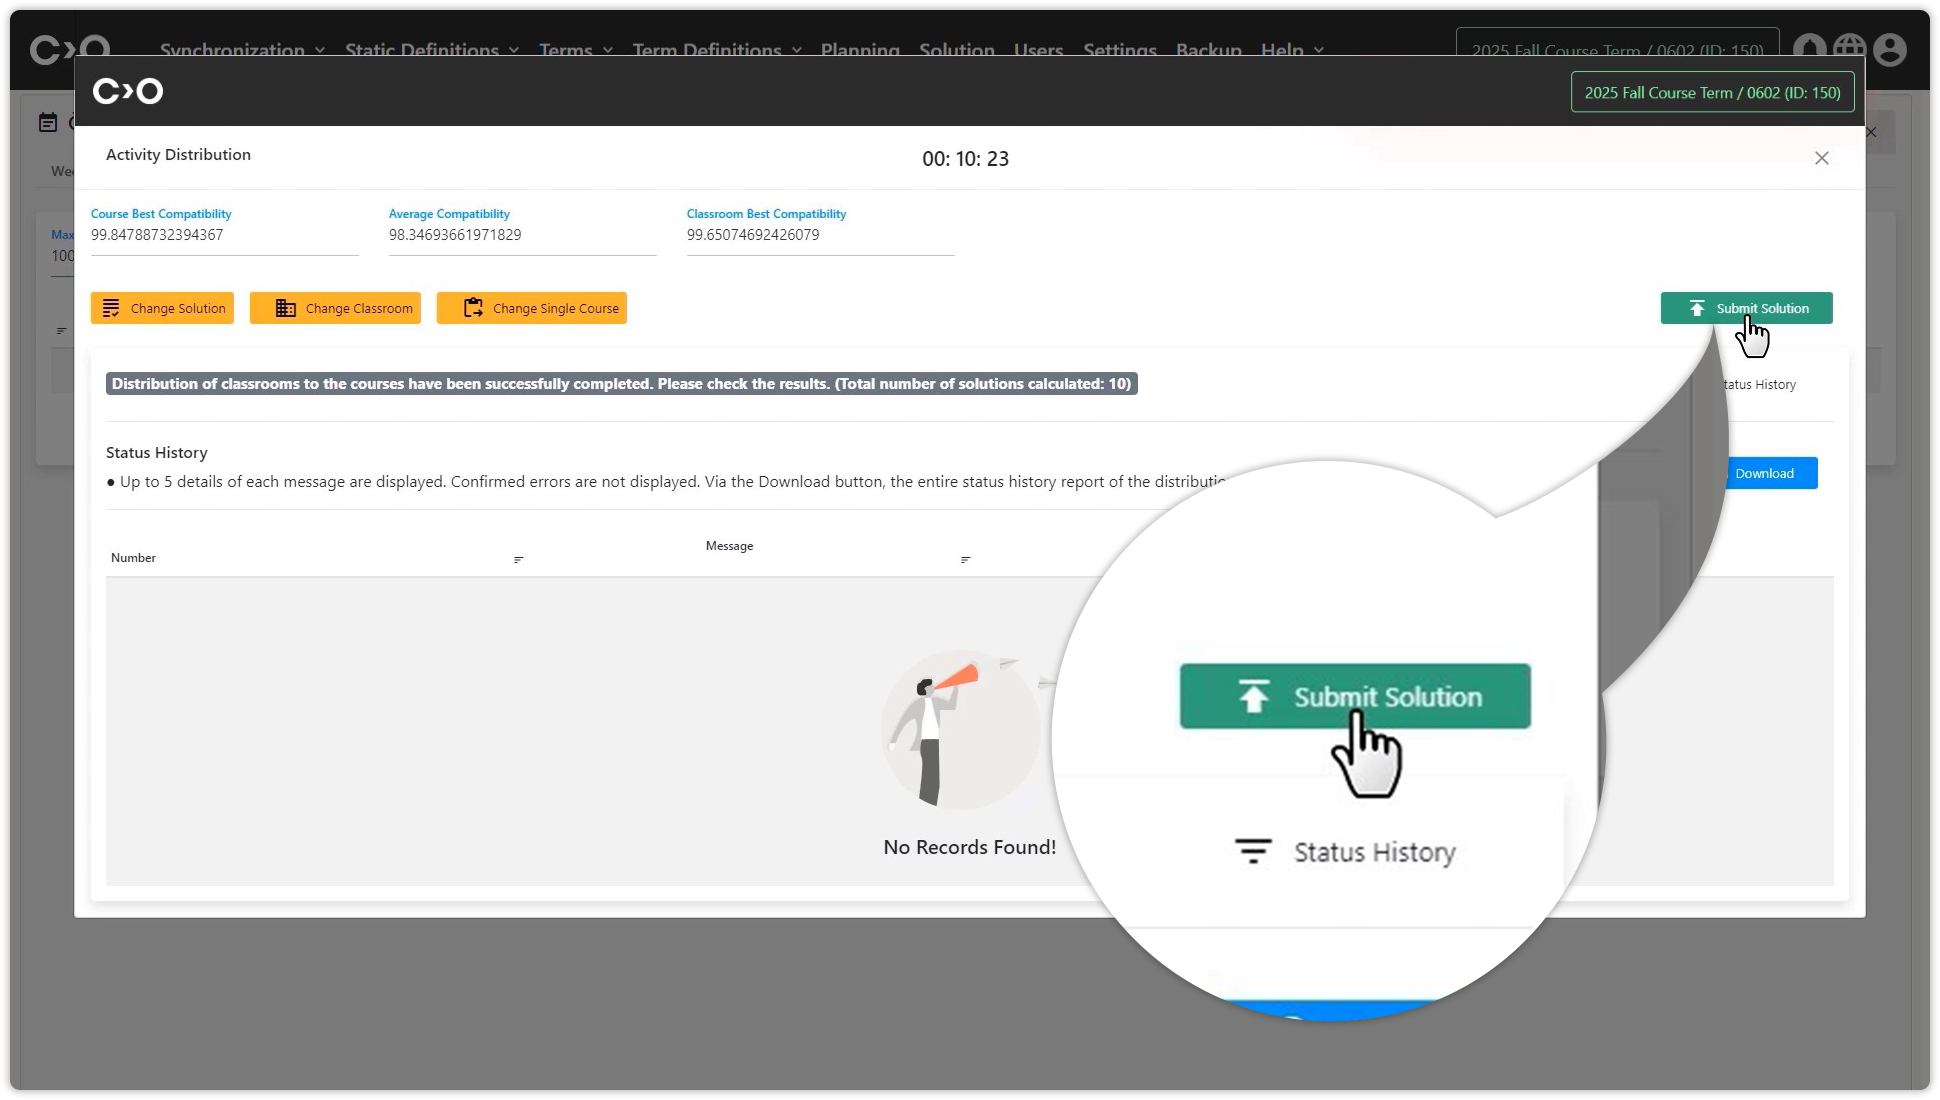
Click the "Submit Solution" button once the planning process is complete.
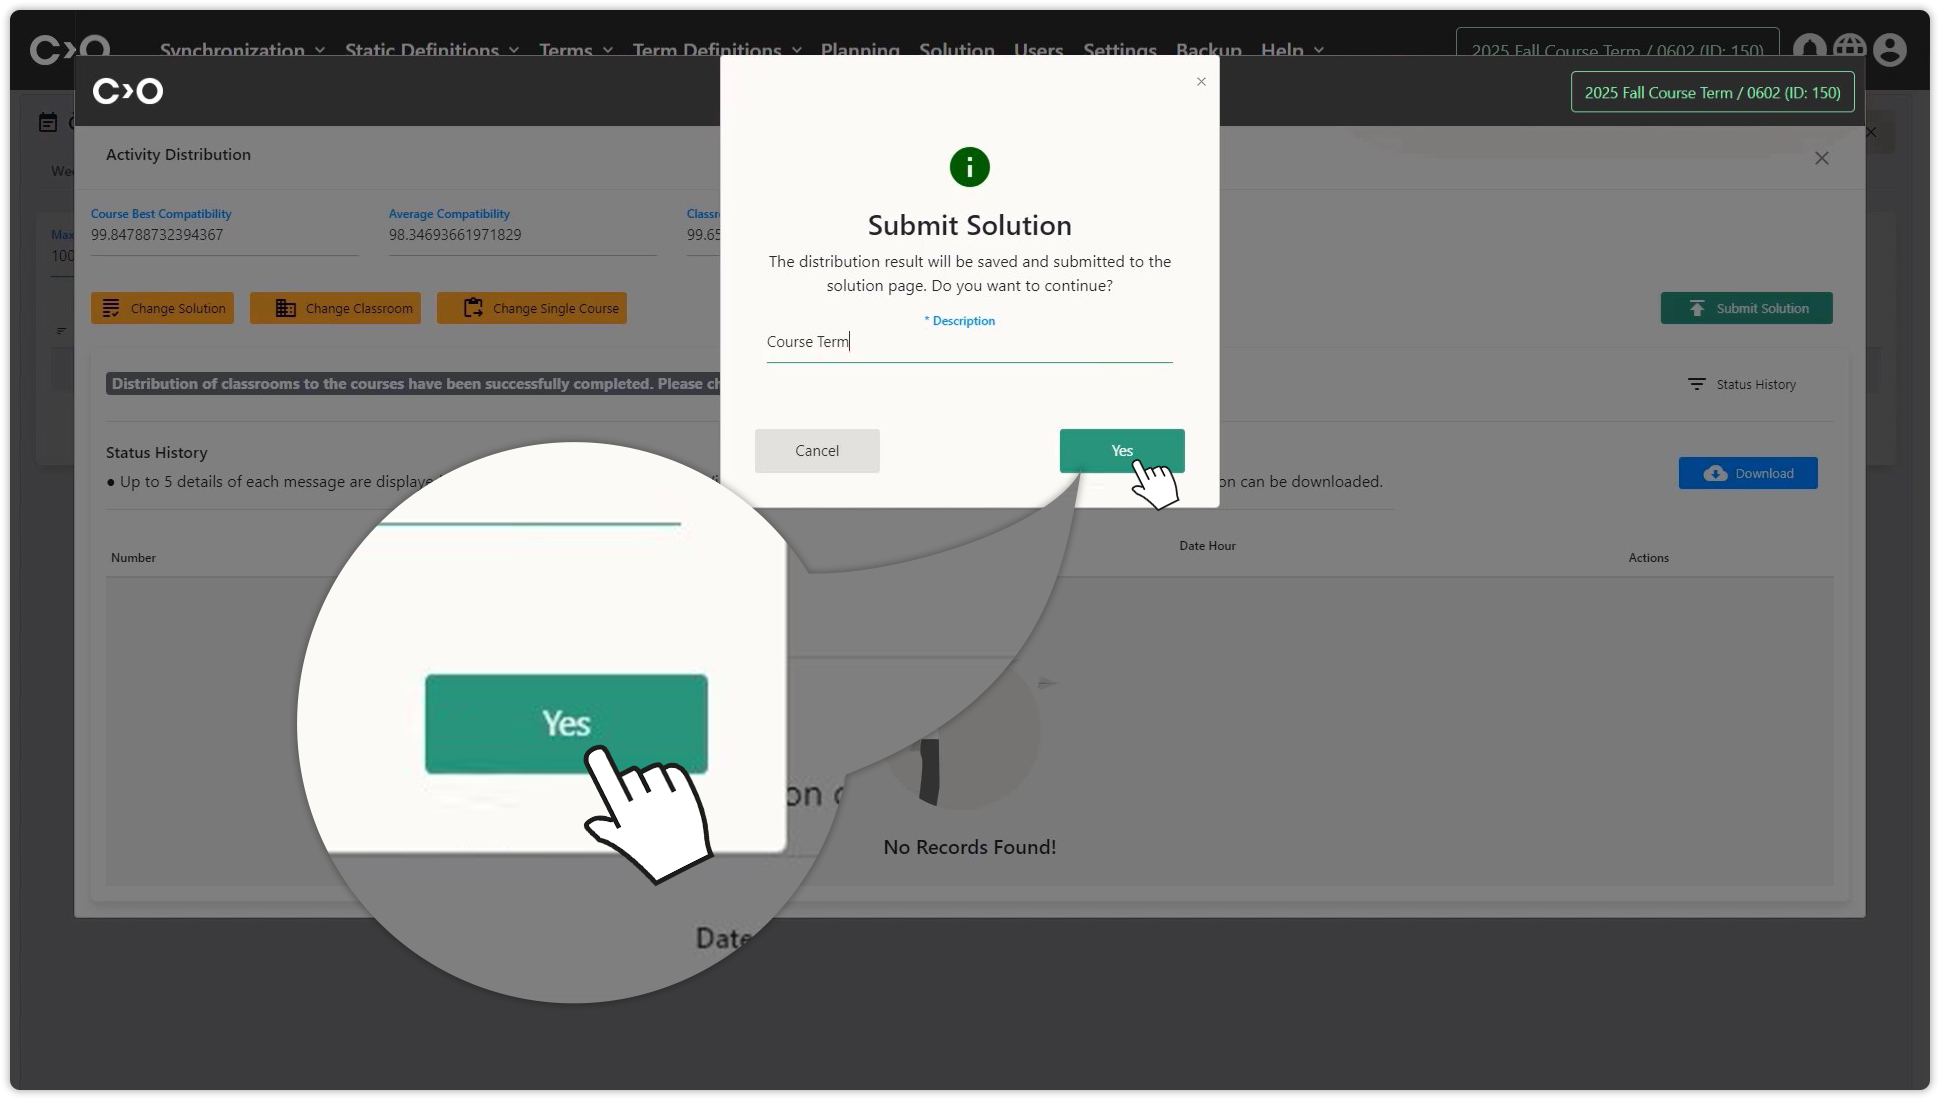
Name your planning solution and save it.
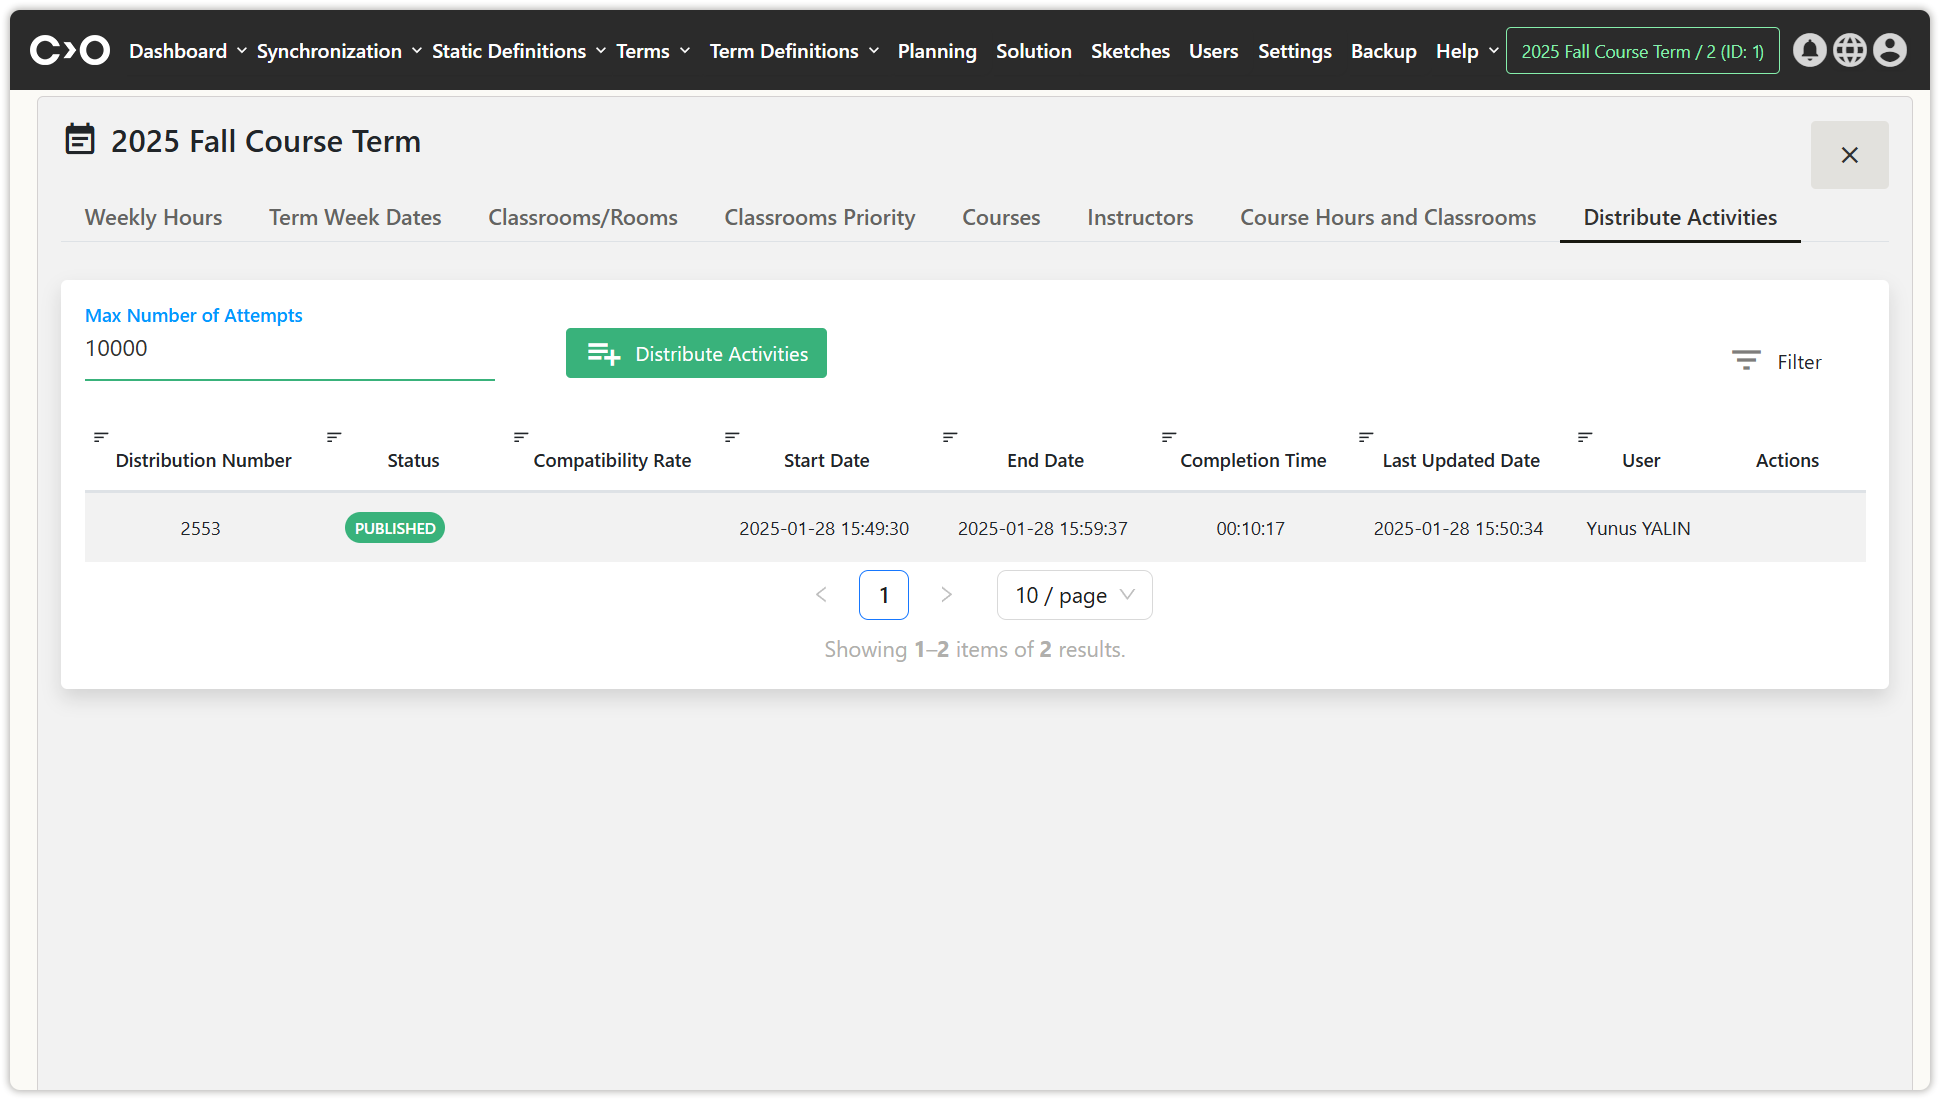
You can see that your solution has been successfully implemented.