Synchronization
Using the synchronization process, you can transfer your institution's information from the Student Information System (SIS) to the Constructor Schedule system, enabling you to create course or exam schedules in the most stable and efficient way. You can perform a new synchronization or copy data from a previous synchronization to update your institution’s information.
| Click on the synchronisation button. | Click on the Start a new synchronisation button. |
Starting a New Synchronization Job for Campuses
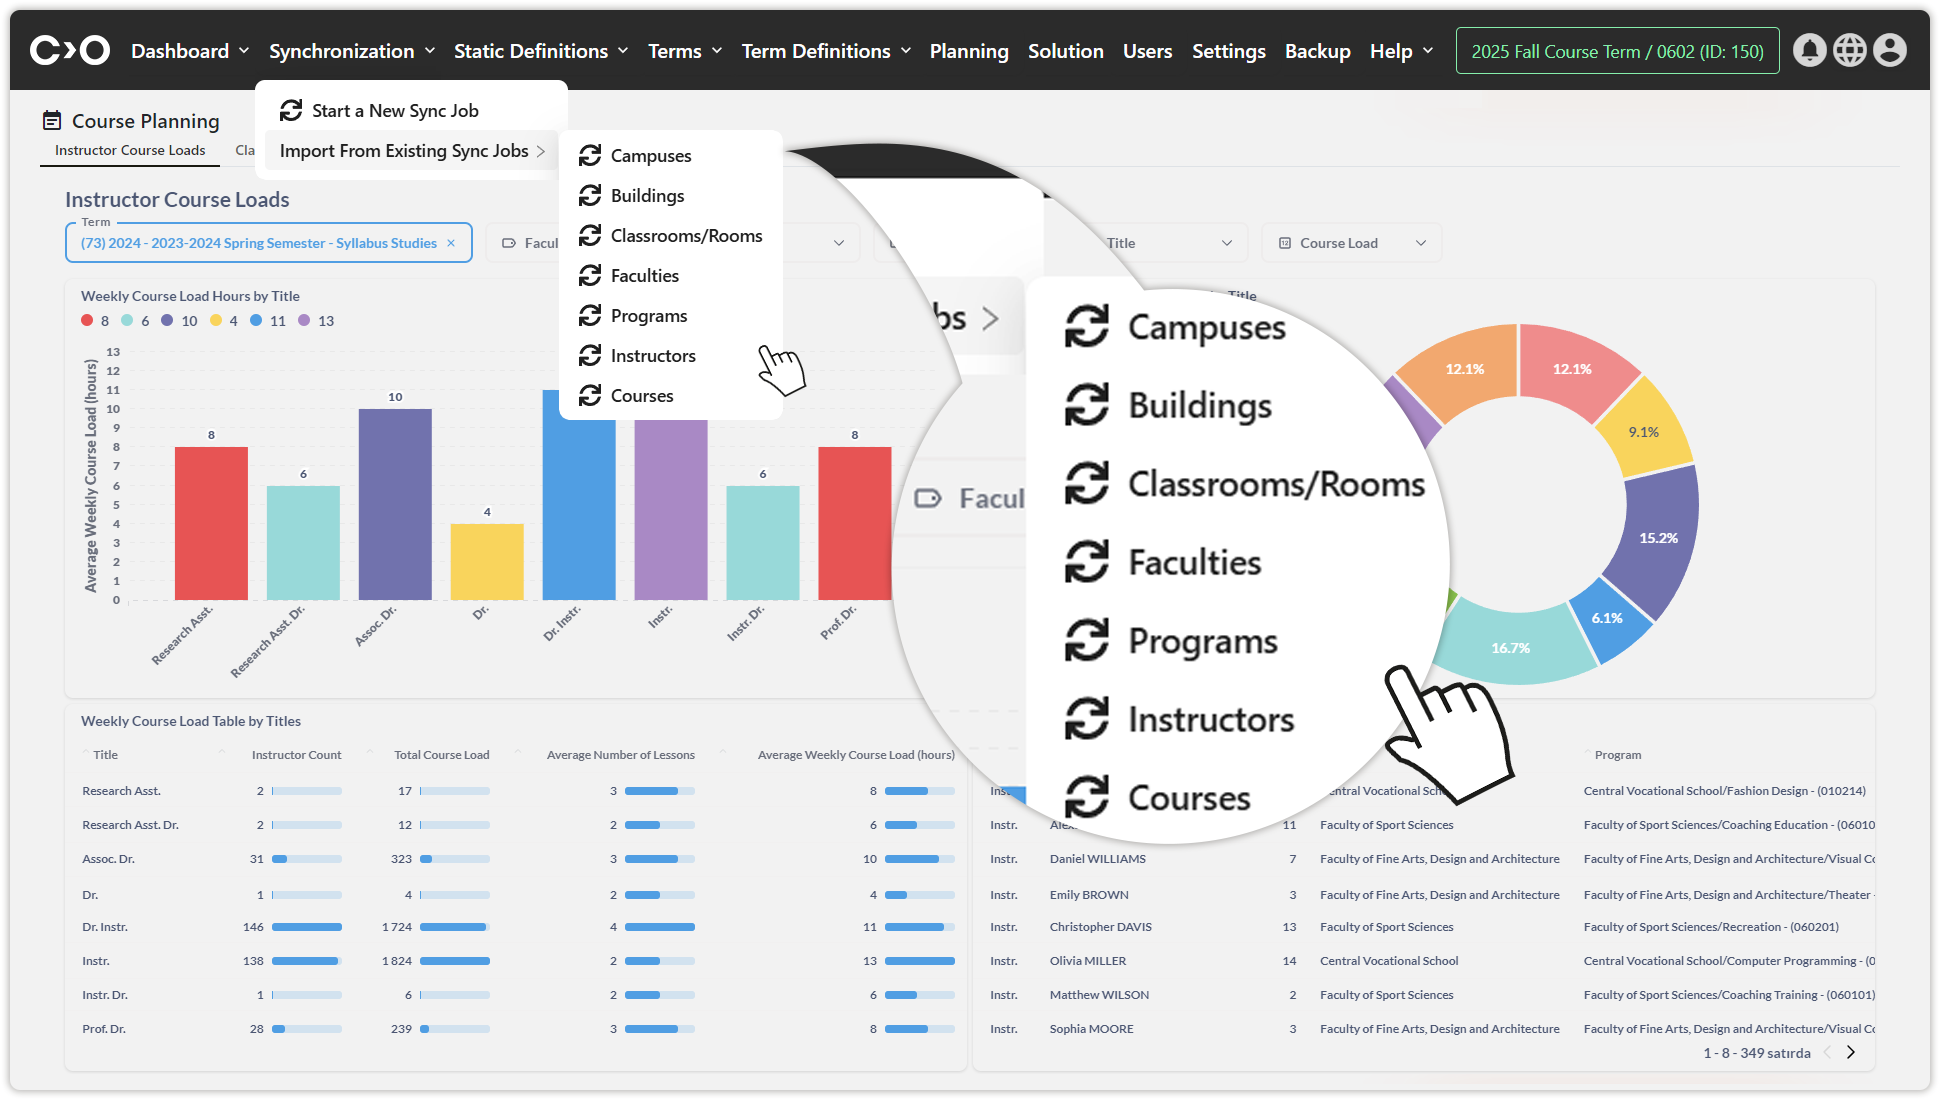
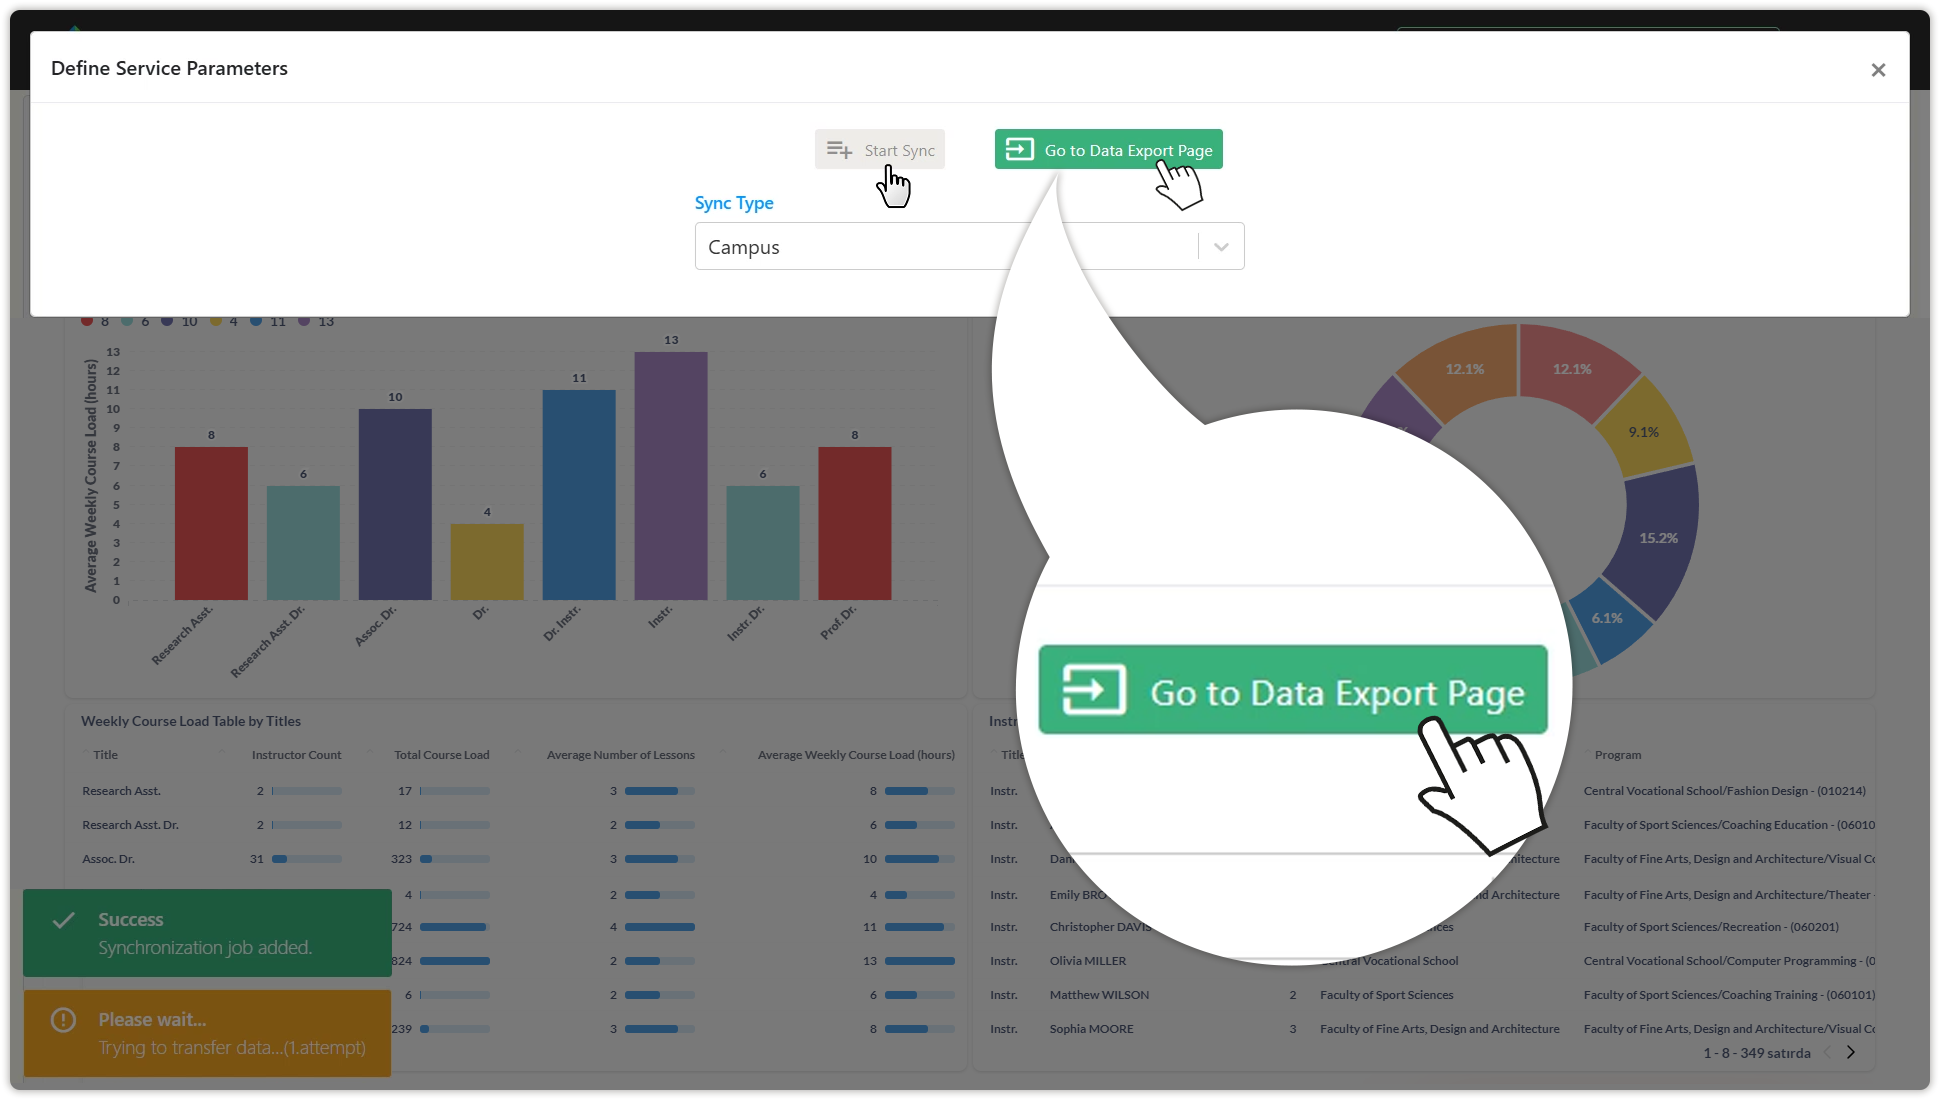
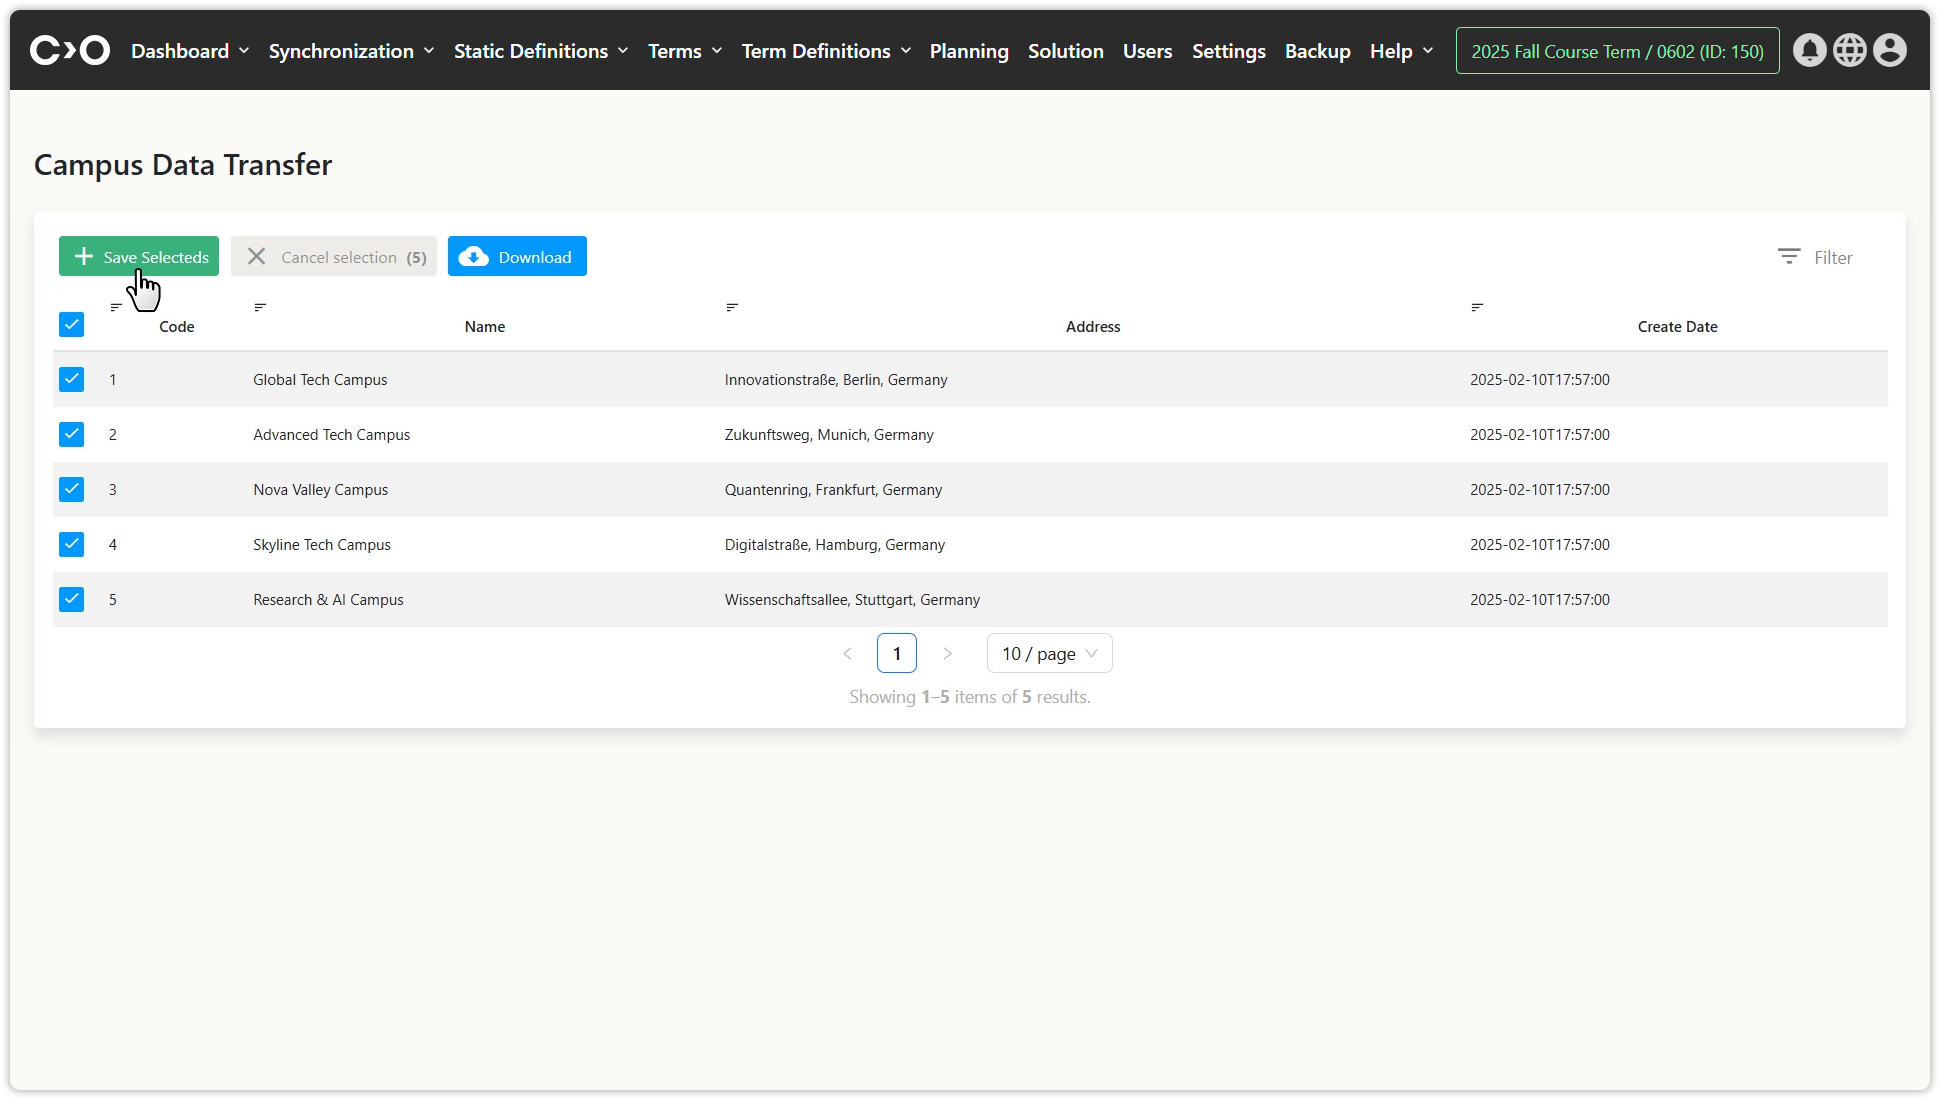
Click on the Synchronization button in the top menu, then select Start a New Sync Job from the drop-down menu. In the pop-up window, choose Campus as the synchronization type and click Start Sync. Once the process is completed, click Go to Data Export Page to view the list of campuses. Select the campuses you want to plan and click Save Selected to add them to Constructor Schedule.
Starting a New Synchronization Job for Buildings
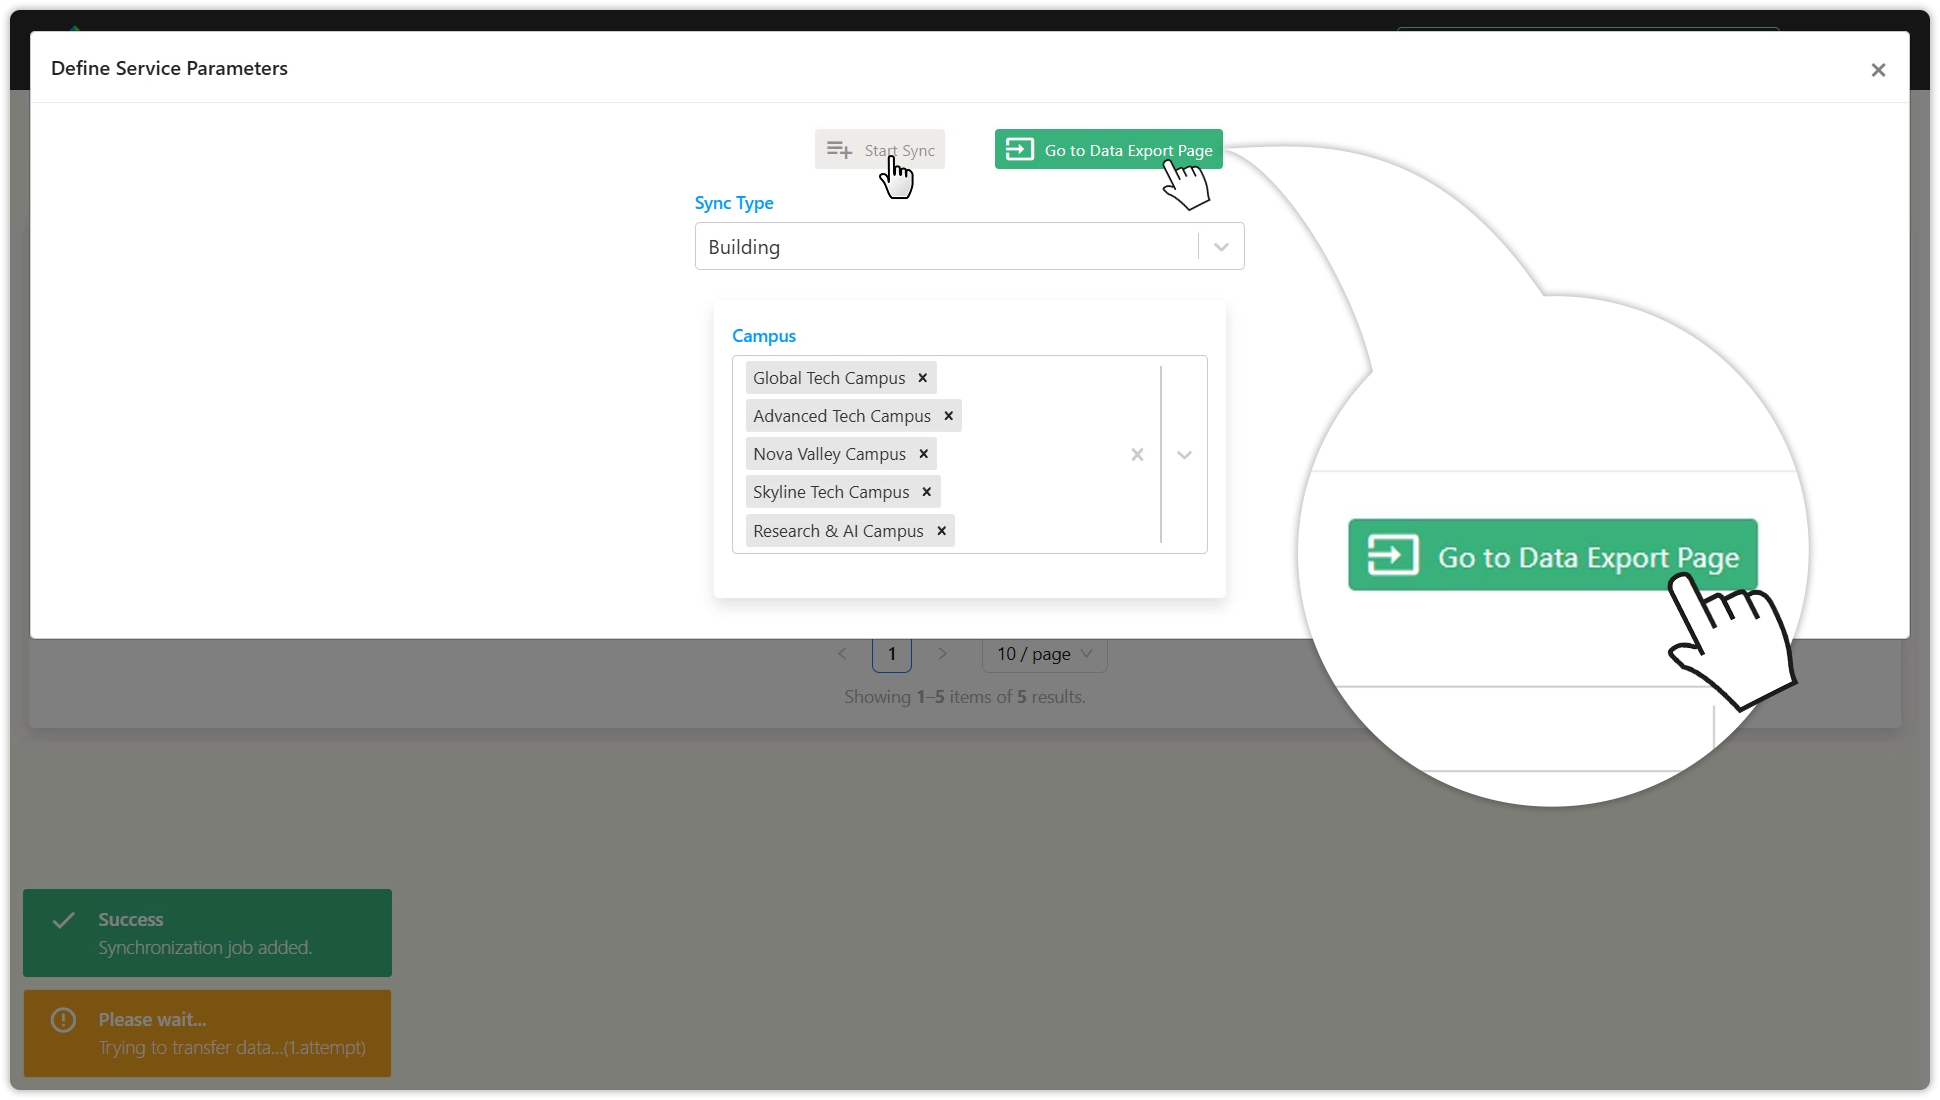
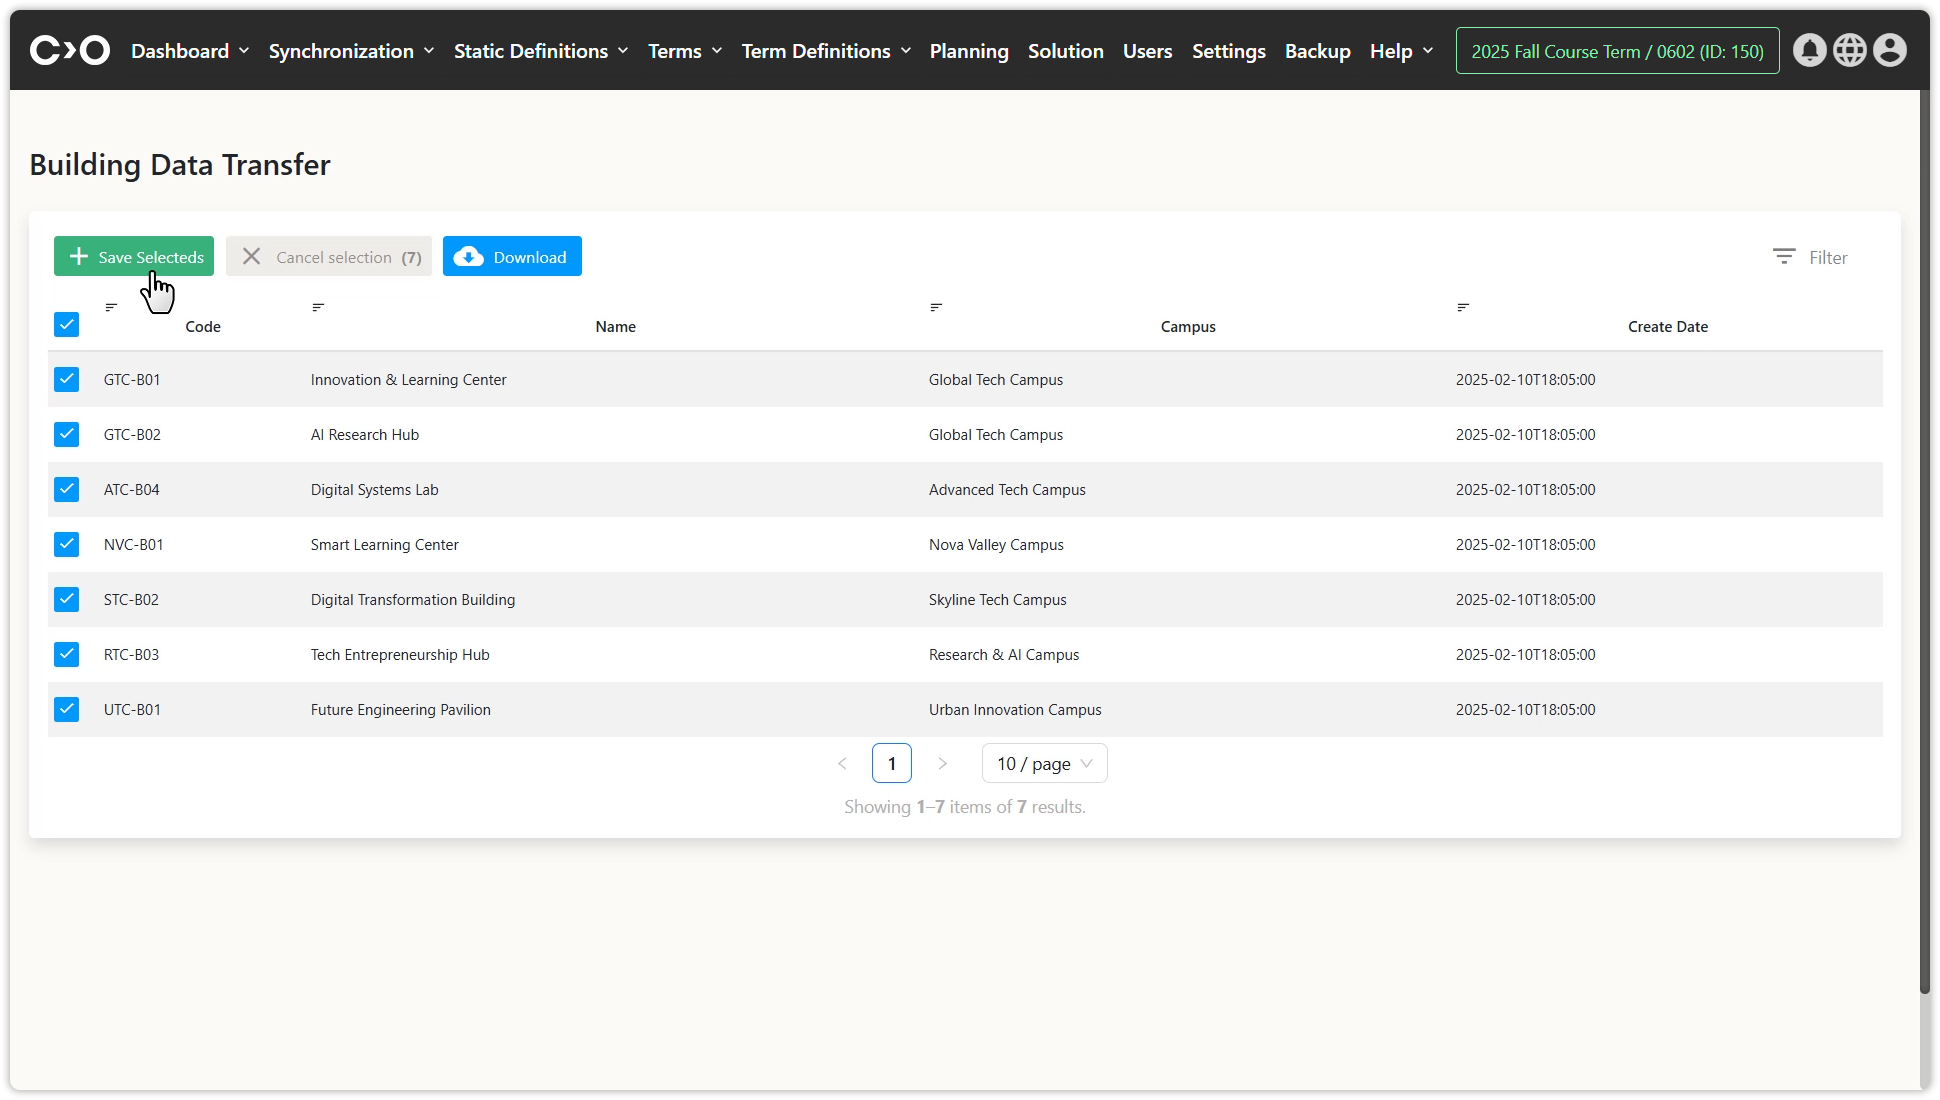
Click on the Synchronization button in the top menu, then select Start a New Sync Job from the drop-down menu. In the pop-up window, choose Building as the synchronization type, select the campuses to be included, and click Start Sync. Once completed, click Go to Data Export Page to view the list of buildings. Select the buildings you want to plan and click Save Selected to add them to Constructor Schedule.
Starting a New Synchronization Job for Classrooms and Rooms
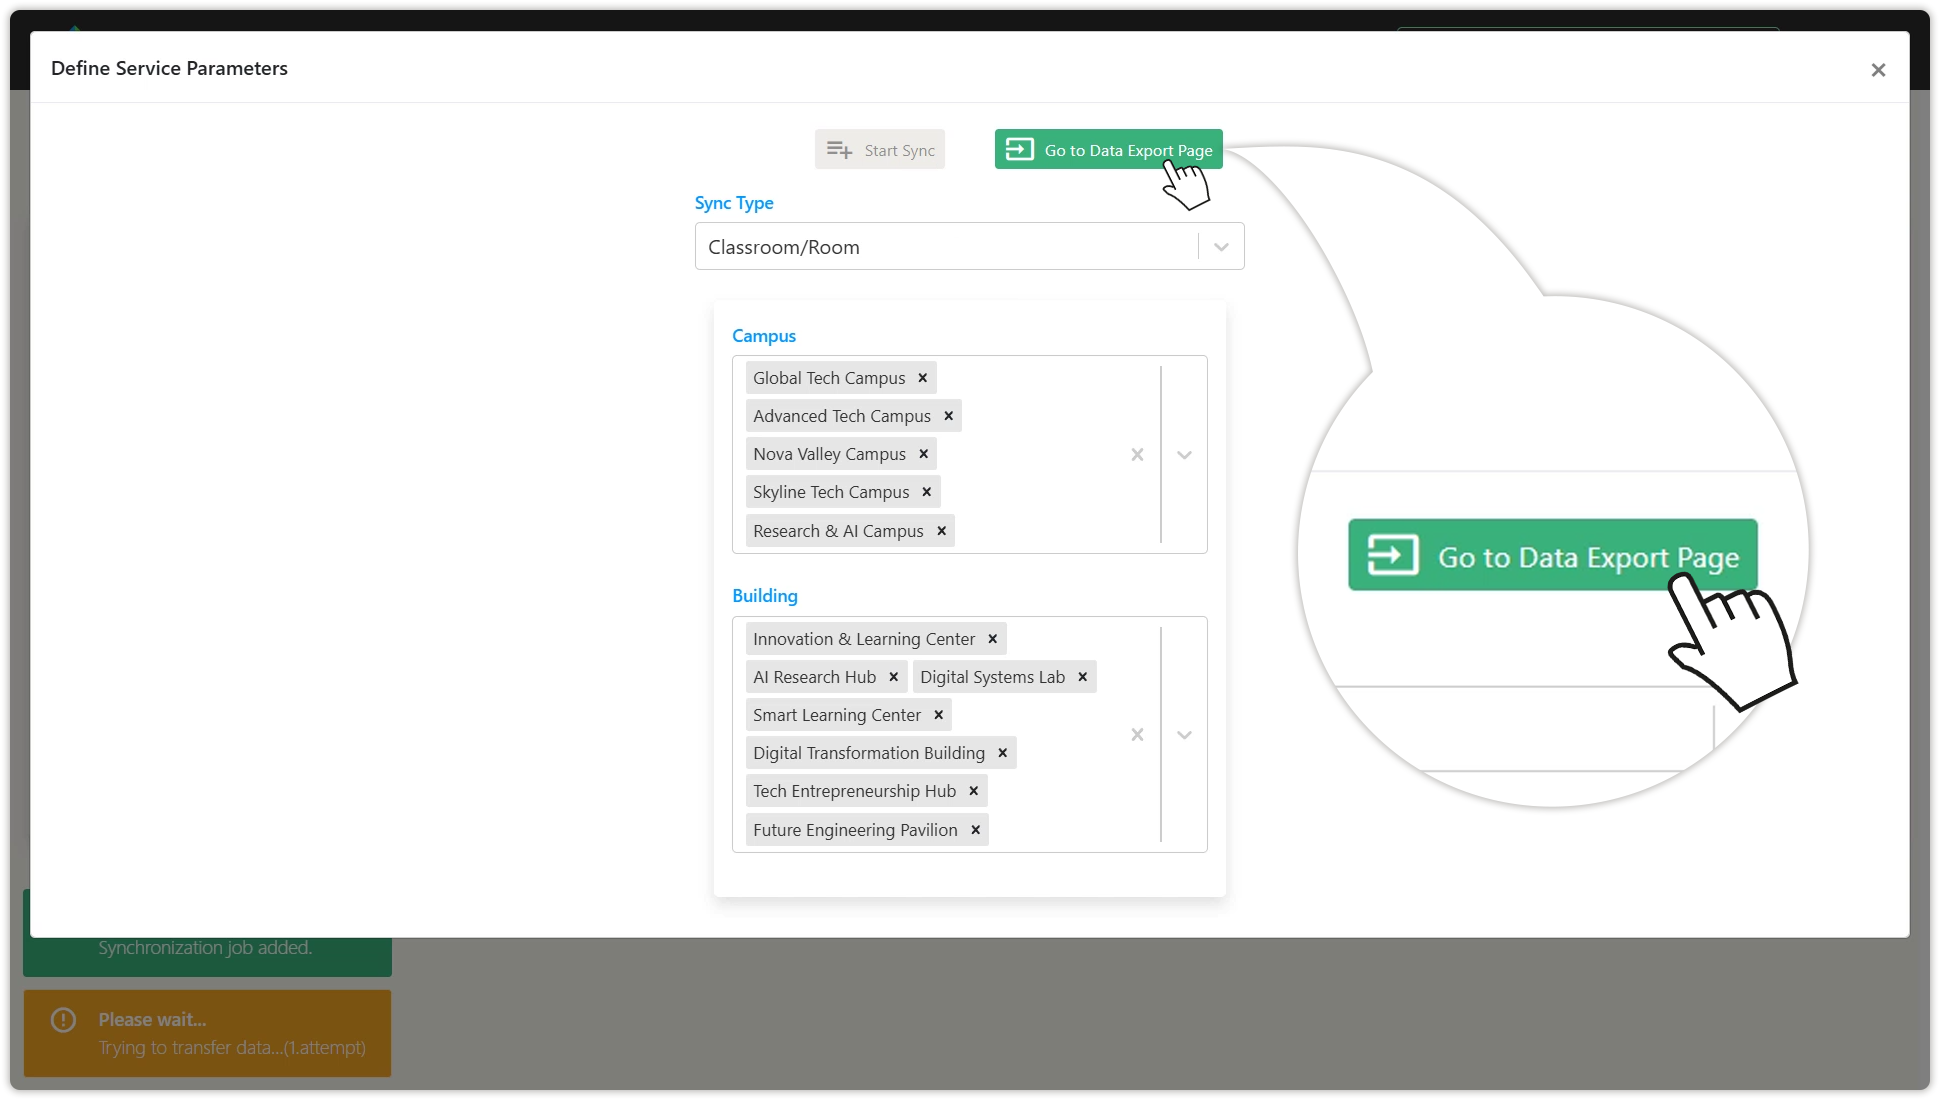
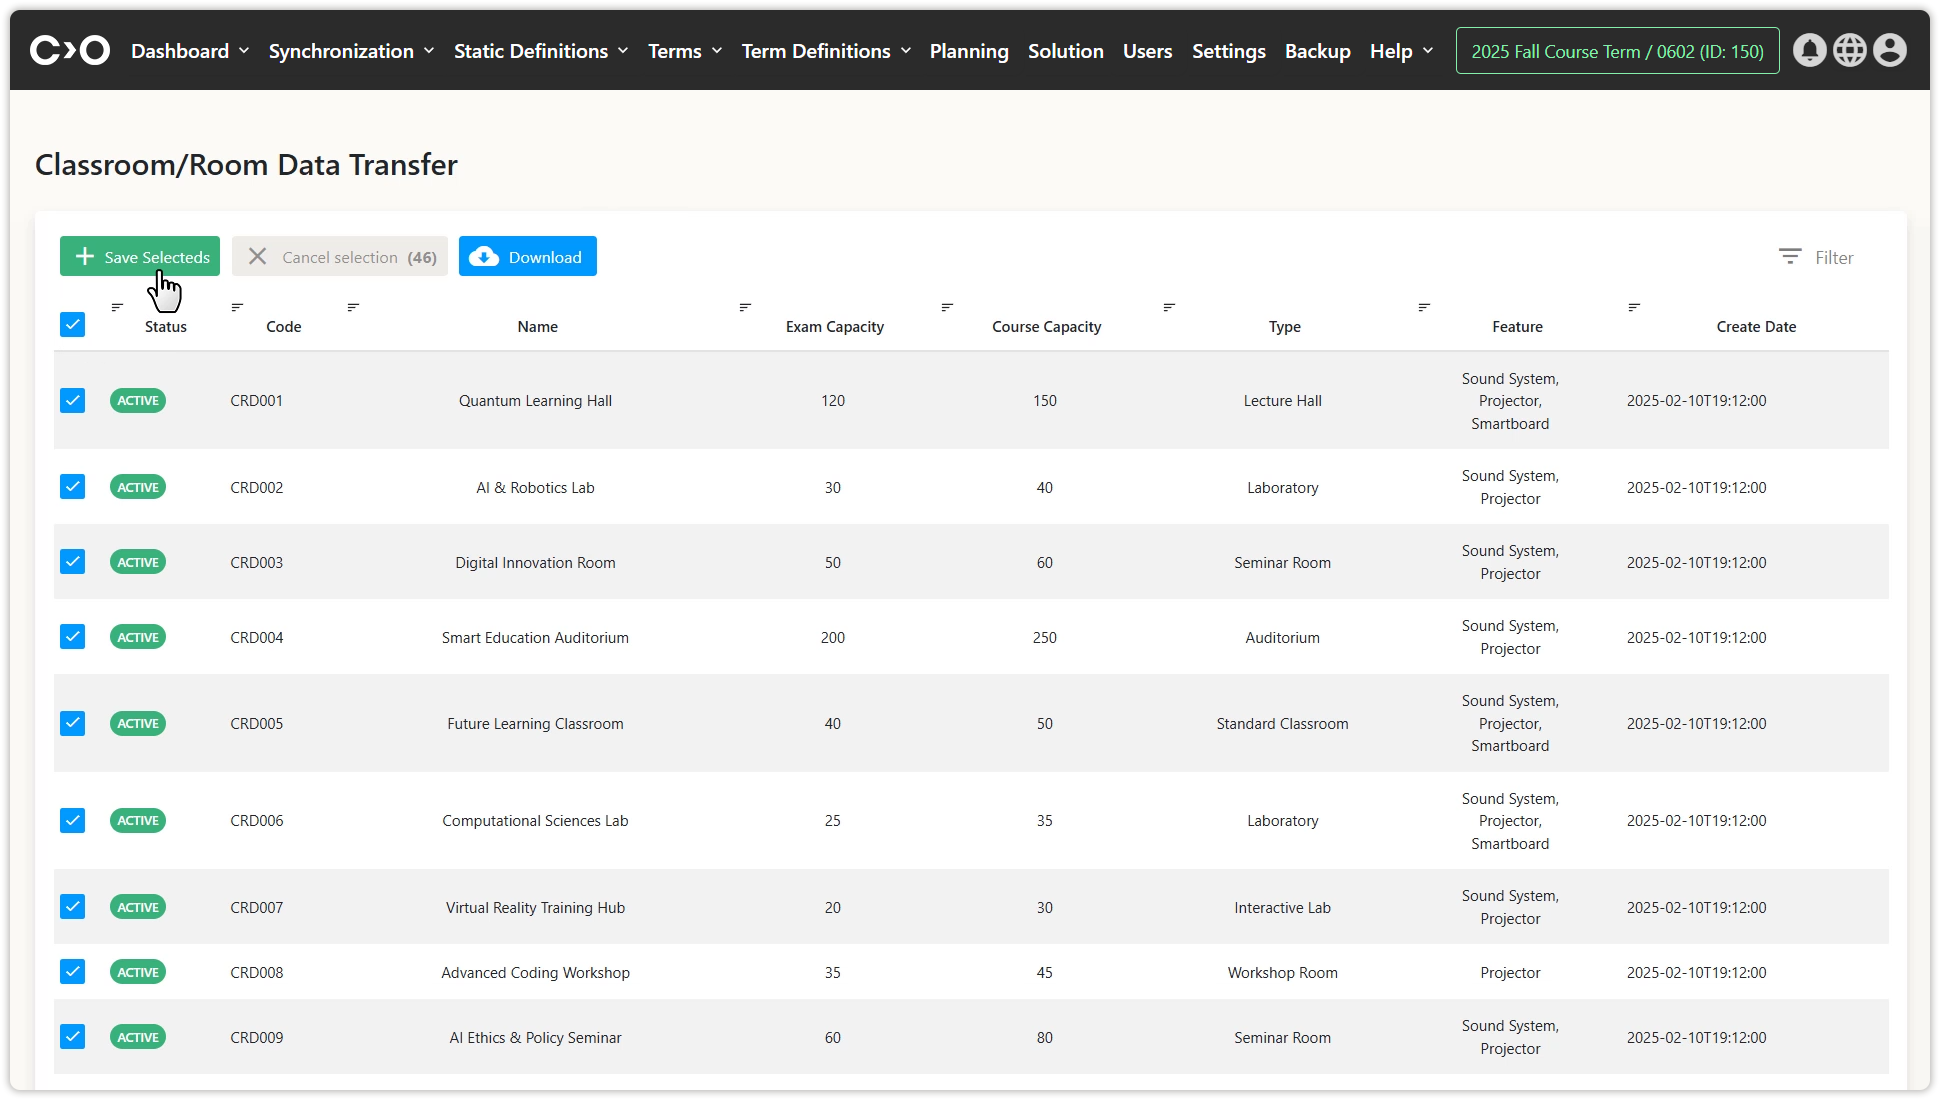
Click on the Synchronization button in the top menu, then select Start a New Sync Job from the drop-down menu. In the pop-up window, choose Classroom and Room as the synchronization type, then sequentially select the campuses and buildings to be included, and click Start Sync. Once completed, click Go to Data Export Page to view the list of classrooms and rooms. Select the ones you want to plan and click Save Selected to add them to Constructor Schedule.
Starting a New Synchronization Job for Faculties, College, and Institutes
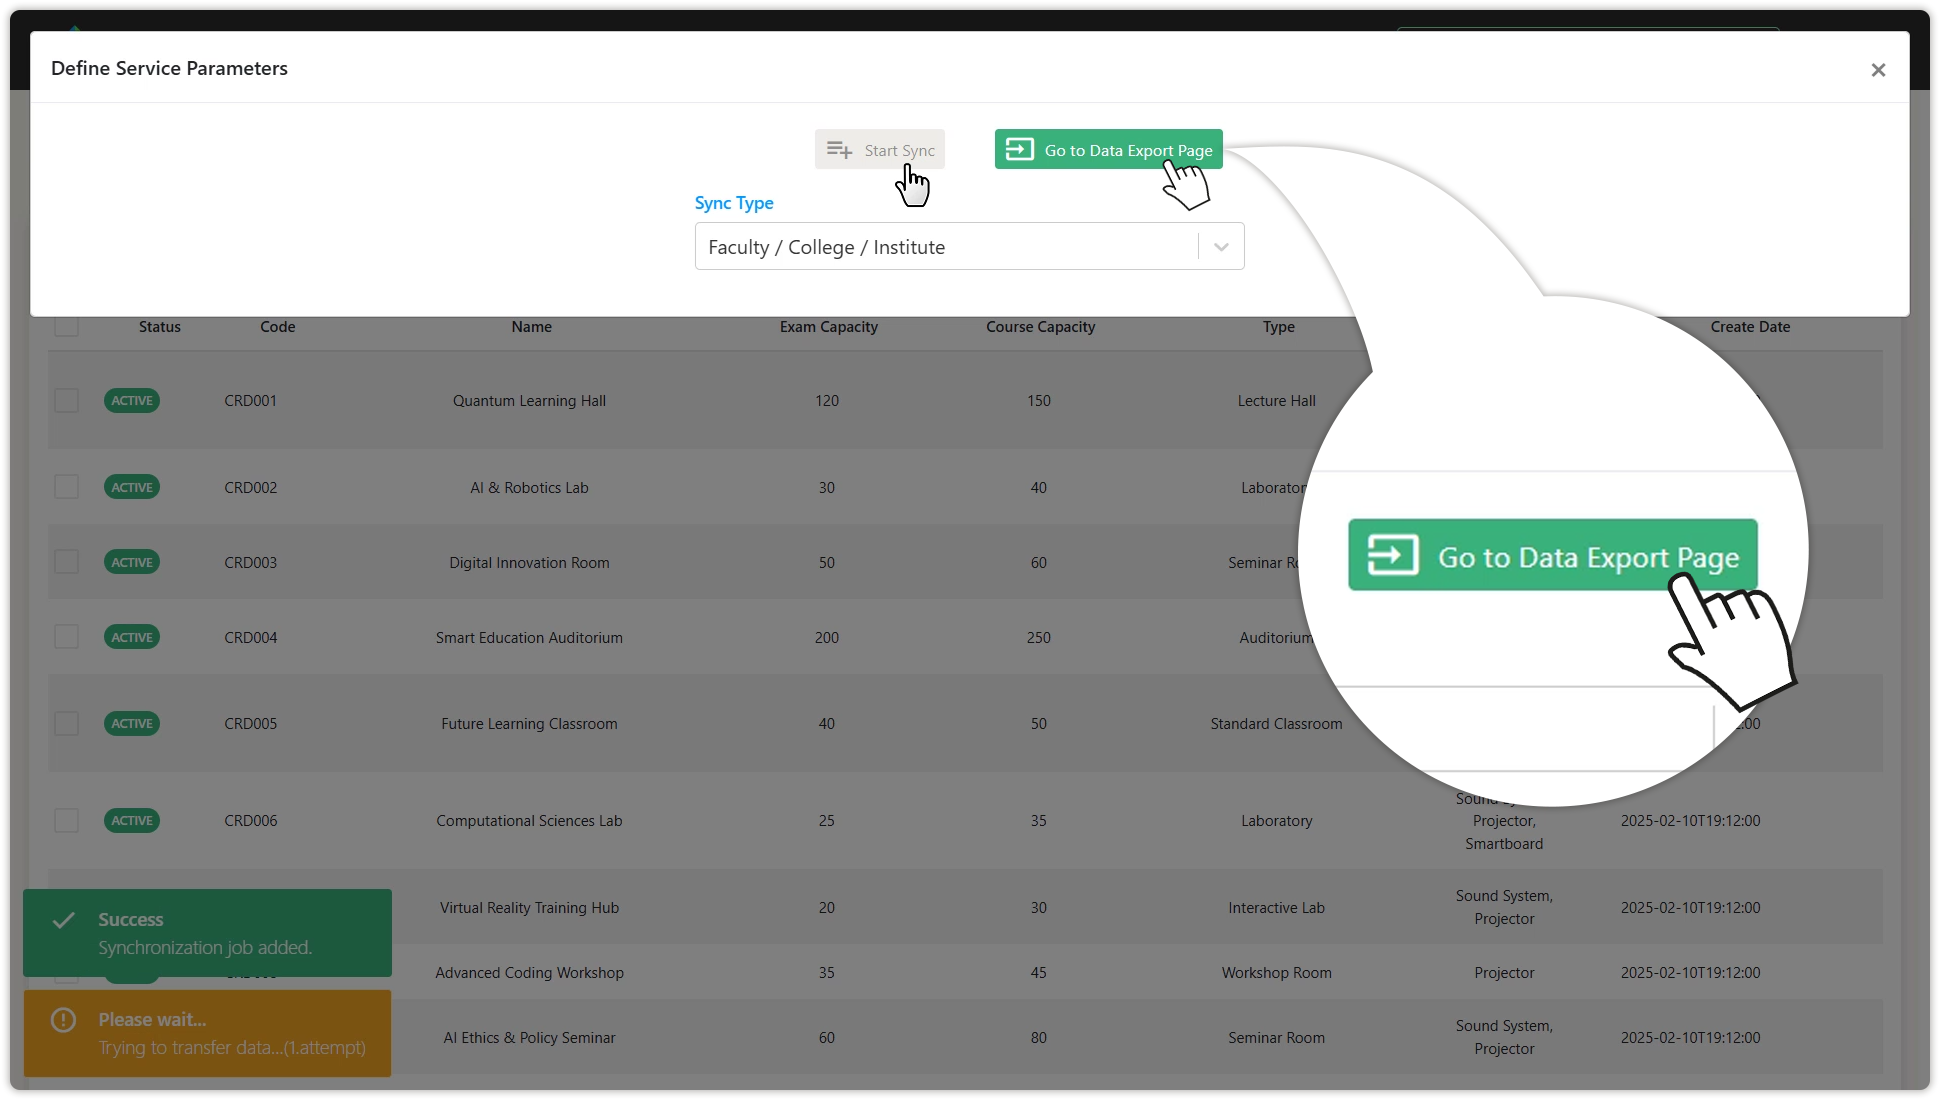
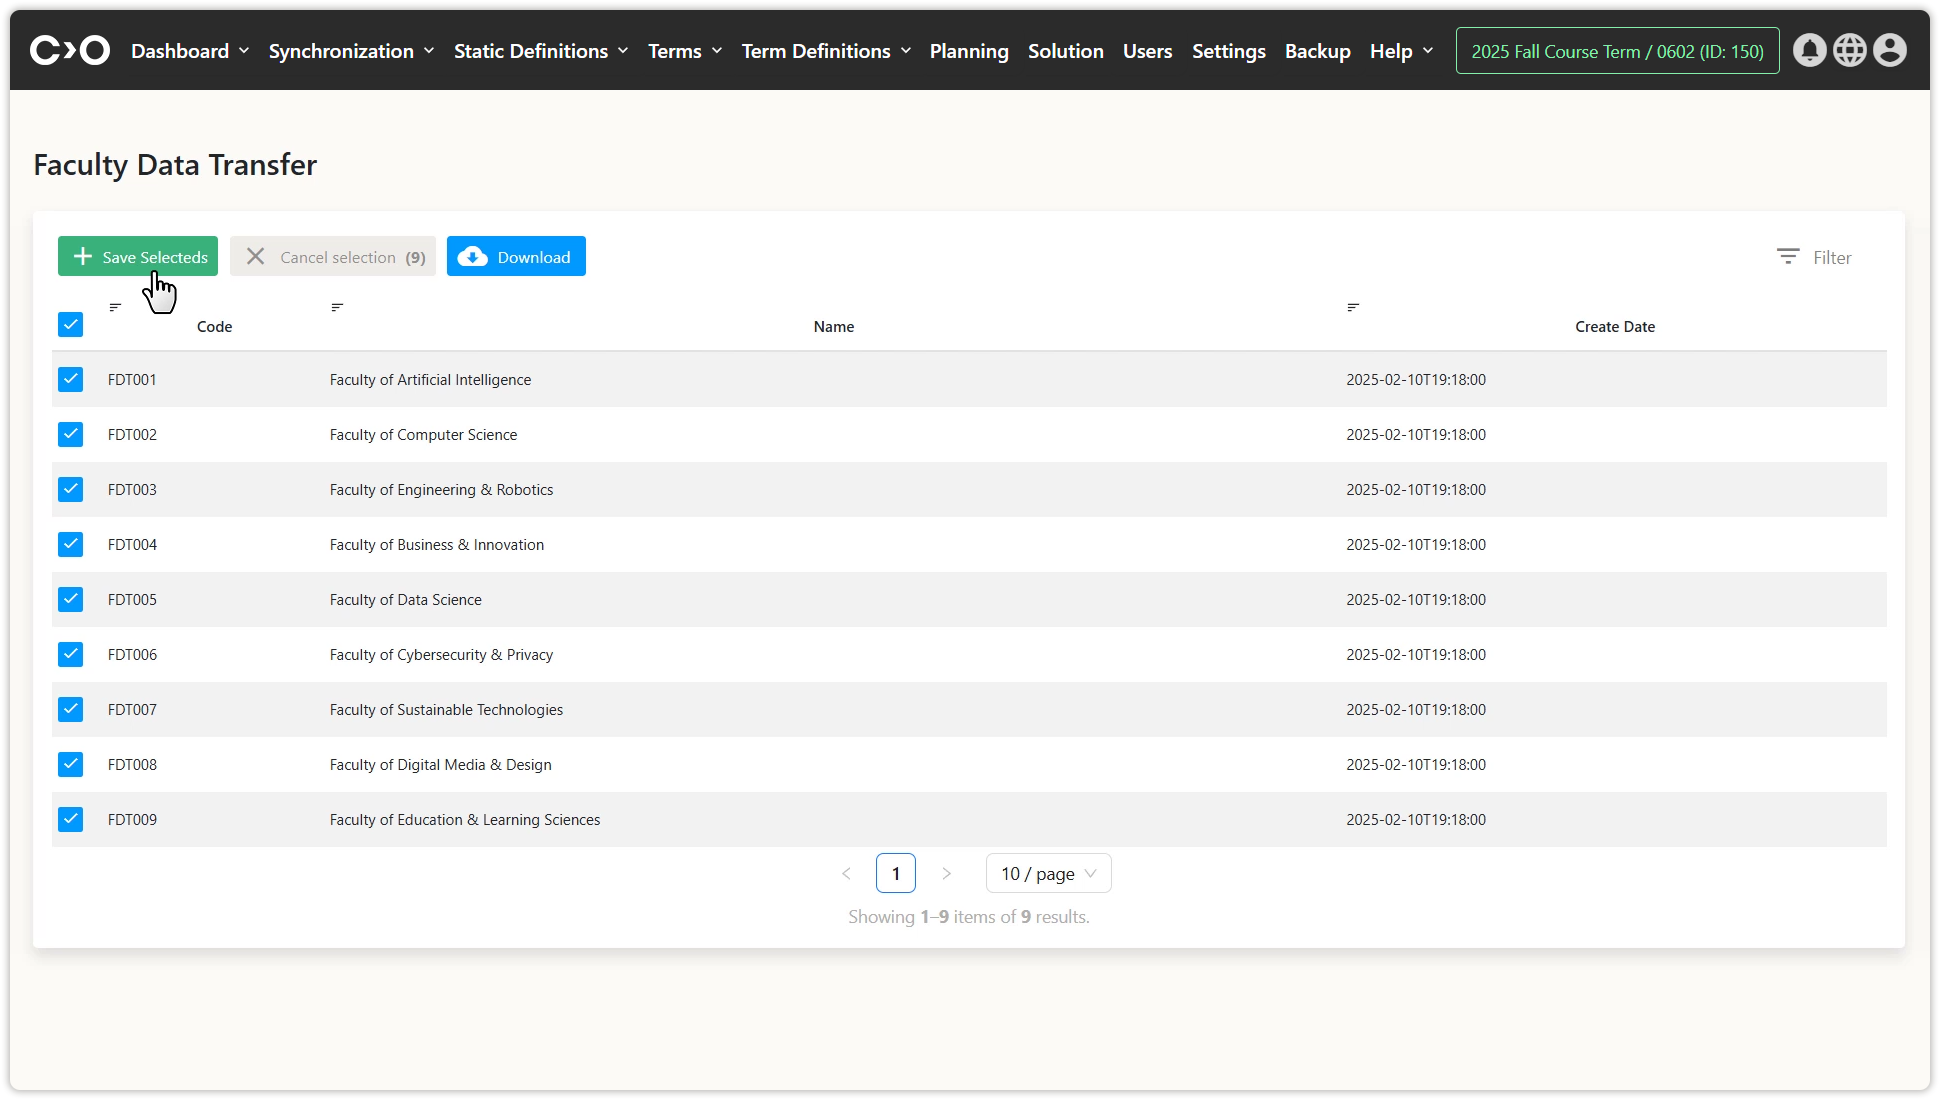
Click on the Synchronization button in the top menu, then select Start a New Sync Job from the drop-down menu. In the pop-up window, choose Faculty, College, and Institute as the synchronization type and click Start Sync. Once completed, click Go to Data Export Page to view the list of faculties, college, and institutes. Select the ones you want to plan and click Save Selected to add them to Constructor Schedule.
Starting a New Synchronization Job for Programs and Departments
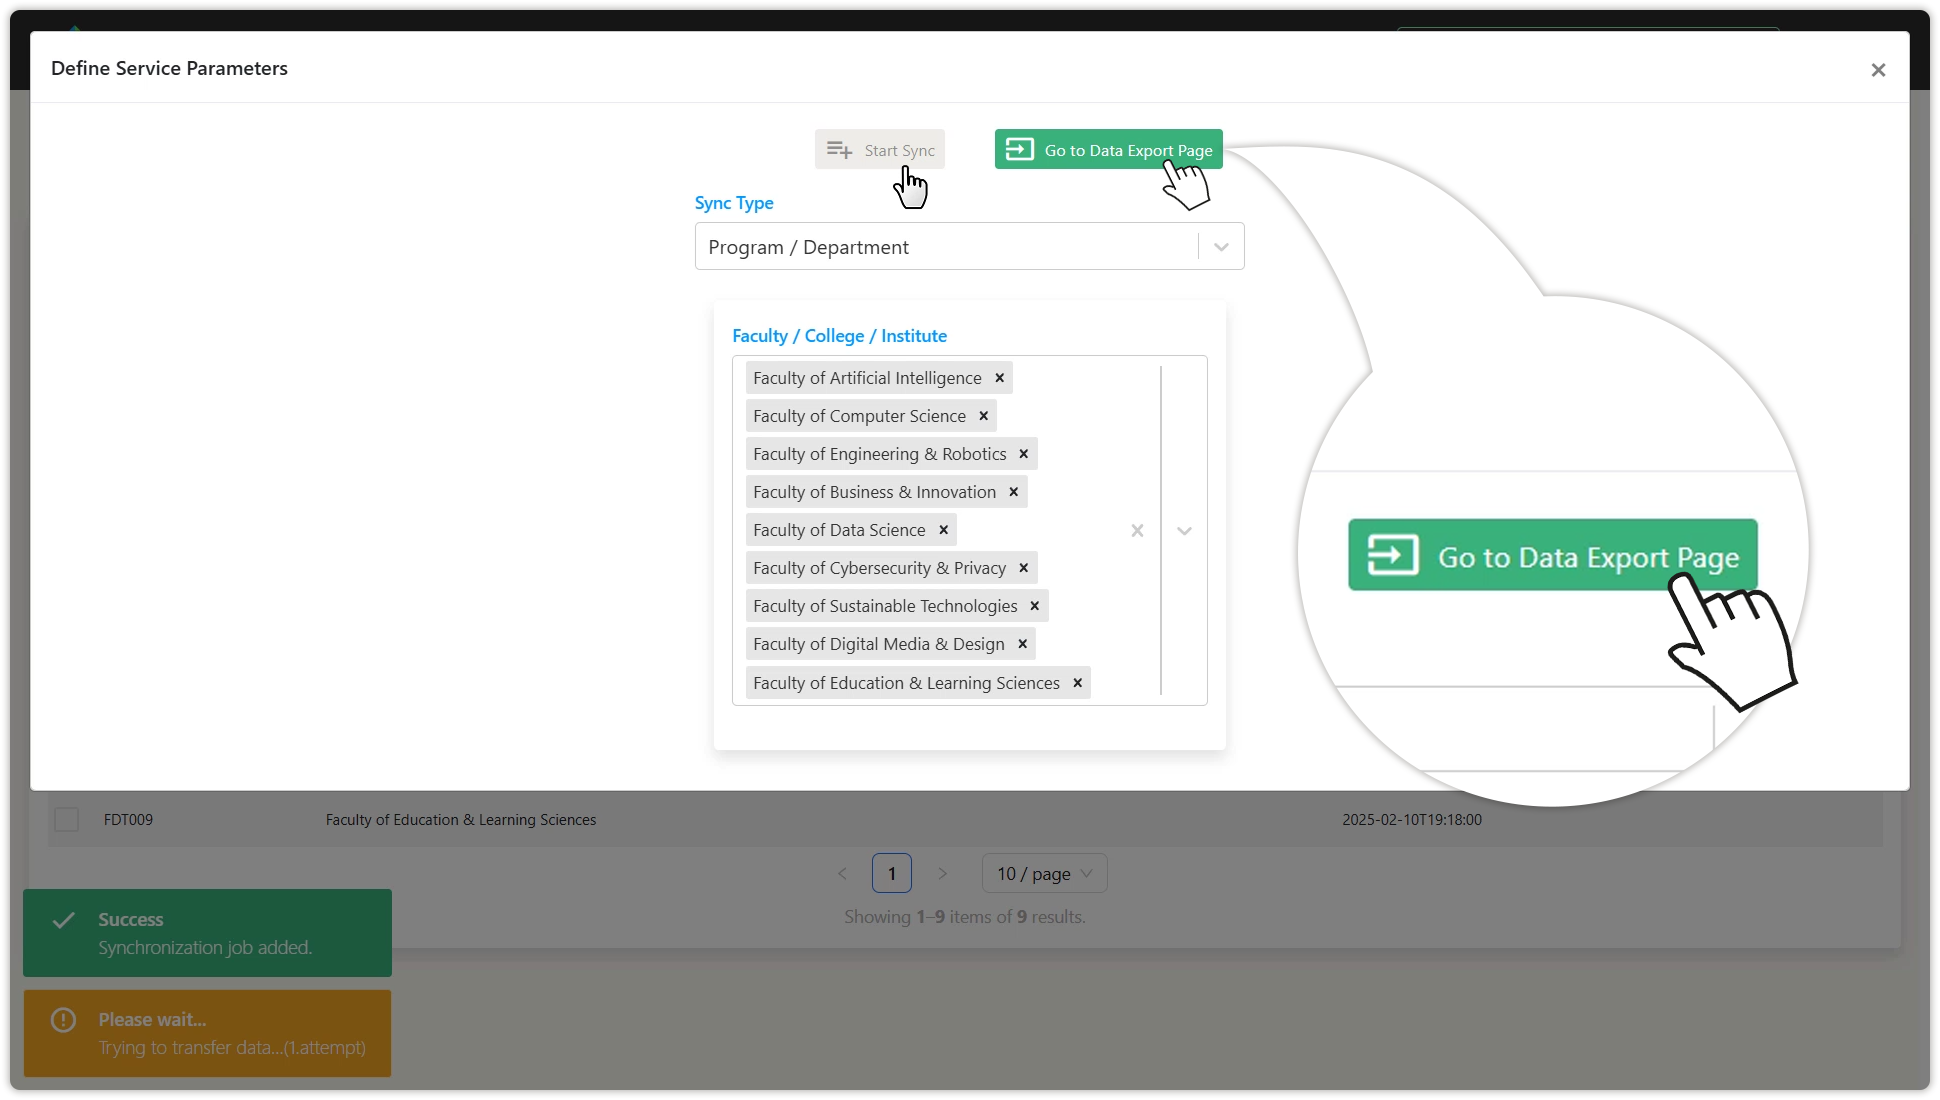
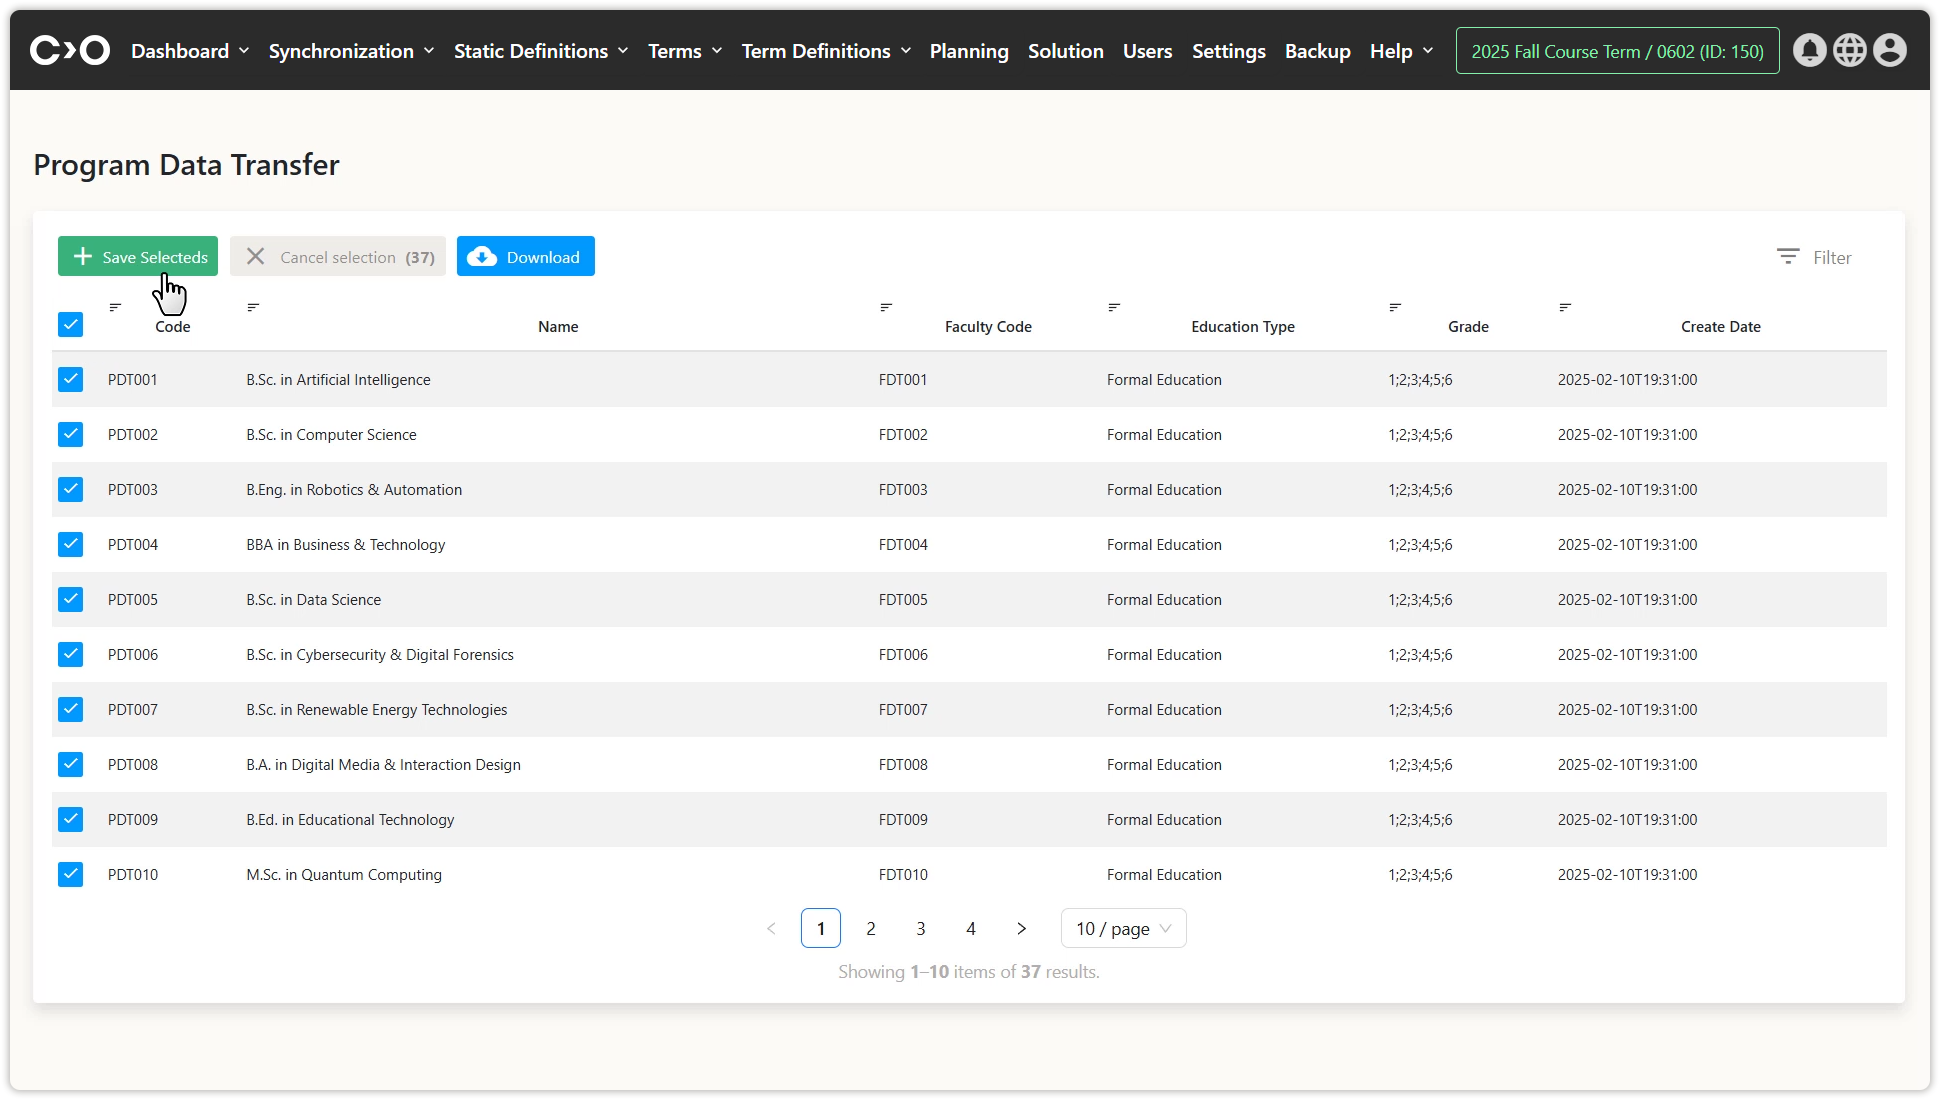
Click on the Synchronization button in the top menu, then select Start a New Sync Job from the drop-down menu. In the pop-up window, choose Programs and Departments as the synchronization type, then select the faculties, college, or institutes to be included, and click Start Sync. Once completed, click Go to Data Export Page to view the list of programs and departments. Select the ones you want to plan and click Save Selected to add them to Constructor Schedule.
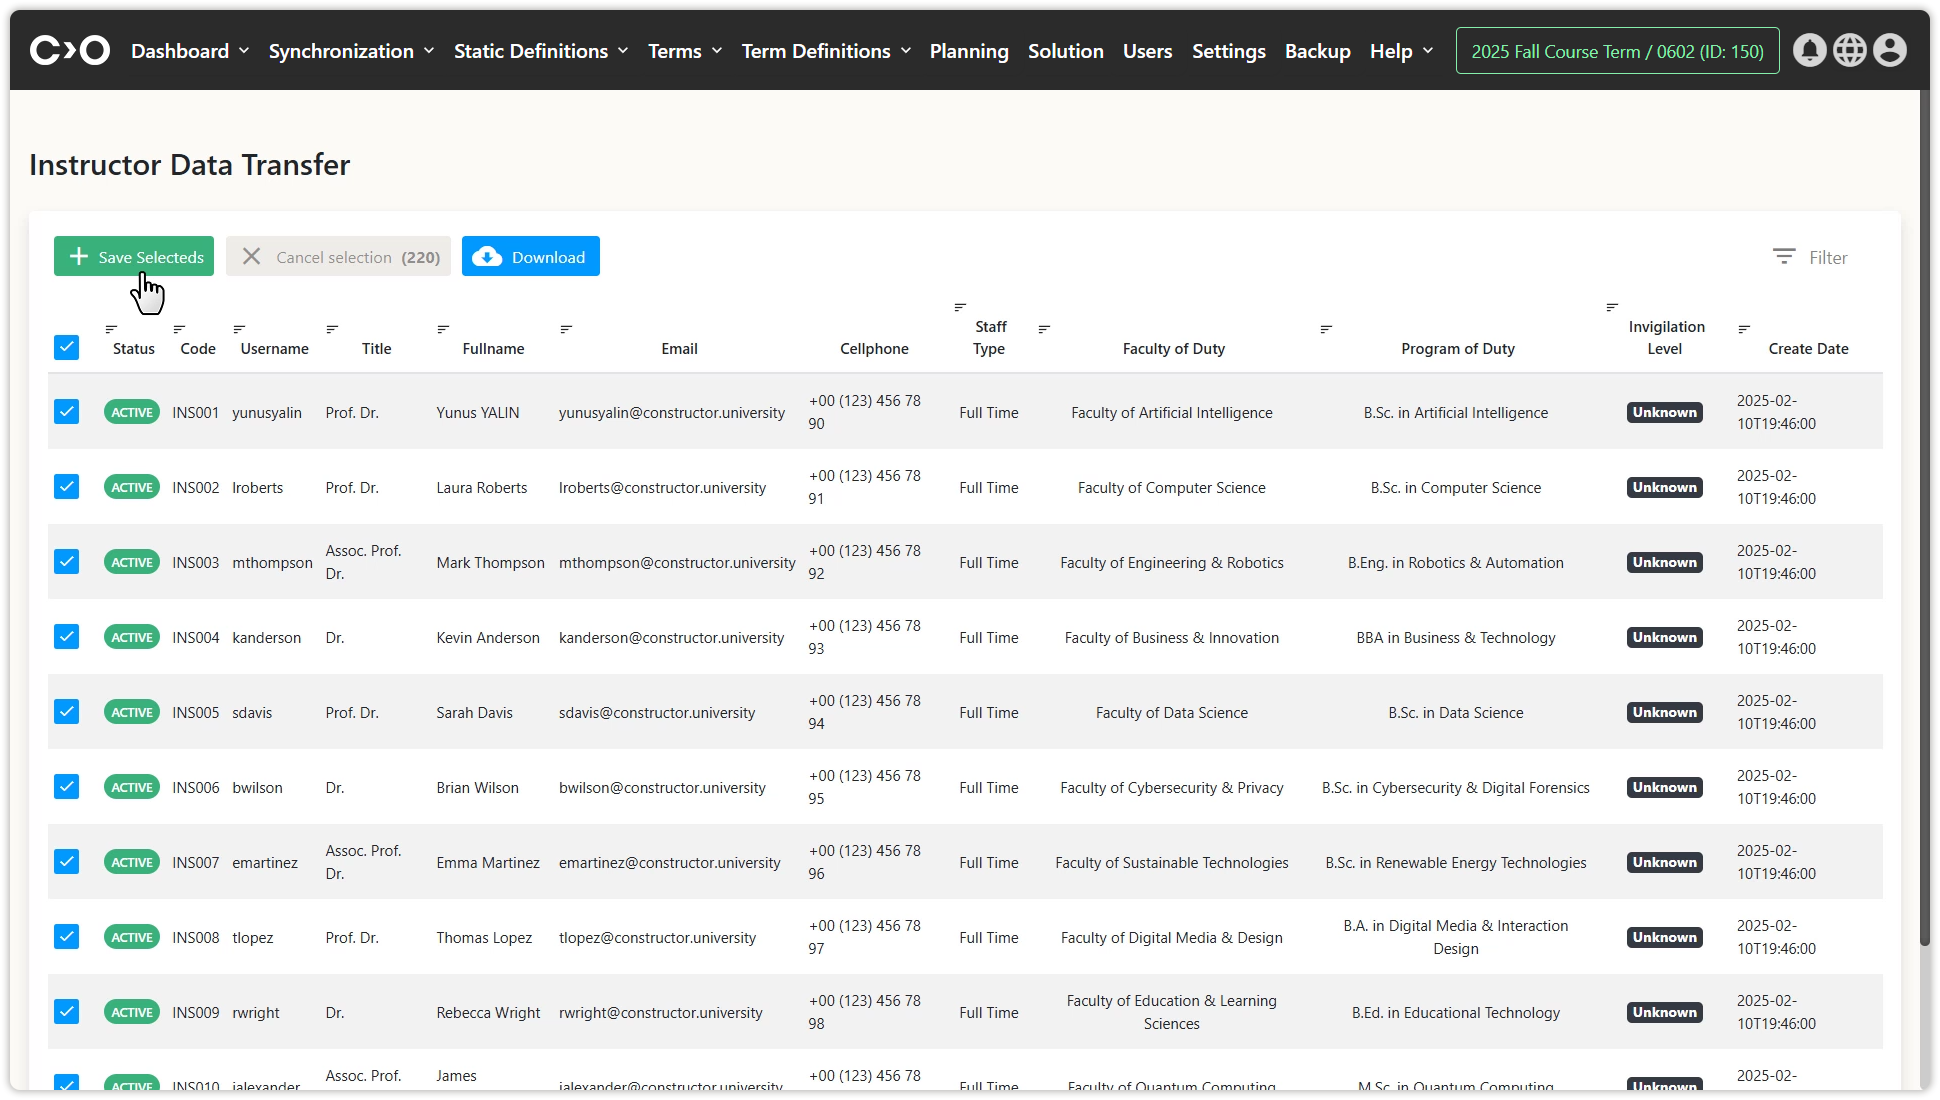
Starting a New Synchronization Job for Insructors
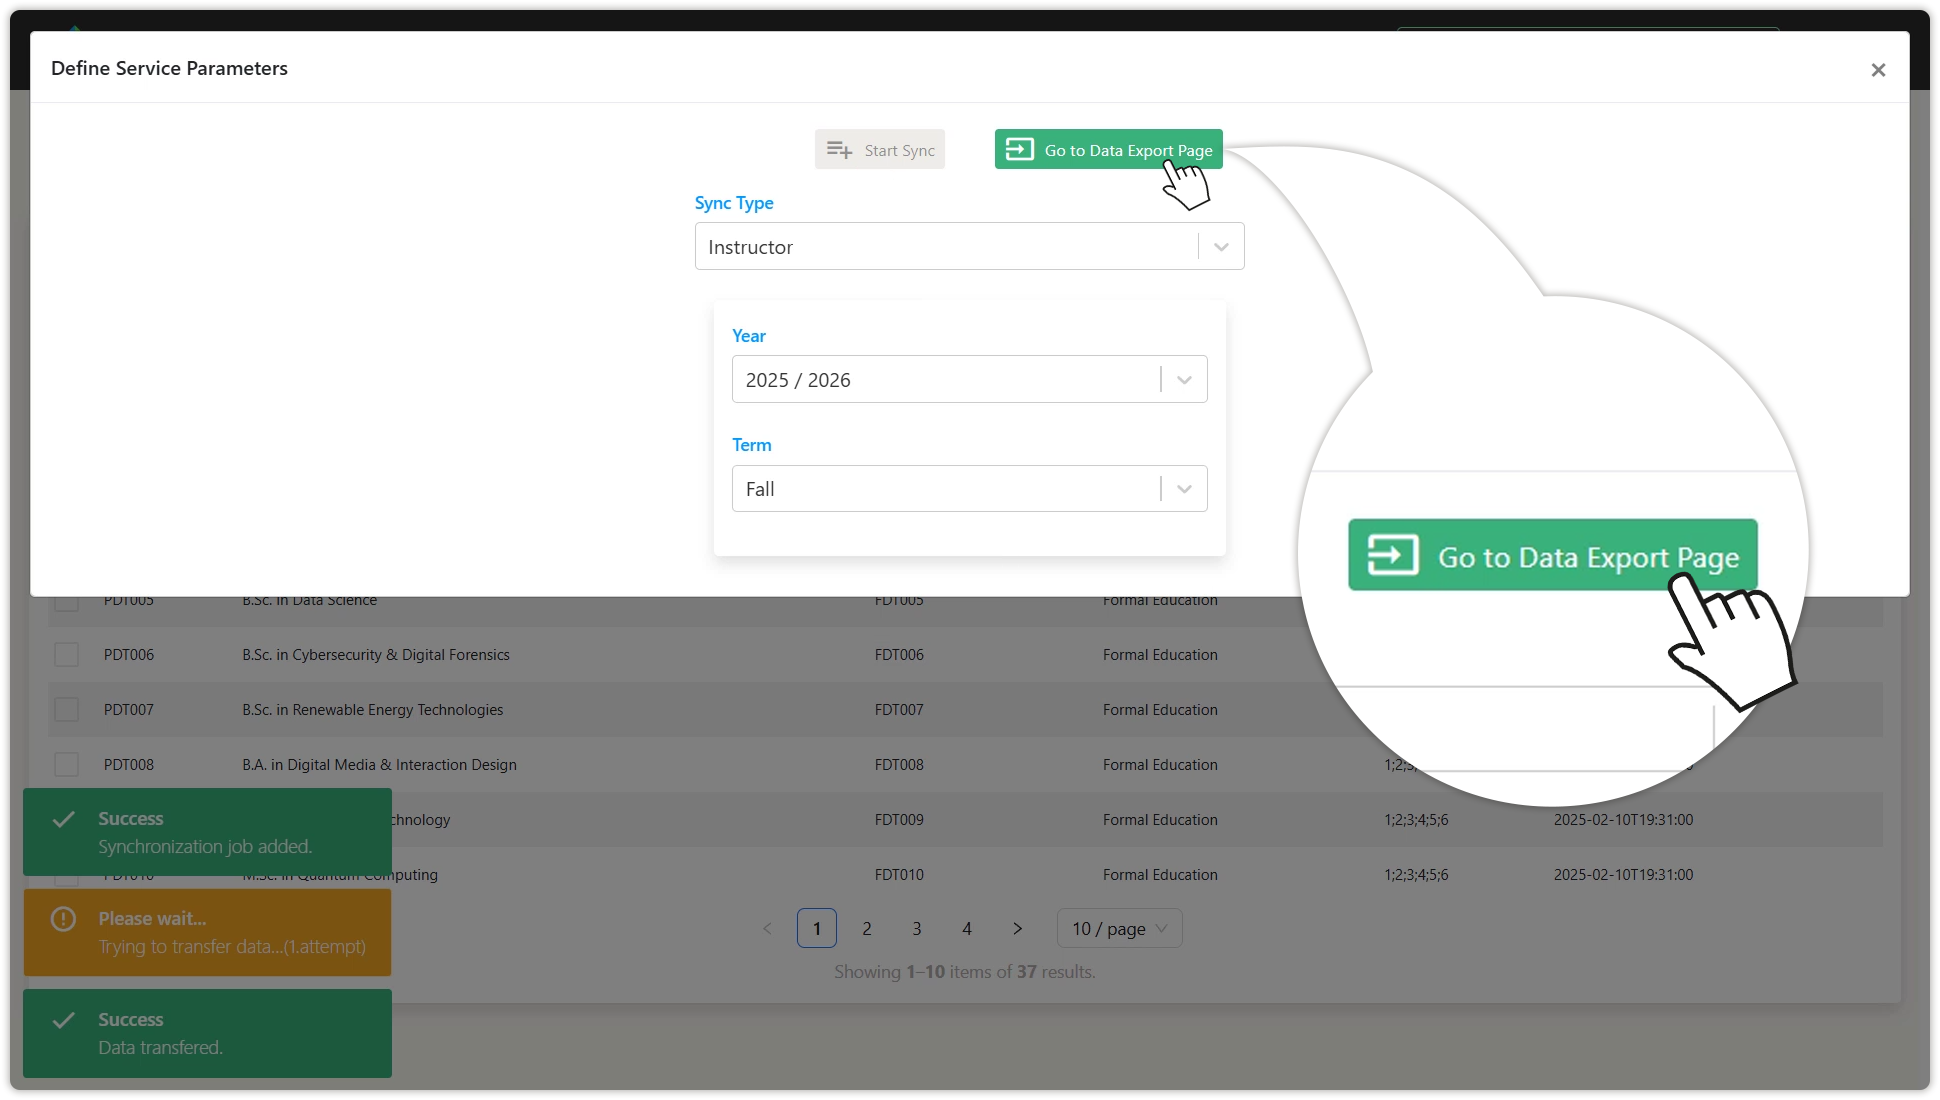
Click on the Synchronization button in the top menu, then select Start a New Sync Job from the drop-down menu. In the pop-up window, choose Insructor as the synchronization type, then sequentially select the year and term to be included, and click Start Sync. Once completed, click Go to Data Export Page to view the list of insructors. Select the ones you want to plan and click Save Selected to add them to Constructor Schedule.
Starting a New Synchronization Job for Courses
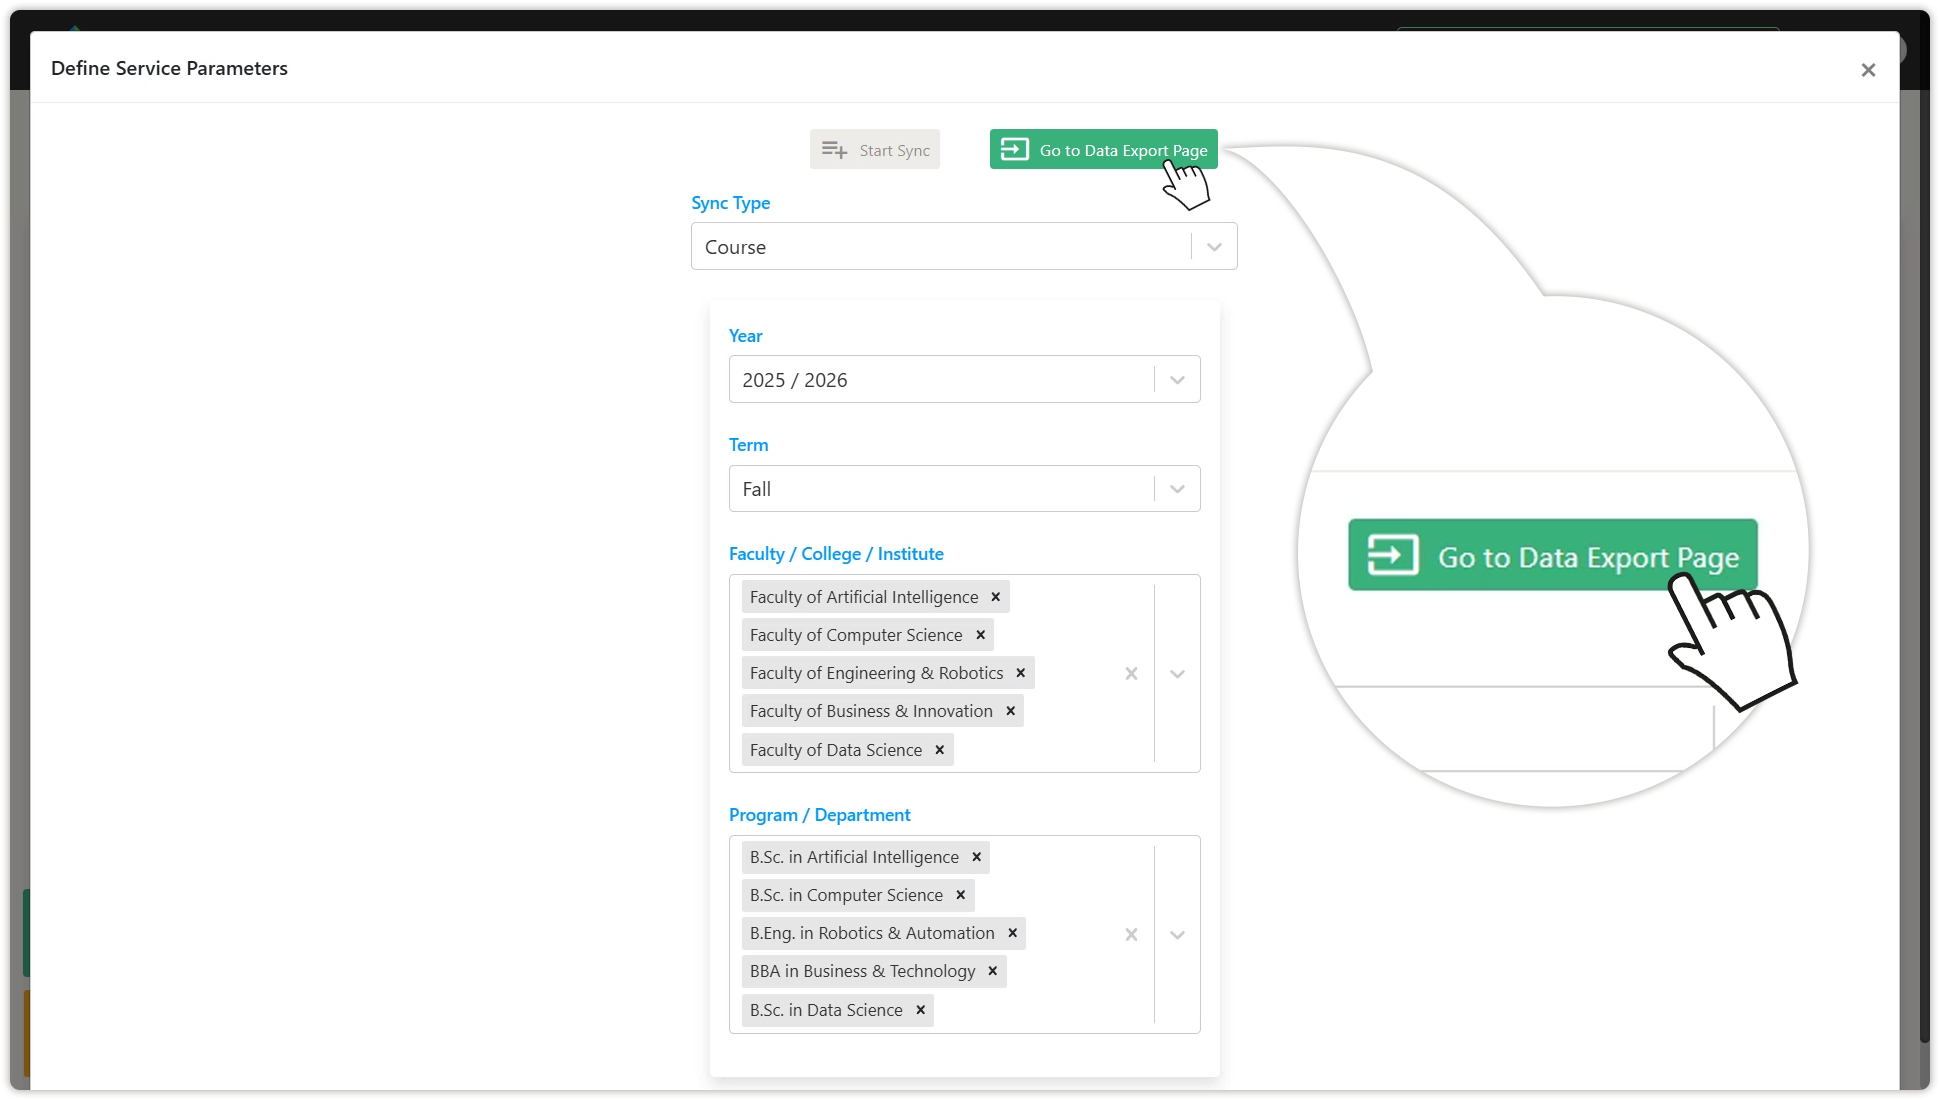
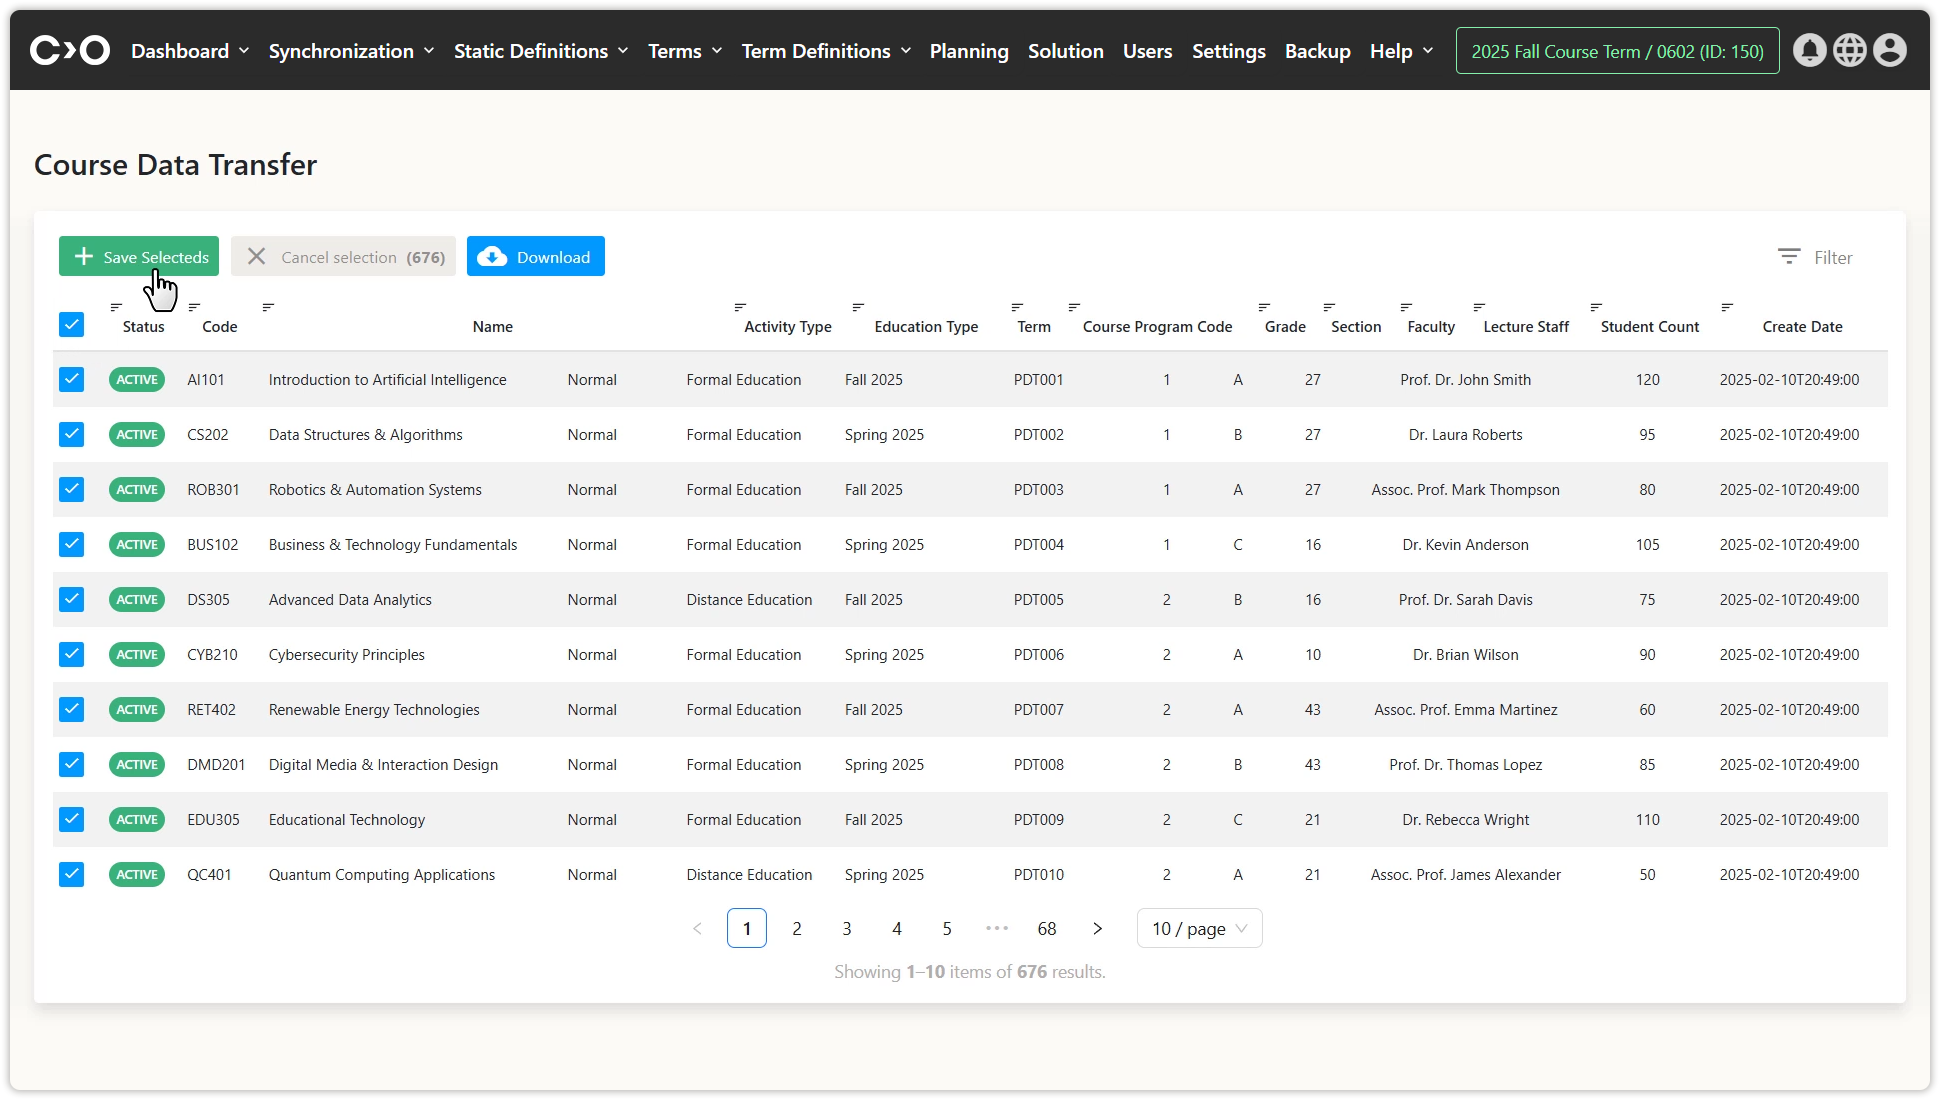
Click on the Synchronization button in the top menu, then select Start a New Sync Job from the drop-down menu. In the pop-up window, choose Course as the synchronization type, then sequentially select the year, term, faculties, college, or institutes, and programs or departments to be included, and click Start Sync. Once completed, click Go to Data Export Page to view the list of courses. Select the ones you want to plan and click Save Selected to add them to Constructor Schedule.
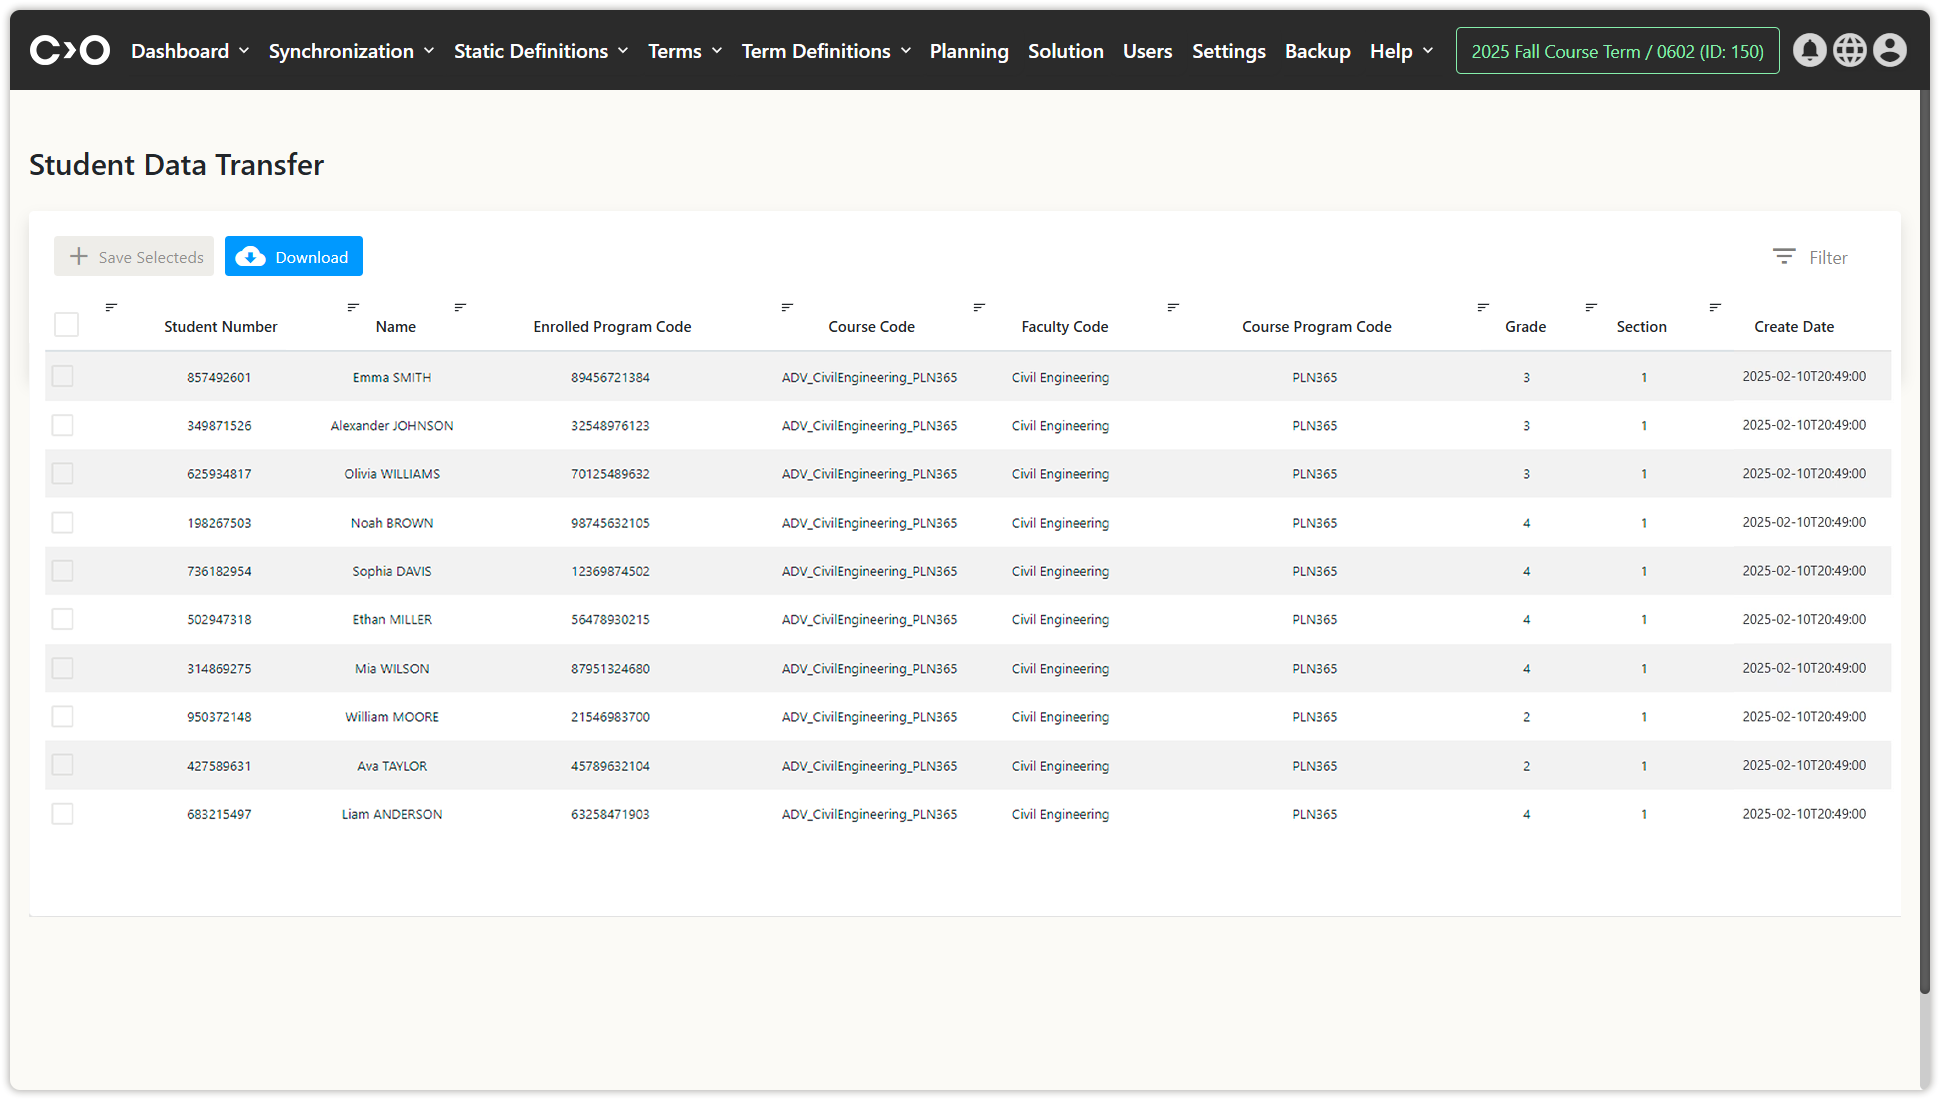
Starting a New Synchronization Job for Students
Click on the Synchronization button in the top menu, then select Start a New Sync Job from the drop-down menu. In the pop-up window, choose Student as the synchronization type, then sequentially select the year, term, faculties, college, or institutes, programs or departments, and courses to be included, and click Start Sync. Once completed, click Go to Data Export Page to view the list of courses. Select the ones you want to plan and click Save Selected to add them to Constructor Schedule.

Import from Existing Synchronization Jobs
Click on the Synchronization button in the top menu, then select Import from Existing Sync Jobs from the drop-down menu. From the previously completed synchronization, select the campuses, buildings, classrooms, faculties, programs, departments, instructors, courses, and students, then select the ones you want to plan and click Save Selected to add them to Constructor Schedule.