Sessions
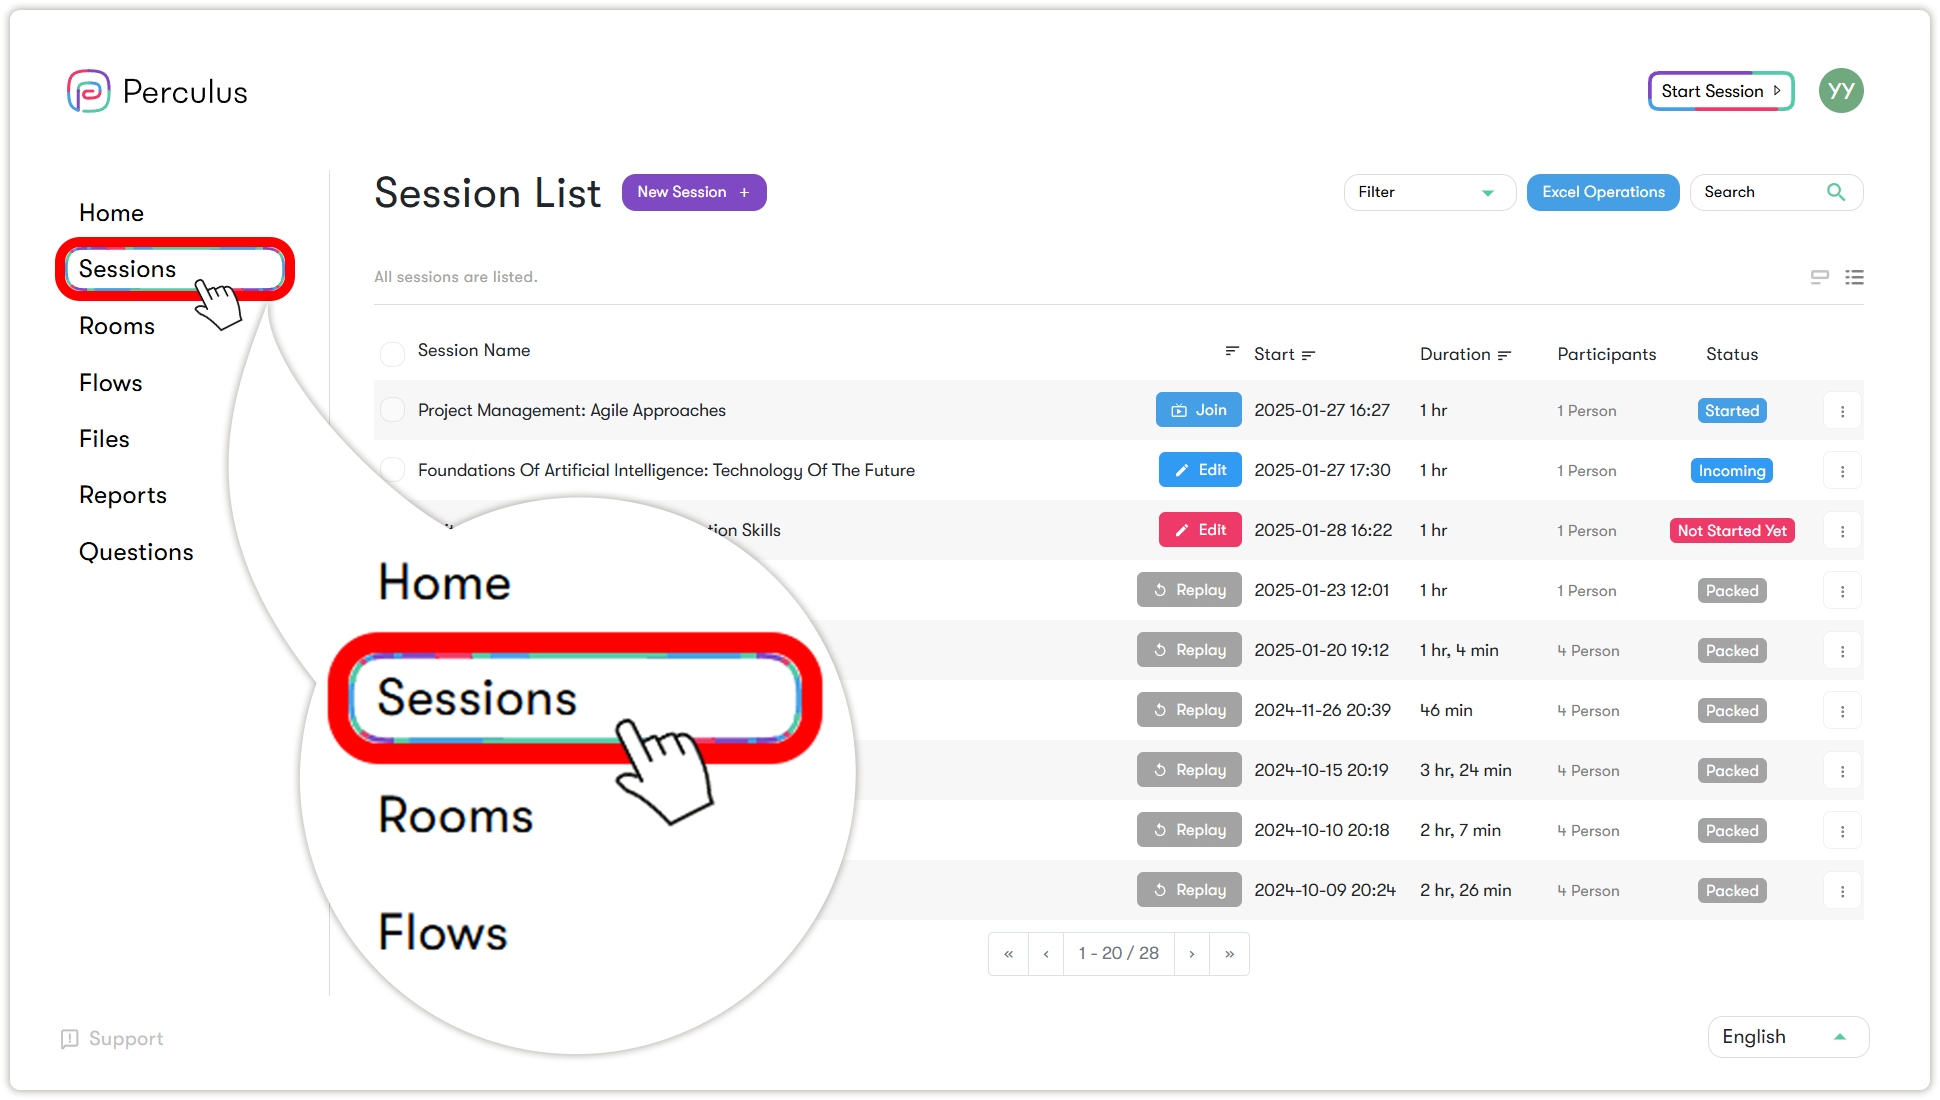
Click on the sessions button, which is the second one from the top on the left side of the window. On the session page, you can create new sessions, delete sessions, join sessions, and watch recorded sessions. You only see sessions for which you are authorized or a participant.
Start Session (Quick Session)
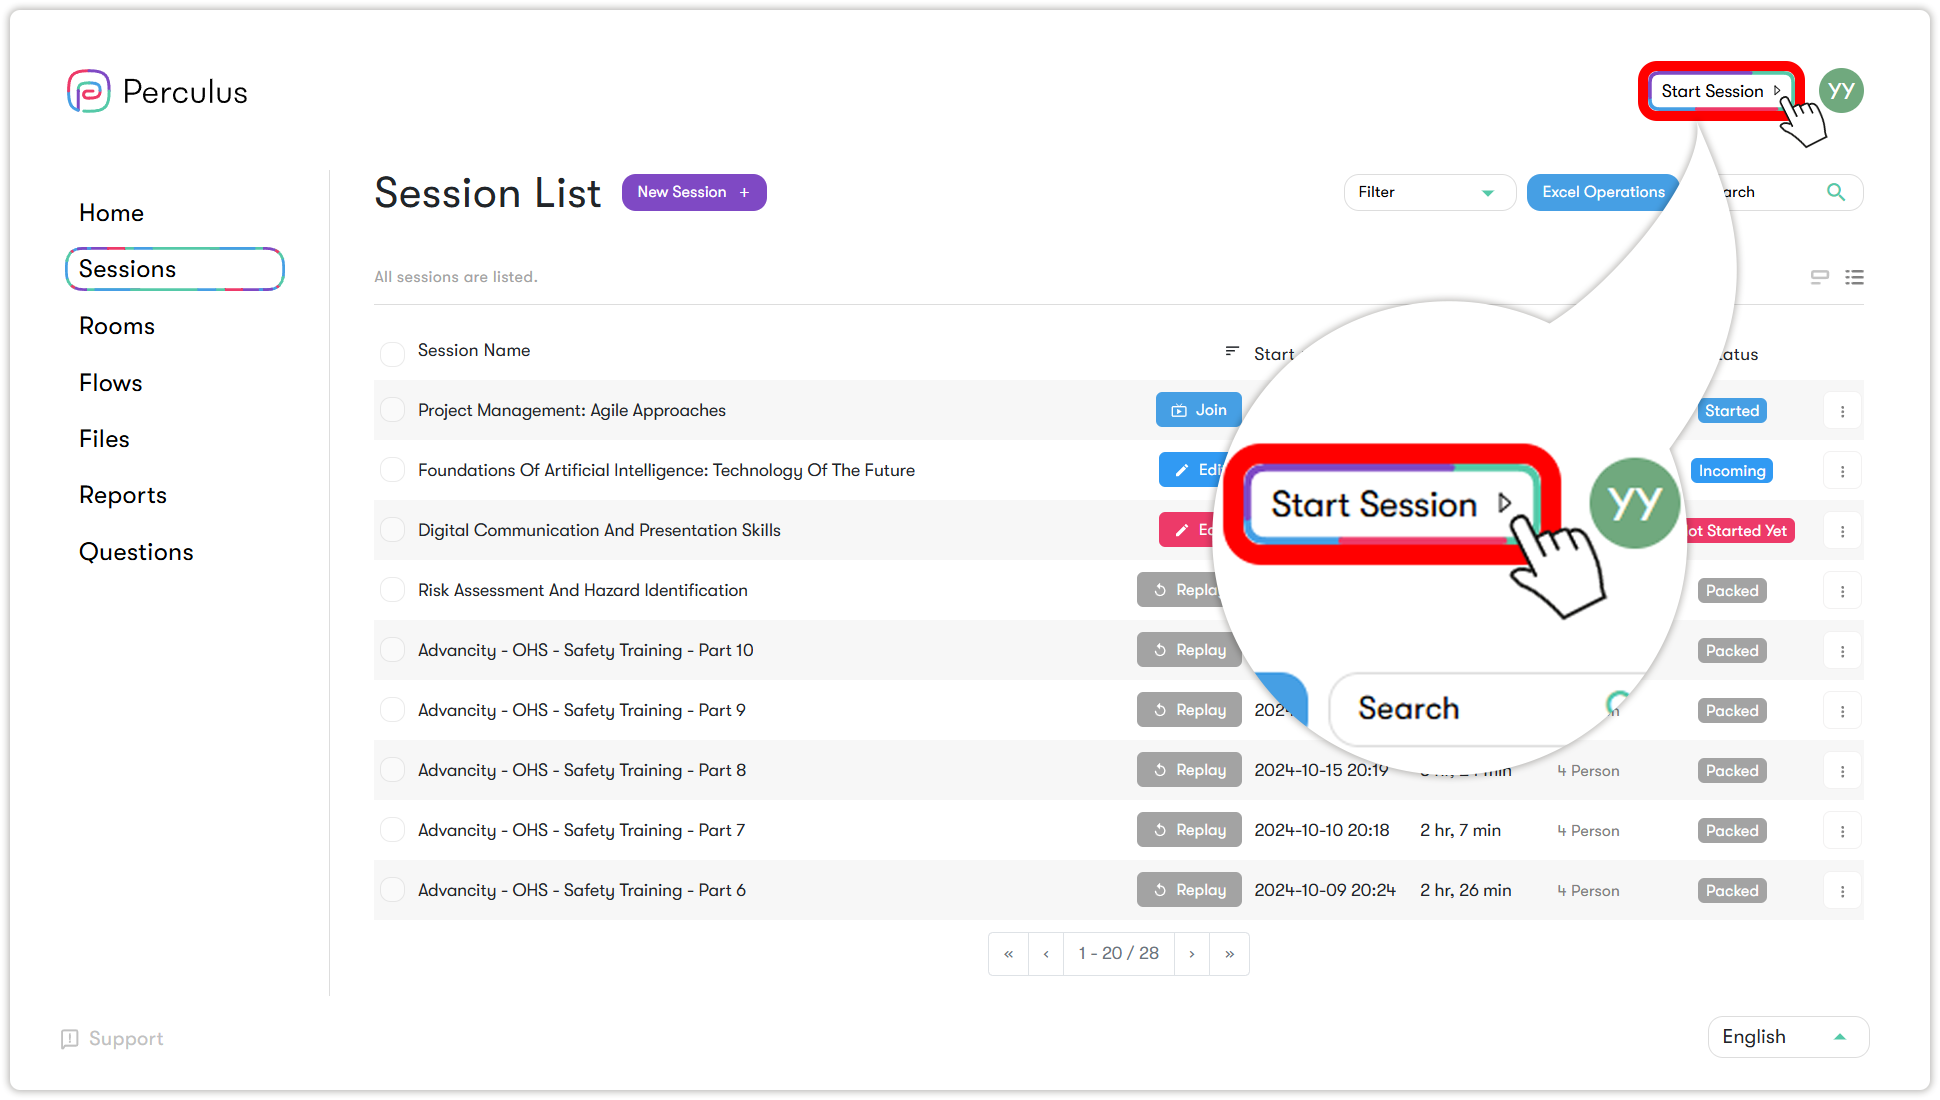
You can schedule your virtual classroom sessions, or you can start a virtual class instantly without any special setup for impromptu needs. Simply click the "Start Session" button, and you'll be instantly taken to a session where you can invite participants through an invitation link.
- Log in to your institution's Perculus panel.
- Click on the 'start session' button located in the top right corner of any page.
- A session is quickly created, and you have transitioned to the virtual classroom session.
- When you log in, an invitation link will appear in the middle of the page.
- Click on the invitation link (link - URL) or the copy button.
- Send the invitation link to the people you want to join the session.
- People who want to join the session can register with their first and last names and send a participation request.
(For detailed information about the virtual classroom session screen, click here.)
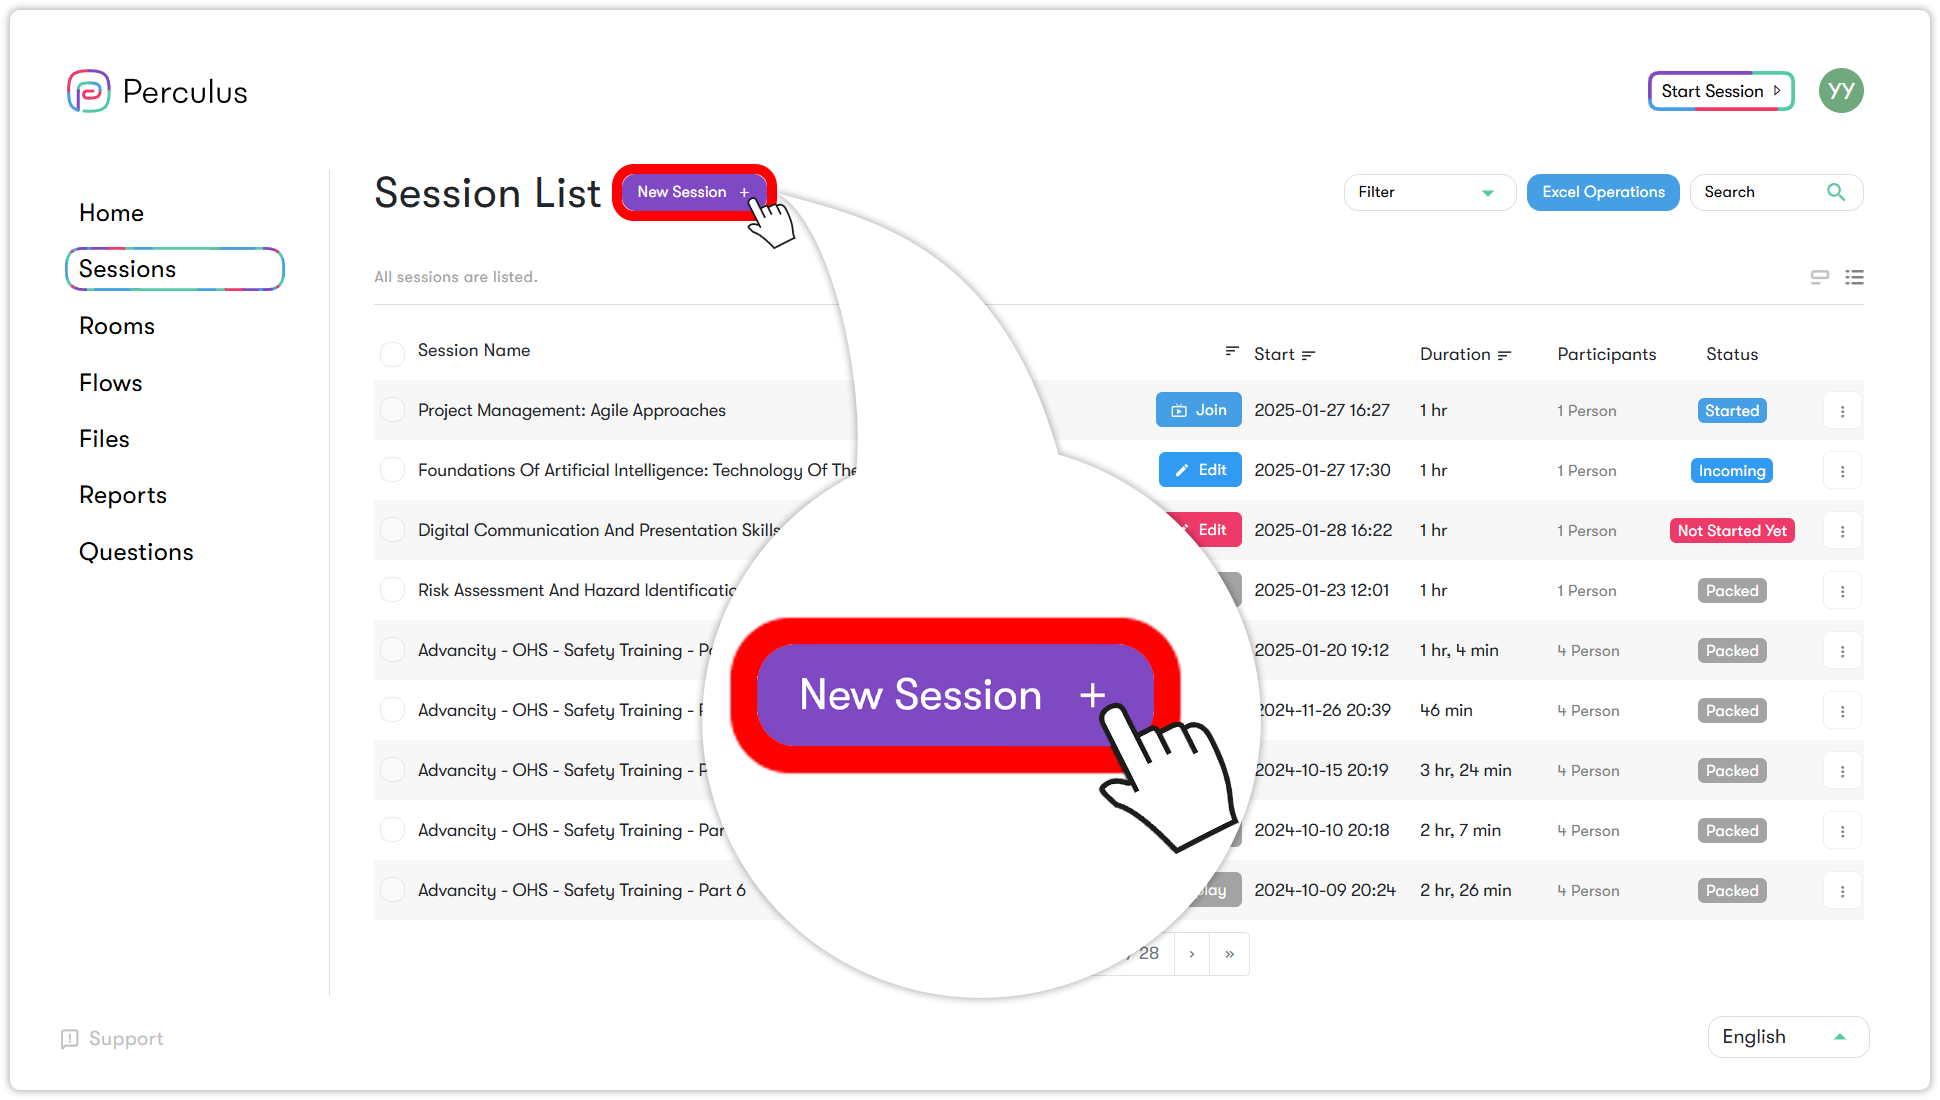
Adding New Sessions (Planning)
- Click on the new session button, located to the right of the "Session List" text at the top of the page.
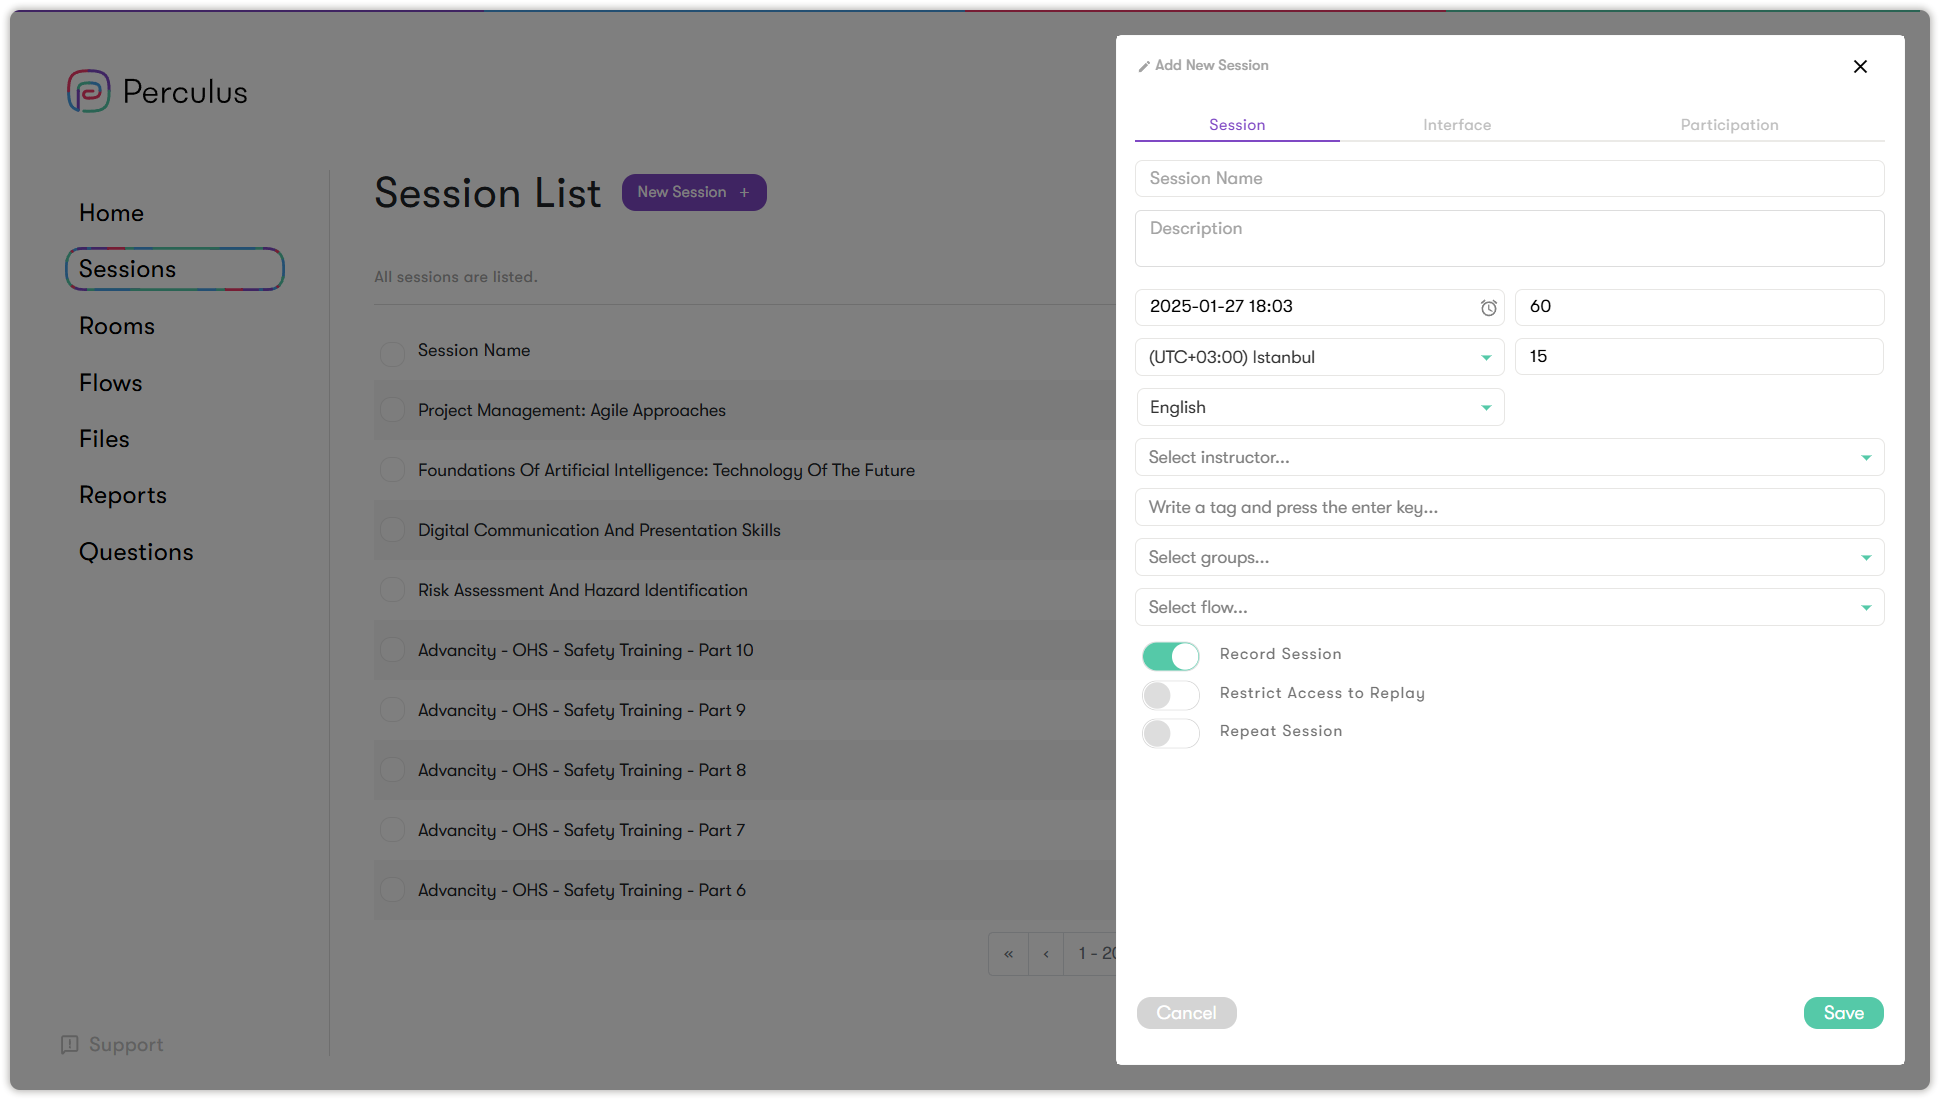
- Enter the session name in the text box located in the first row at the top of the pop-up window.
- Click on the session start date and time text box located in the first position in the third row at the top of the window.
- Select the desired date and time for the session from the pop-up calendar.
- Writethetotal duration of the session in minutes in the text box located in the second position in the third row at the top of the window.
- Click on the save button located at the lower right of the window.
- A new session (planned) has been created, and you can join it when it starts.
(For detailed information about the virtual classroom session screen, click here.)
Adding Participants to the Session from the User List
| Click on the options (three dots) button to the right of the row of the session whose participants you want to view, and in the window that opens, click on the participants button, second from the top. | On the session participants list tab, click on the add participant button in the top left. |
| In the user list, click on the checkboxes next to the usernames to select individual users. | Click on the external participants text (tab) in the center at the top of the window and enter first name, last name and email address. Add participants to the session one by one by clicking the add to list button. |
| Click on the save and close button in the bottom right of the window. |
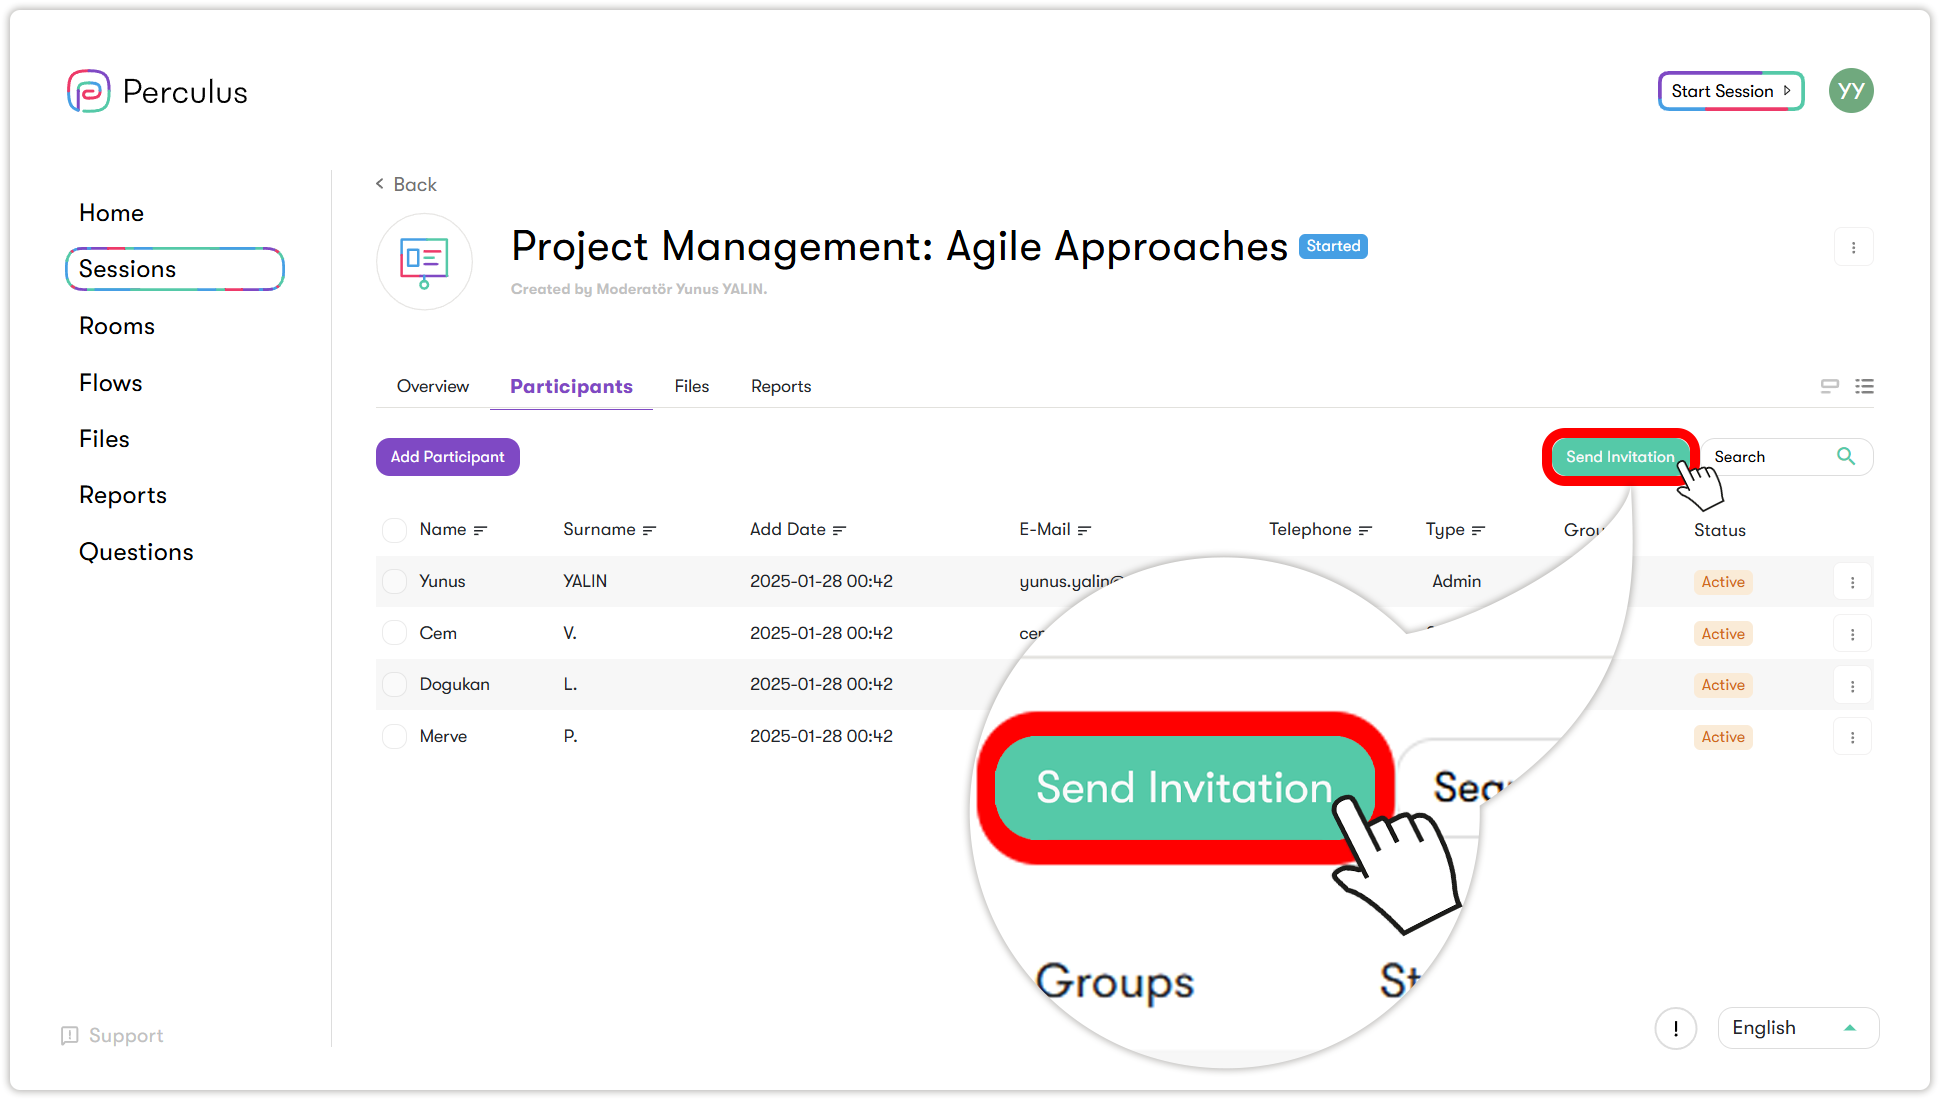
You can send invitations to participants to join the session by clicking on the Send invitation button at the top right of the list of session participants.