Configuring the plugin
- Open the Proctor Moodle plugin settings window: go to Moodle > Site Administration > Plugins and scroll down to Availability Restrictions. Click Proctor by Constructor settings:
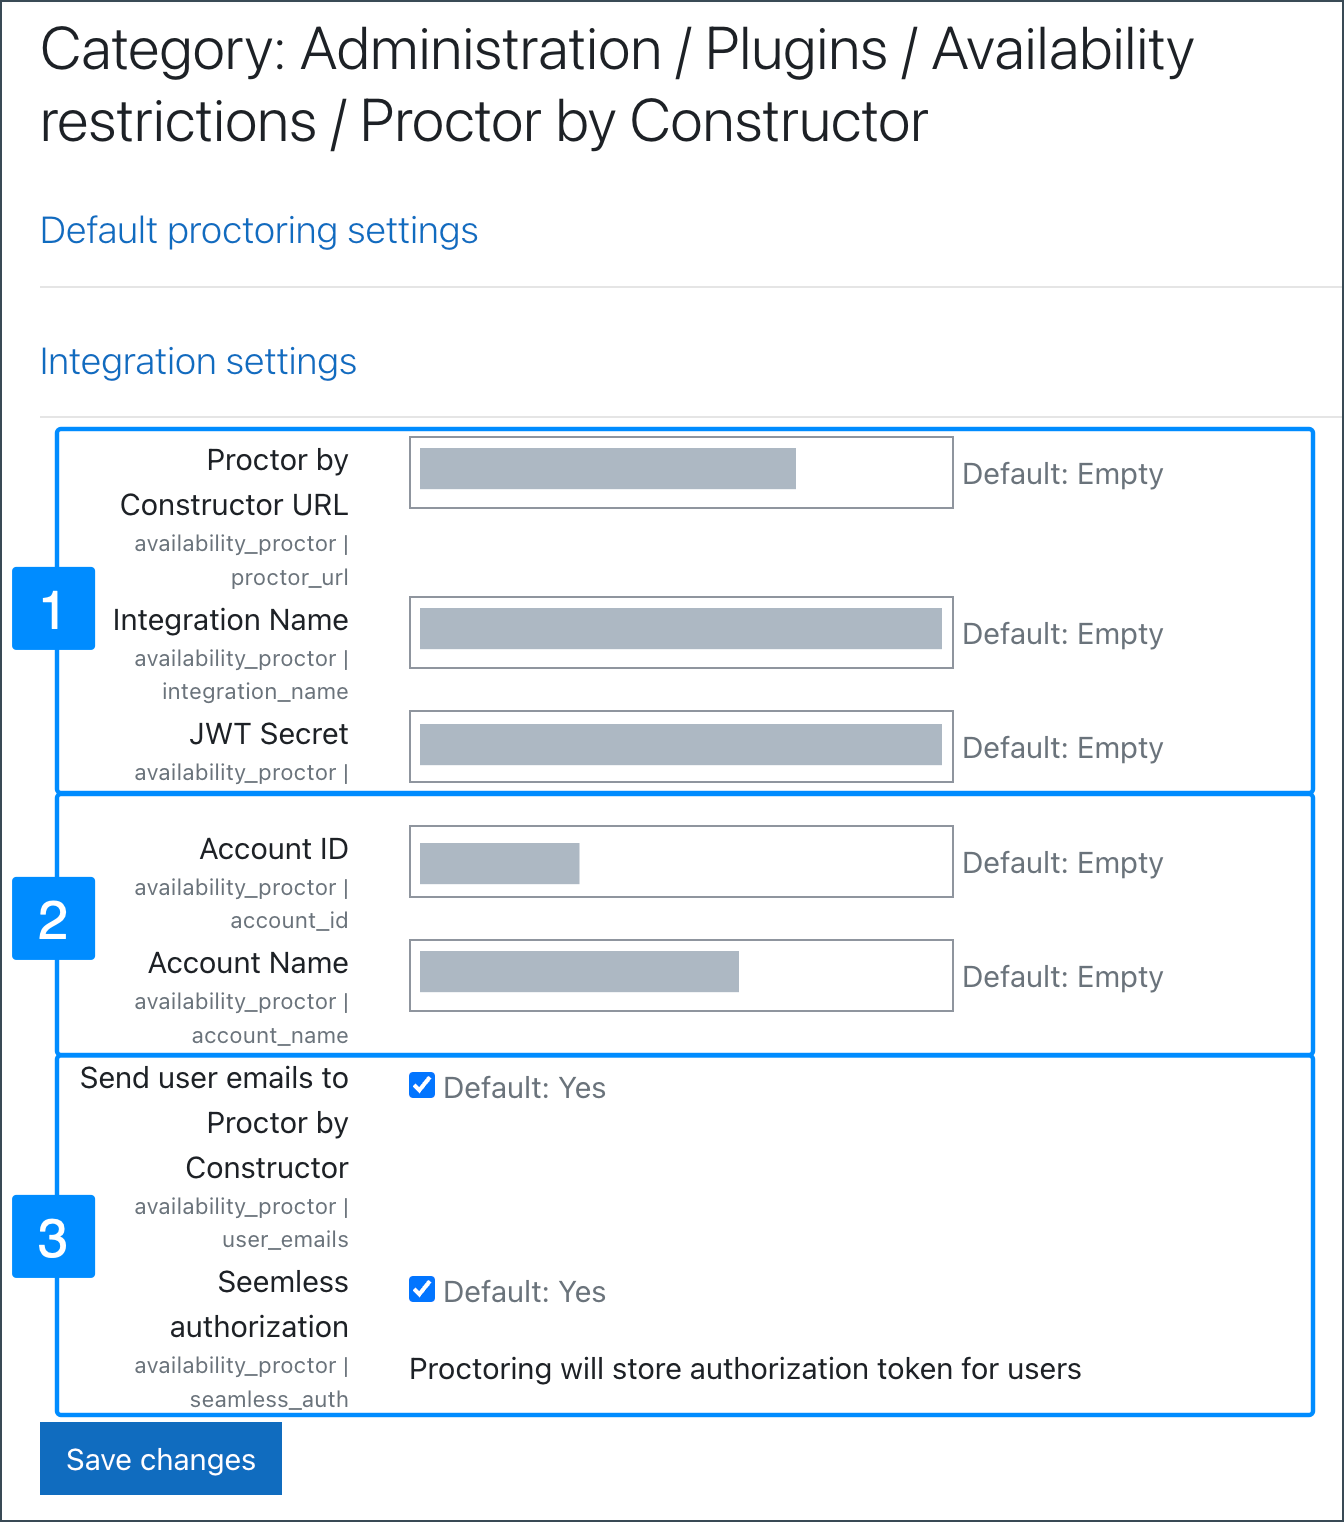
Paste the values sent by the integration manager at Constructor.
Fill out two additional fields:
- Account ID — enter a number. This parameter is not in use yet so you can enter any value you wish – it will not affect your experience with the plugin;
- Account Name — enter the name of your organization the way it should be displayed in the Proctor dashboard.
Choose whether to enable the following options:
- Send user emails to Constructor — if checked, Moodle will send examinee’s email addresses to Proctor Dashboard. If not checked, Proctor by Constructor will automatically generate a mock email address for each examinee to use it as unique identifier in the Dashboard.
- Seamless authorization — this feature decides if Moodle authentication tokens are forwarded to Proctor. It's advised to enable this option if you use Secure Browser.
Click Save Changes.